Based on Pumpkin and Peanut Butter Dog Treats by Sam Turnbull
Pumpkin and Nut Butter Dog Treats
My twenty-year-old dachshund, Vala, has been on a prescription diet for years for IBD and food allergies. With prices on the rise across the country, I have been looking for ways to reduce costs. One way was to start cooking her food and baking her doggie treats. With her food allergies, I needed to find a recipe with limited ingredients, which could easily be substituted if she was allergic to any of them. I had tried baking treats for her years ago and she had turned her nose up at them, but when I found the recipe for Pumpkin and Peanut Butter Dog Treats, I knew I had found the right recipe.
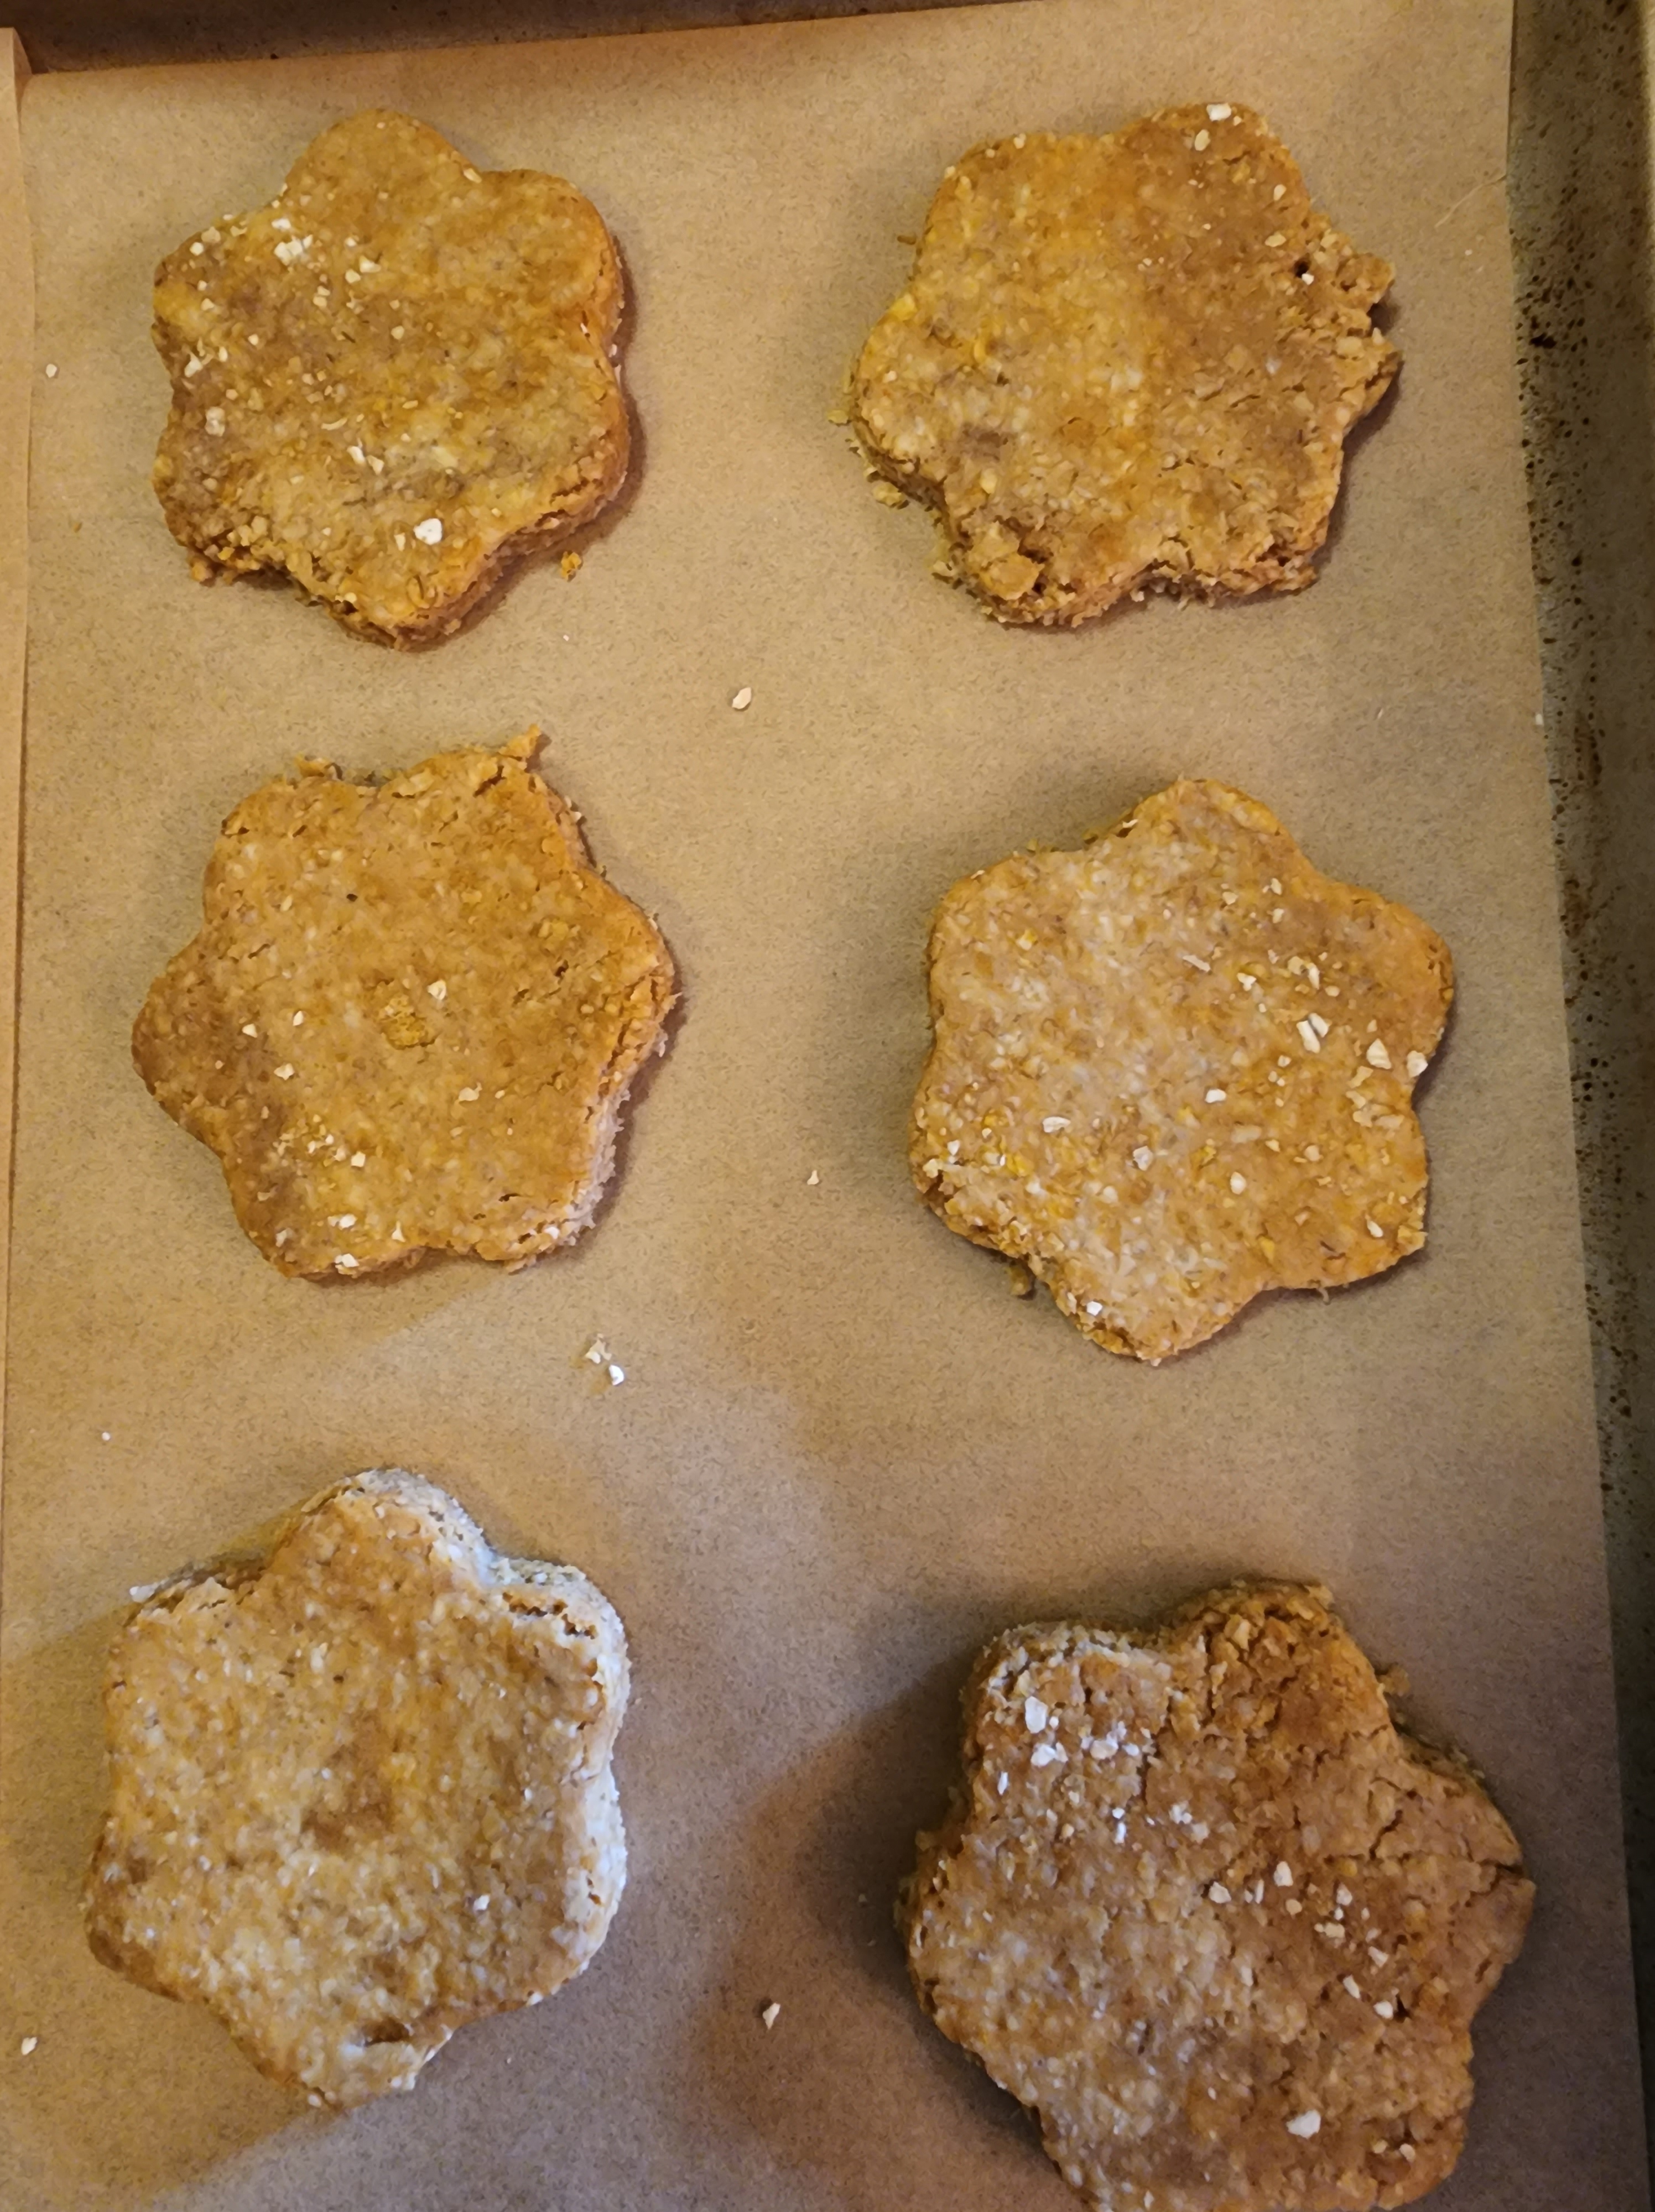
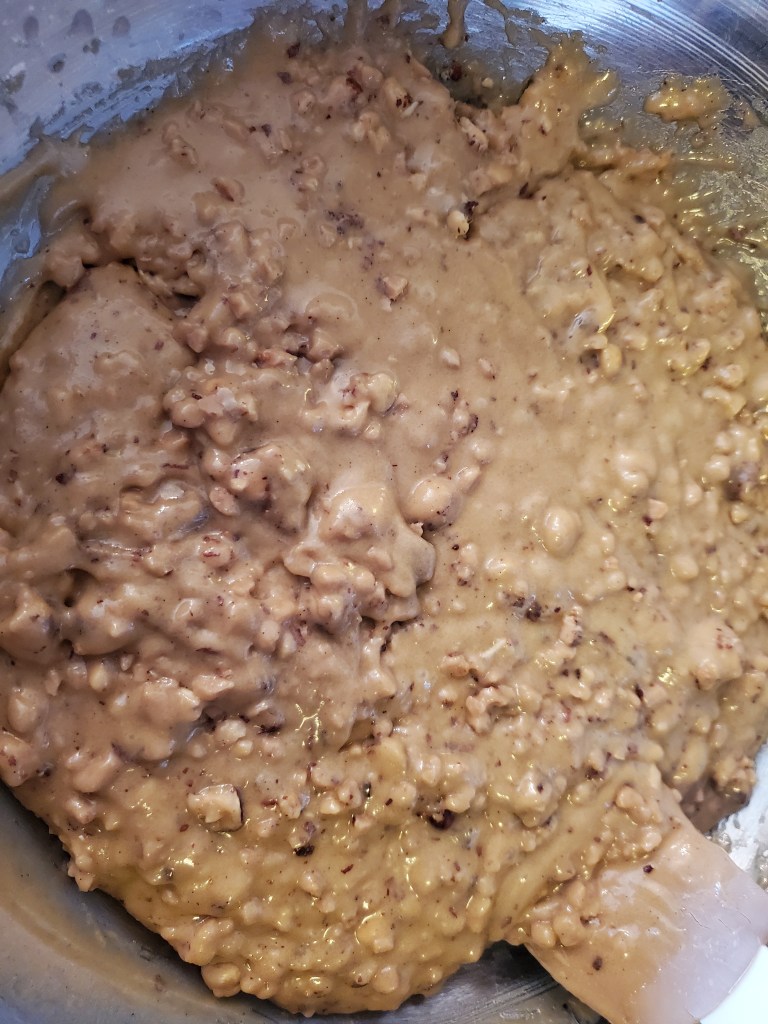
The recipe has only three ingredients: pumpkin puree, peanut butter and oatmeal. Unfortunately, Vala has a peanut allergy, so an alternative would have to be used. The most popular choice for people with peanut allergies is almond butter or cashew butter. I have found that the consistency of both of these nut butters is much thicker and not as creamy as peanut butter. My choice for a peanut butter alternative is Sun Butter, which is made from sunflower seeds. Sun Butter has slightly higher fat than peanut butter, but the sodium and fat content is lower. This makes it a great choice for your dog.
Ground Oatmeal and Biscuit Dough
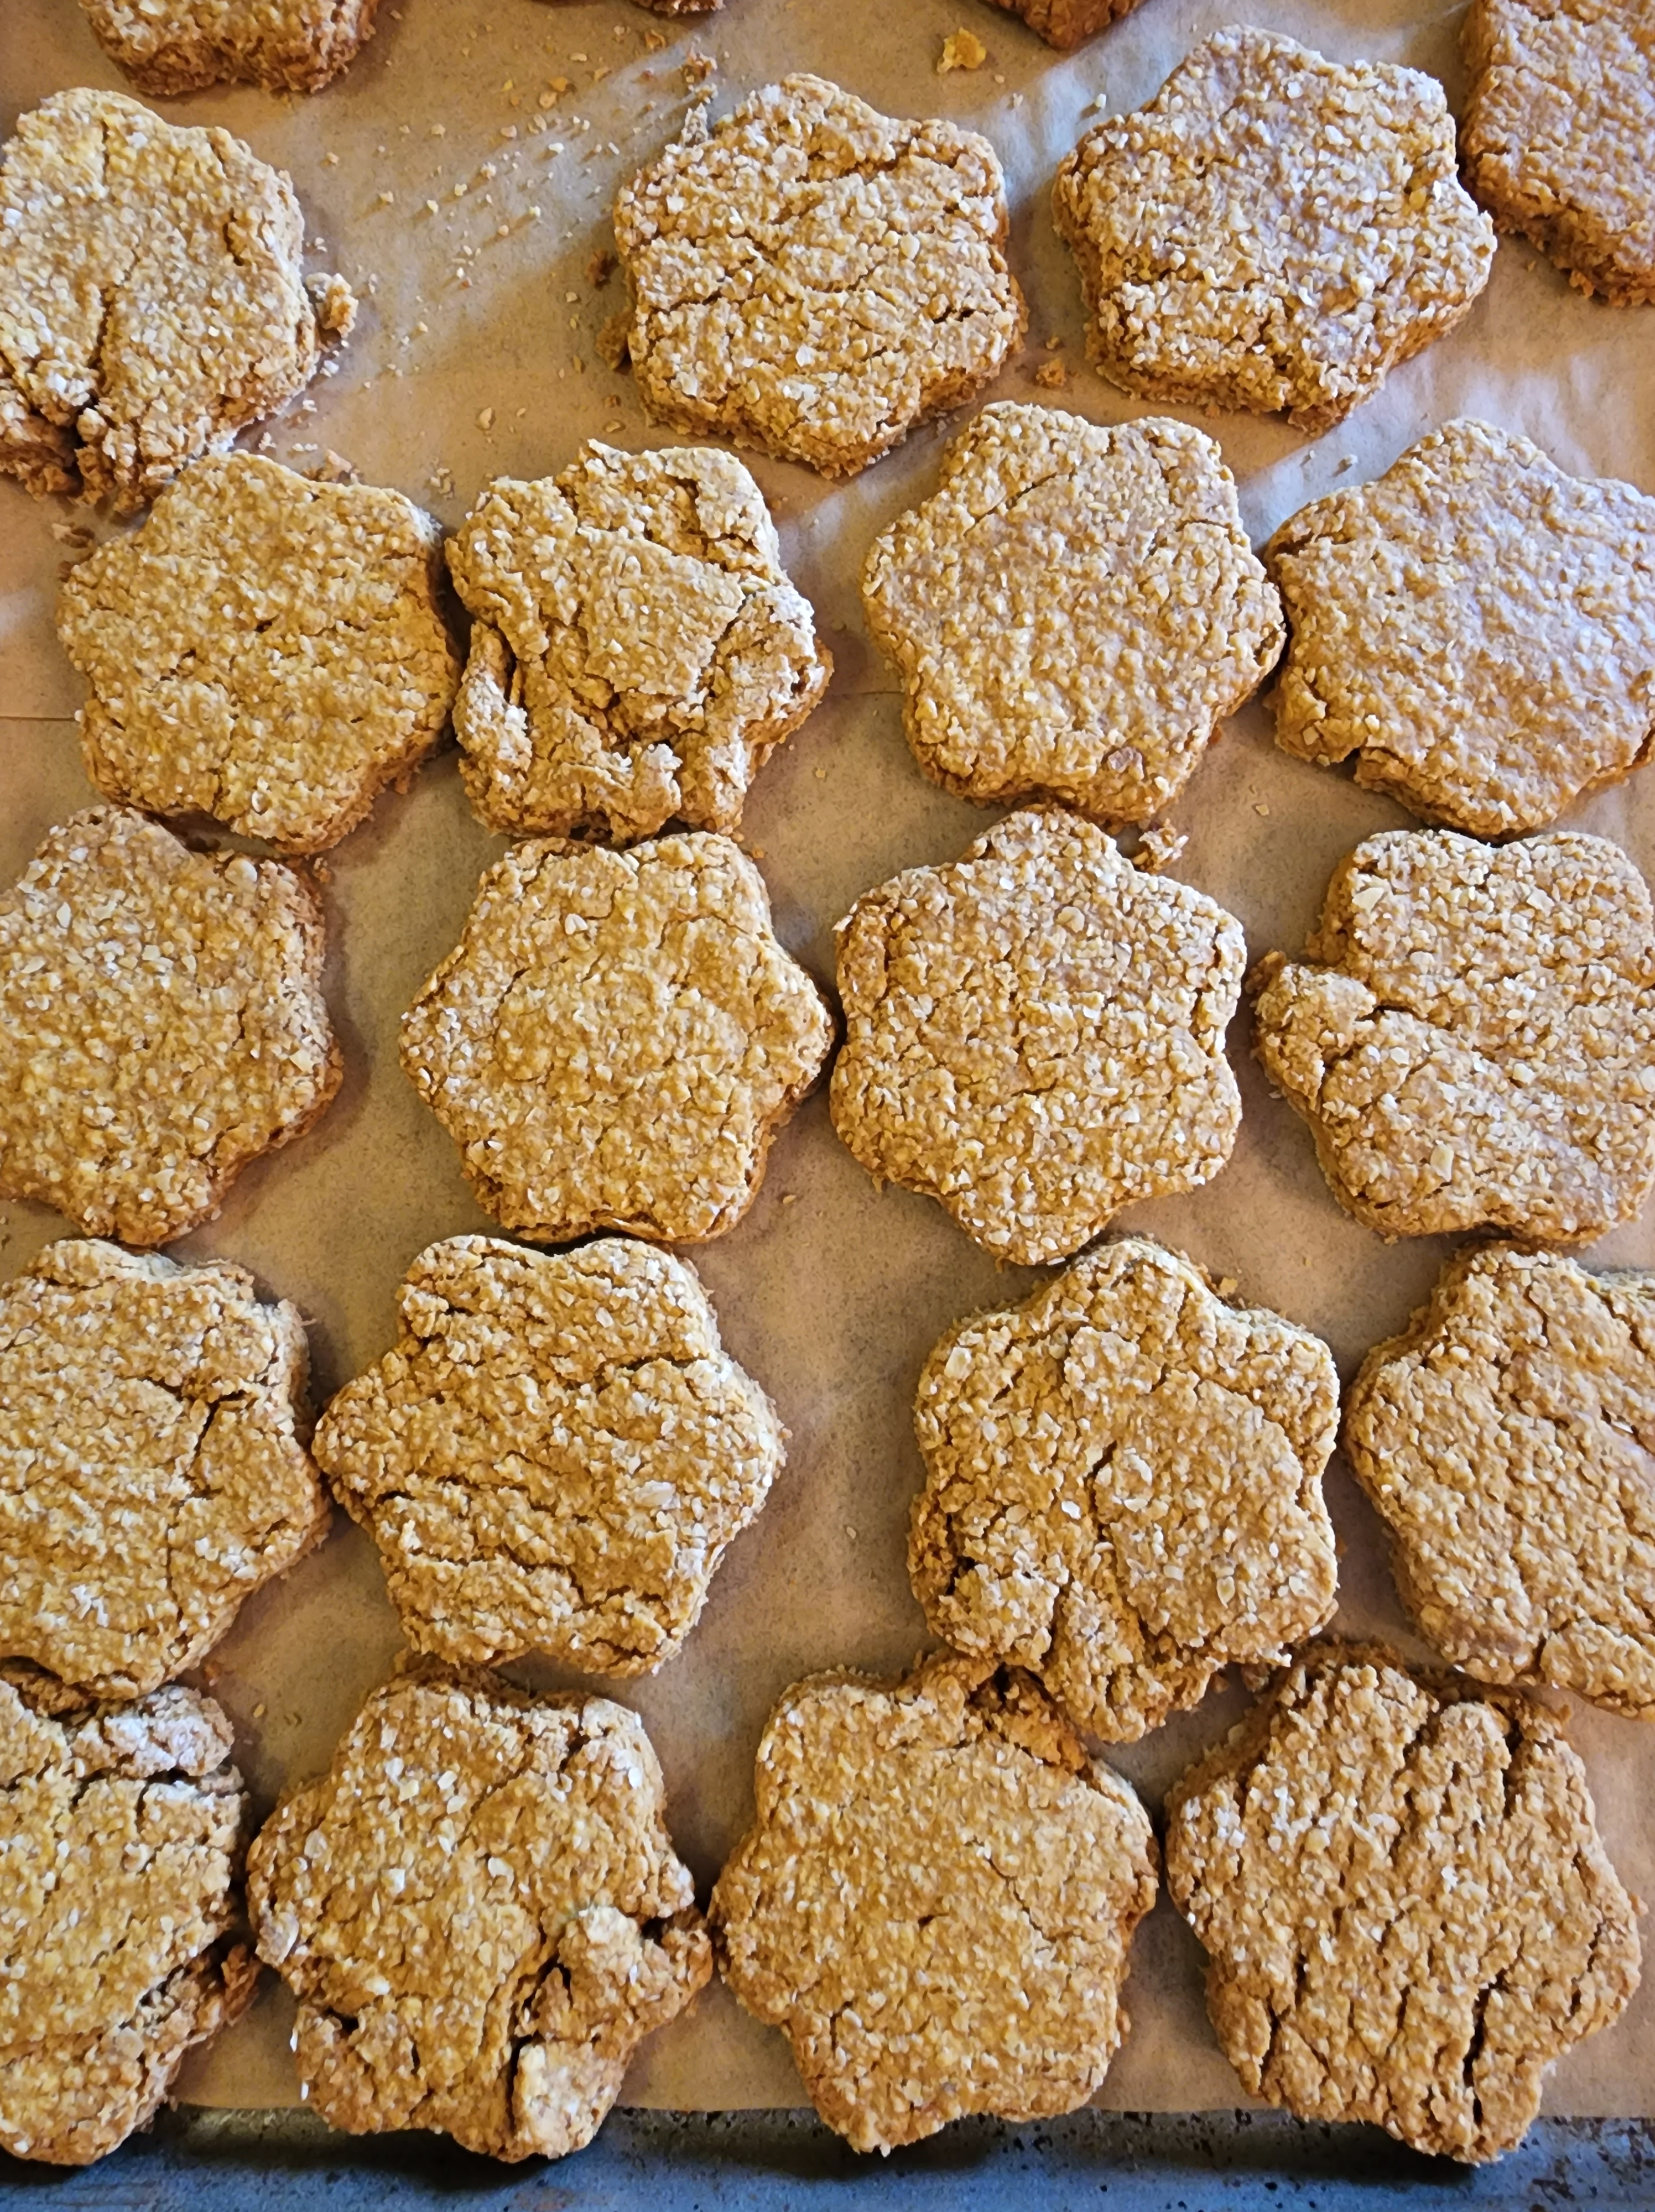
If your pooch is also gluten intolerant, be sure to grind more oatmeal than needed for the recipe. You can also substitute a portion of the oatmeal flour with flaxseed meal. Flaxseed meal contains fiber, fatty acids and nutrients that is good for their coat and joints. The dough is very stick, so you can use the additional oatmeal flour to dust your cutting board as you roll out the dough. I rolled the dough to a thickness of 6 mm, which yielded approximately 40 treats. The thicker or larger the treat, the longer you will need to bake the biscuit.
Treats will keep for a week at room temperature, but can will keep longer if refrigerated or frozen.
From Carlene O’Connor’s Murder at an Irish Christmas
Irish Brown Bread
A few years ago, a friend of mine gave me a gift certificate to Audible.com and since then I have become addicted to audio books. One of the series I have been listening to is the Irish Village Mystery Series by Carlene O’Connor.
In every book, Carlene writes about Siobhan O’Sullivan’s Brown Bread and how it is the best Brown Bread in Ireland, so I kept telling myself that I needed to find a recipe for Irish Brown Bread. I was pleasantly surprised when at the end of Murder at an Irish Christmas, the narrator began to read the recipe for Siobhan’s Irish Brown Bread. I hurriedly wrote down the recipe and decided that this was going to be my next attempt at baking bread.
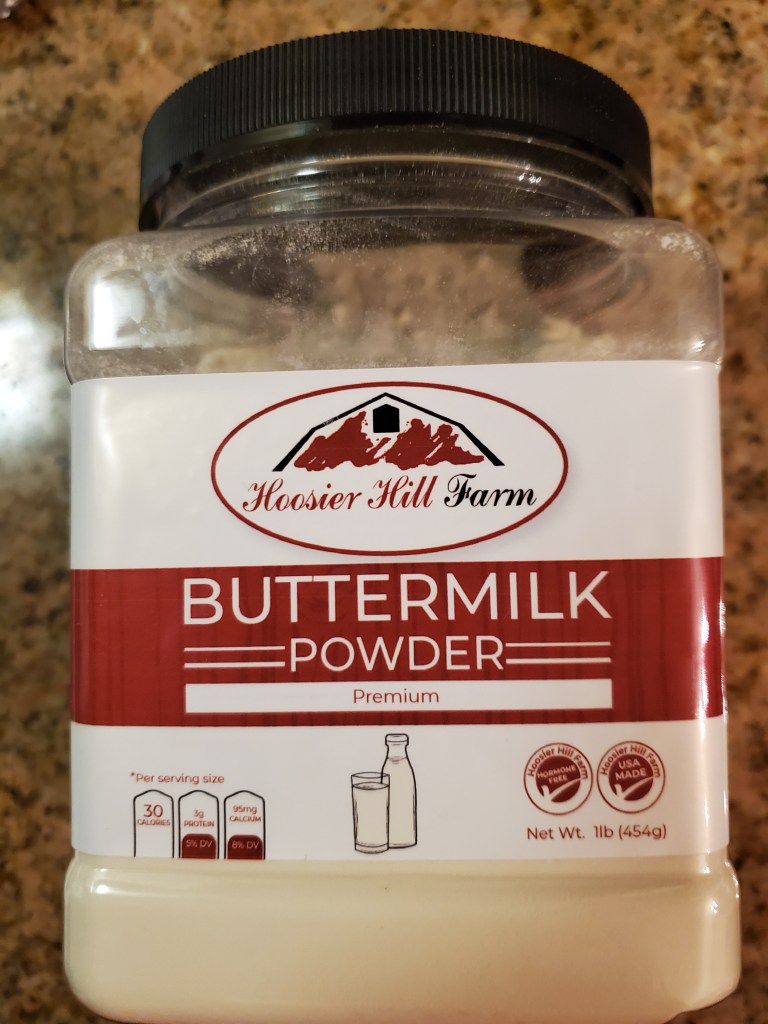
One positive of making Irish Brown Bread or Irish Soda Bread, is that these are unyeasted breads. They both use baking soda and buttermilk as the leavening agents. If you are a novice in breadmaking, this is a good place to start. Buttermilk also makes a softer bread, but one reason I shy away from recipes with buttermilk is the fact that most of the quart of milk goes to waste. You can freeze the extra buttermilk, if you have the room in your freezer, but you can also use Buttermilk Powder and water as a replacement for the 14 ounces buttermilk in a recipe. This can You can order this from King Arthur Flour or Amazon and I find that it works just as well. Simply combine 6 tablespoons of buttermilk powder and 15 ounces of water, which can be made ahead of time and chilled.
Buttermilk Powder
This recipe also calls for Stone Ground Whole Wheat Flour. Living in Los Angeles, I figured that whole wheat flour would be readily available in all stores, but was only able to find organic whole wheat flour at Whole Foods. If you are so inclined to you can order Irish Style Flour also from King Arthur Flour, which is ground from red whole wheat and designed specifically for Irish Soda Breads.
Siobhan O’Sullivan says that she also “adds a drop of Guinness for good luck;” however, I was left to wonder how much a “drop” is. I looked at several brown bread recipes and either buttermilk was used or Guinness and melted butter, so I decided to decrease the amount of buttermilk from 1-3/4 cups to 1-1/2 cups and add 1/4 cup of Guinness. If after mixing the dry and wet ingredients together you find that the dough is too dry, you can add additional Guinness or buttermilk.
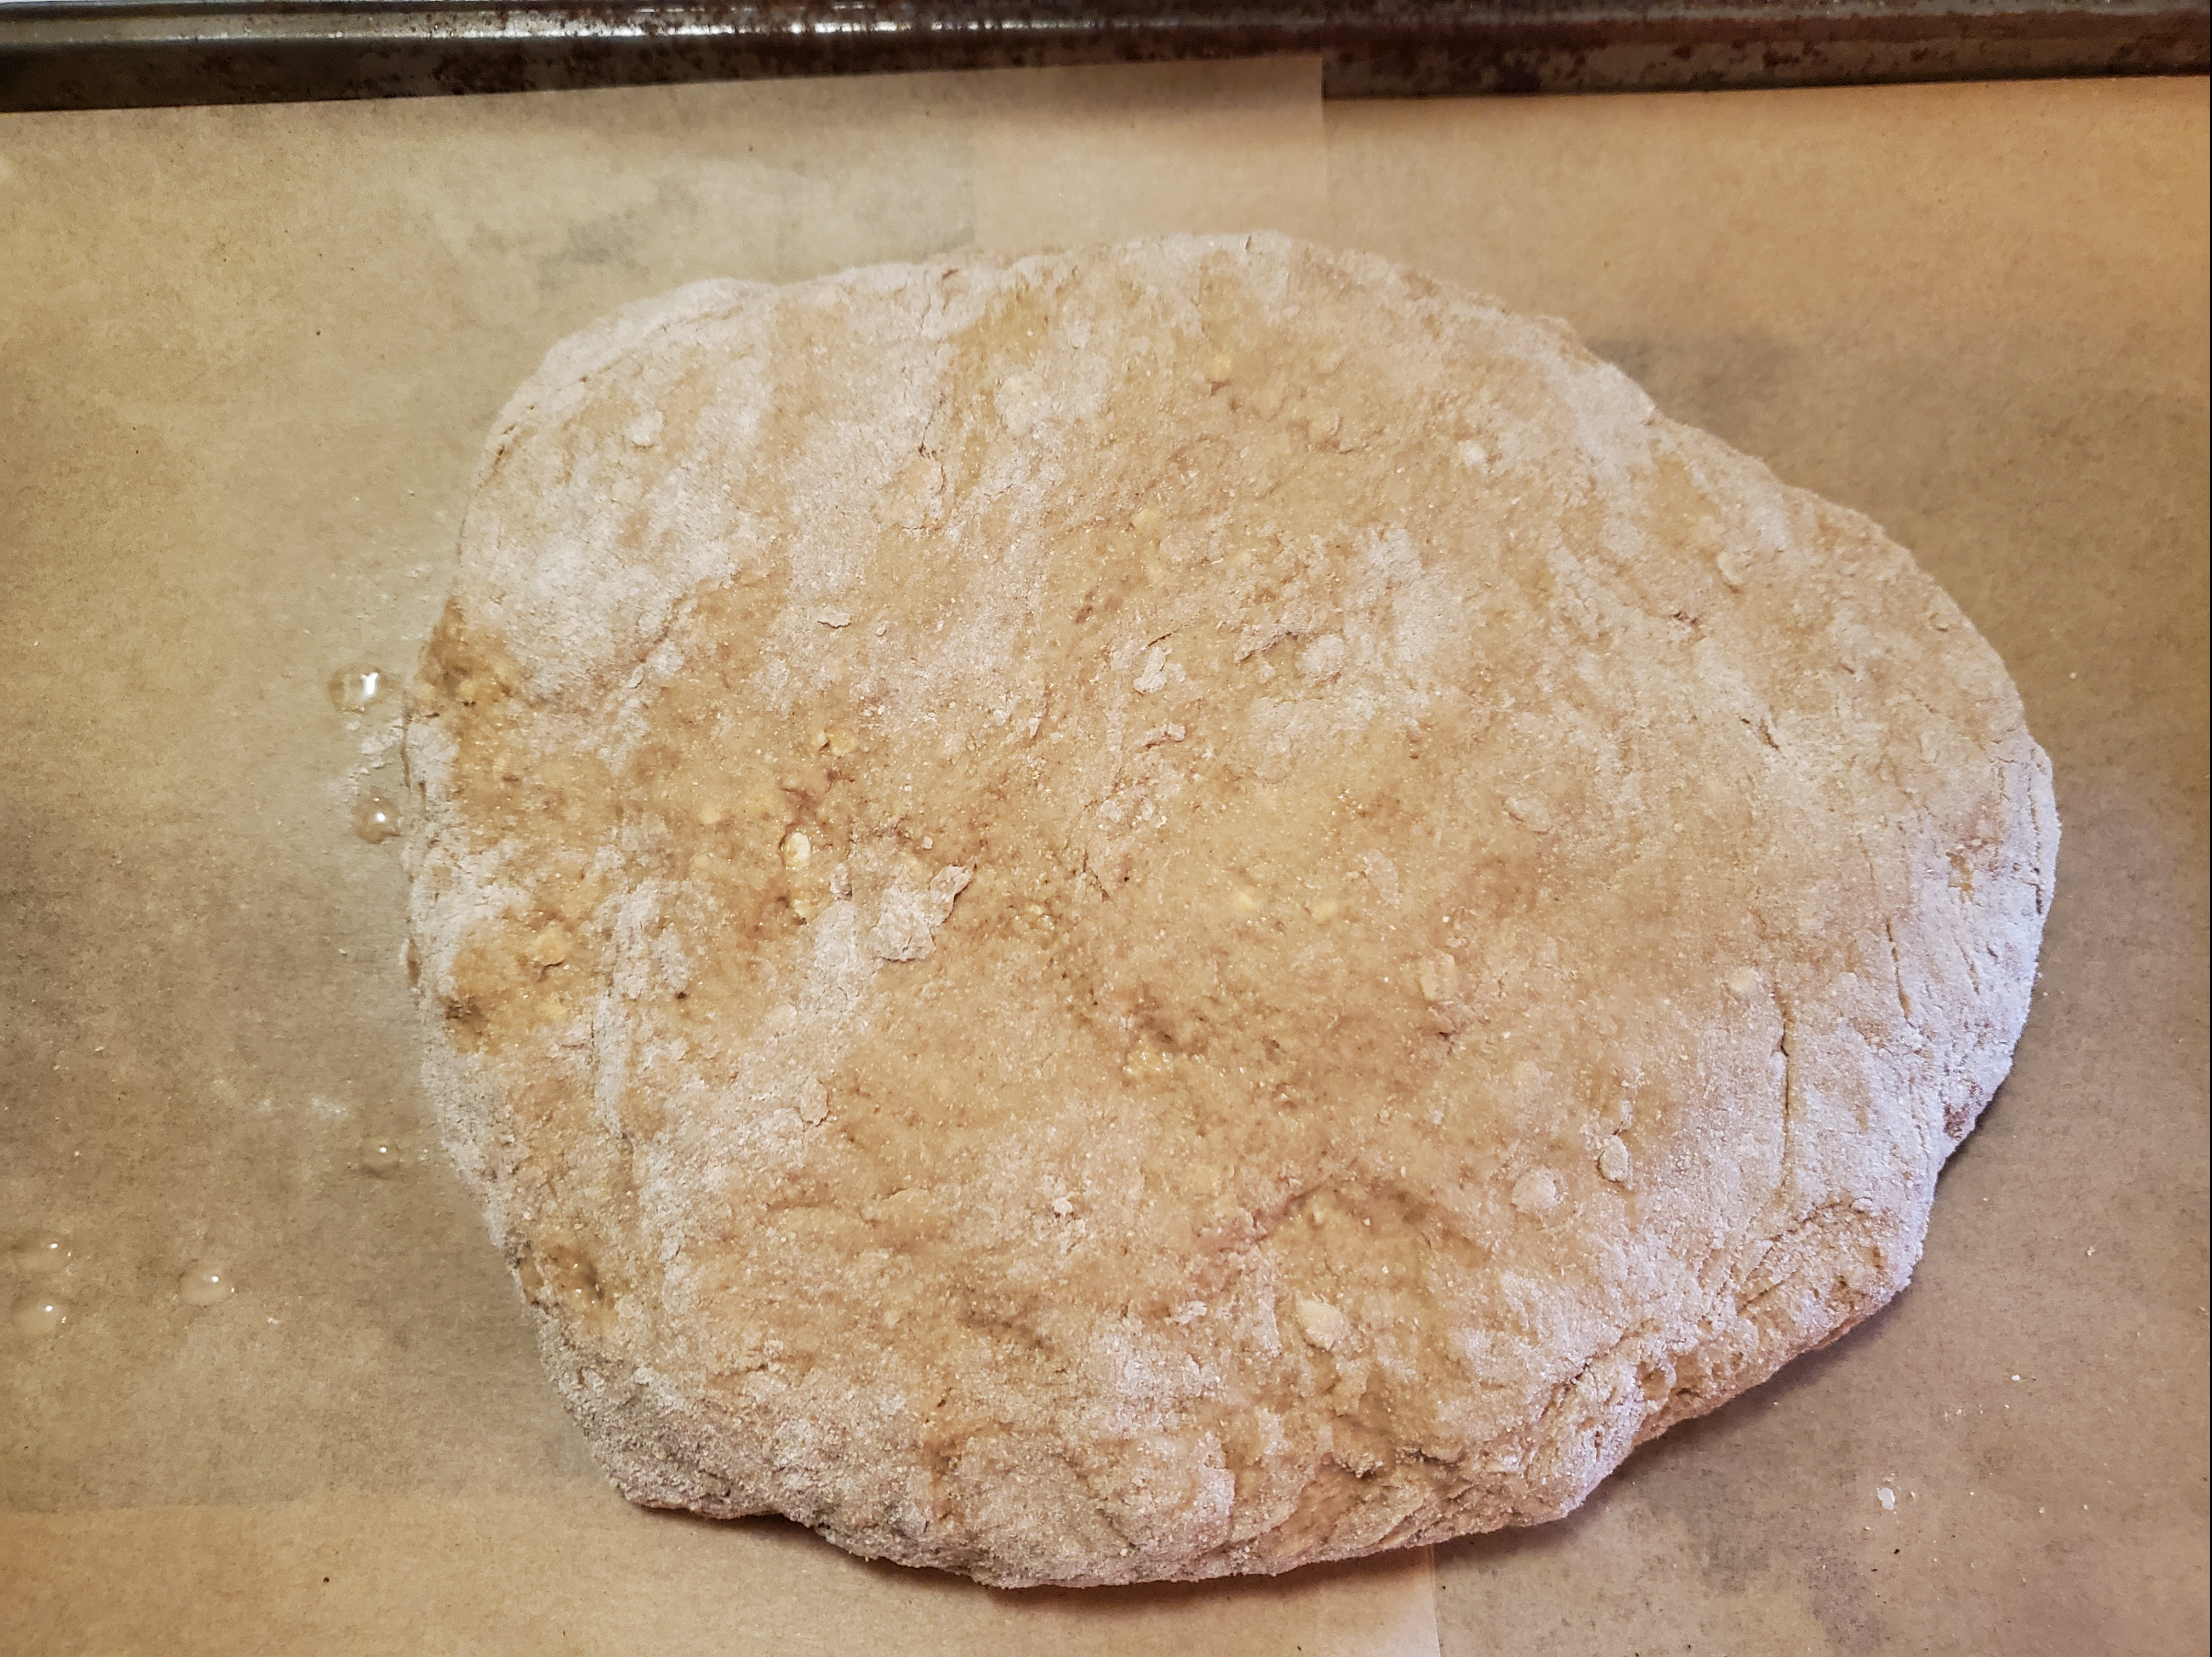
Brown Bread Dough
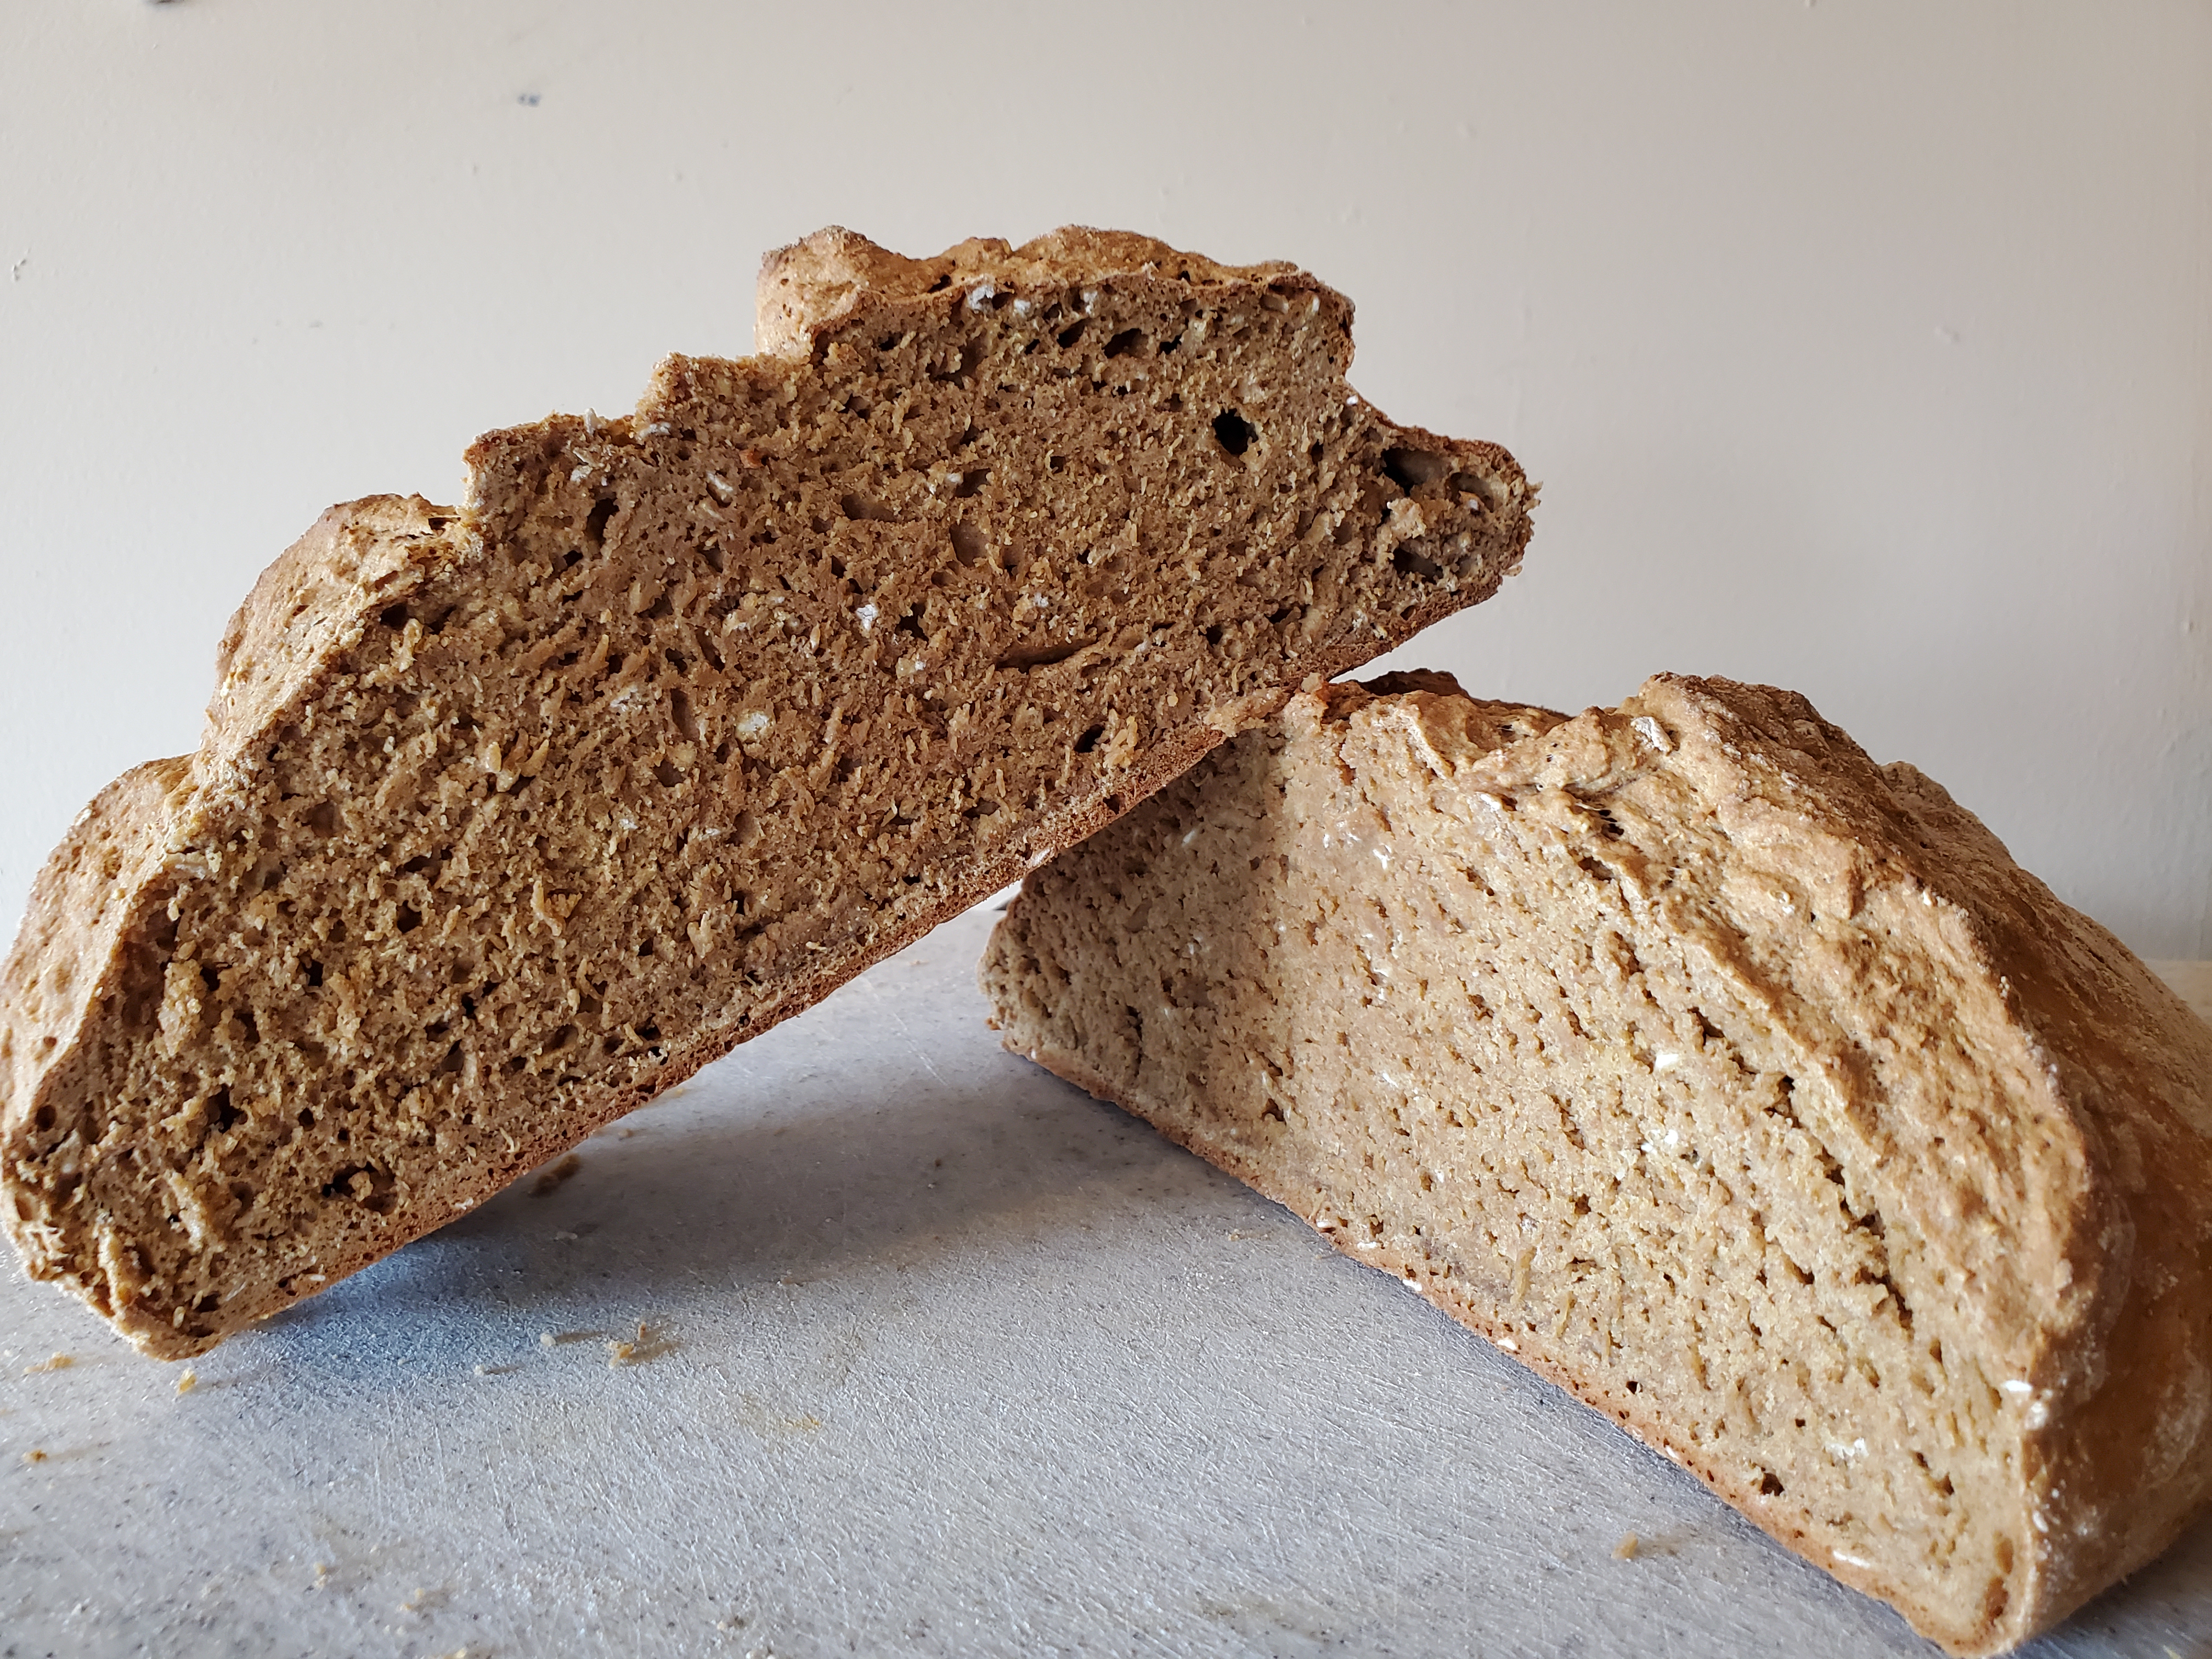
Combine the dry ingredients and wet ingredients in a separate bowl, then make a well in the middle of the dry ingredients and pour in the buttermilk mixture. Unlike yeasted bread, you do not need to knead this dough very much. You are just kneading it about 10 times, just enough to form a ball. Most soda breads are baked freeform on a baking sheet, but if you prefer you can bake it in a loaf pan. Remember, if you bake in a loaf pan to grease the pan before adding the dough, or line the loaf pan with parchment paper and spray with cooking oil. Using a loaf pan may also increase the baking time. The bread is done, when tapped on the bottom and it sounds hollow. To test the bread baked in a loaf pan, just like a cake, see if a toothpick comes out clean. Internal temperature should be about 200 degrees for either method. Cool on baking sheet or in loaf pan until cool.
This brown bread has a nice soft texture and tastes wonderful with butter and jam in the morning. I have also read that it freezes very well, so if you slice it and place it on a cookie sheet and put it in the freezer for about 2 to 3 hours, so the slices don’t stick together, then place in a freezer bag. It will keep for about 3 months.
Credit: Carlene O’Connor Murder at an Irish Christmas
2-1/2 c stone ground whole wheat flour
1-1/2 c all purpose flour
1/2 c rolled oats
1-1/2 tsp salt
1 tsp baking soda
1-1/2 c buttermilk
2 tbl molasses or treacle
1/4 c Guinness
Directions
Preheat oven to 450 degrees.
Combine dry ingredients into a large bowl
In a smaller bowl, whisk together buttermilk, Guinness and molasses.
Stir with fork or spatula until combined.
Cover hands in flour and knead bread in bowl until forms into a ball, about 10 turns. If too sticky, you can sprinkle in some more flour as you knead the bread.
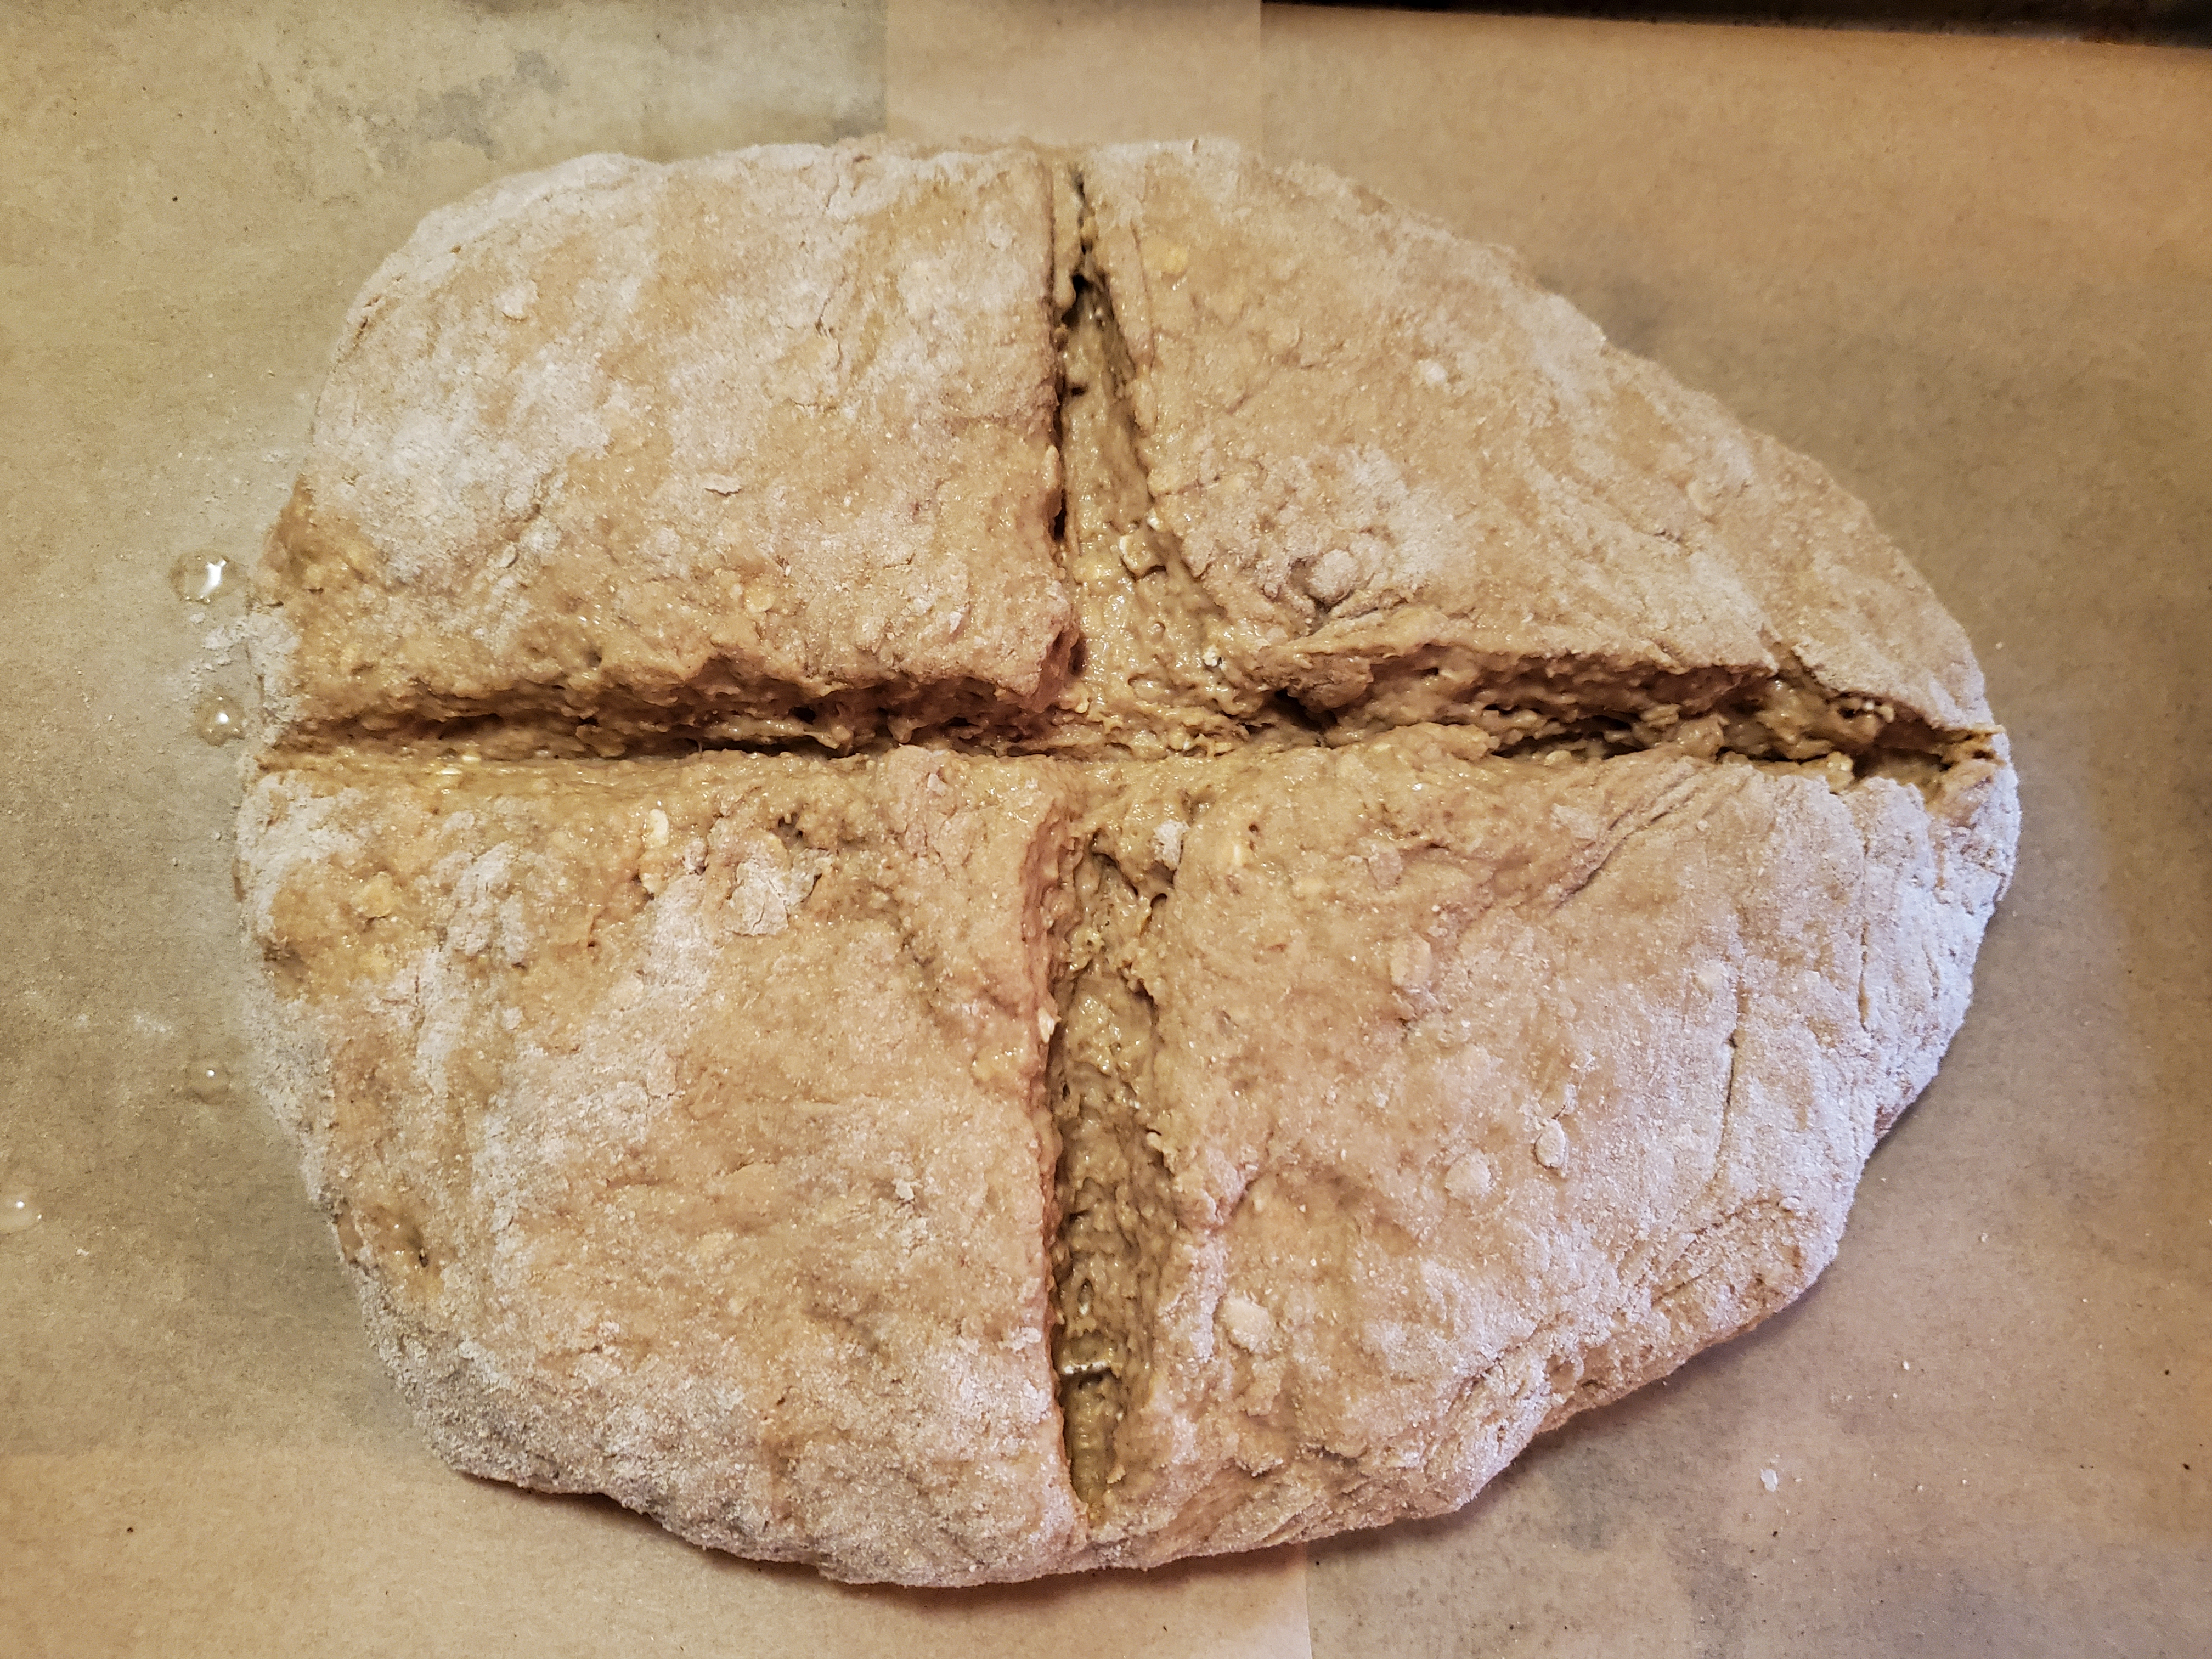
Line a baking sheet with parchment paper and press down until about 2 – 3 inches thick.
With a sharp knife, cut about half way through the dough and make a cross on top of the loaf.
Bake at 450 degrees for 15 minutes.
Reduce temperature to 400 degrees and bake for an additional 20-25 minutes, until bread sounds hollow when tapped.
Cool and serve.
Variations
Add 1 cup dried fruit; such as raisins or cranberries
Add 1/2 cup dried fruit and 1/2 cup chopped walnuts or pecans.
Replace all purpose flour with whole wheat flour.
Replace all the buttermilk with one can of Guinness (15.2 ounces ) and 3-1/2 tbl melted butter.
I am going in to the office for the first time in over a year, so I decided to bake for my coworkers. I’ve had this recipe in my big binder for quite some time, but I haven’t tried it, because I’m not a huge fan of coconut. I used to love it when I was a child, but as I got older, I just lost my taste for it. When I looked at the recipe, it kind of reminded me of a Snickerdoodle, so I knew it would be a fast and easy recipe to make in addition to my Hazelnut and Toffee Blondies. I decided to give coconut another try.
I’m not sure what magazine I originally cut this recipe out of, and I have tried looking online to see if I could find the exact recipe, but have had no success. The recipes all have the same ingredients, but differing amounts. The original recipe calls for Bakers’ Ammonia to be dissolved in boiling water. This is not something I keep in my pantry, but I used the substitution suggested of 3 teaspoons of Baking Powder.
The recipe called for almond extract, which I didn’t have. I had also used up all my vanilla extract in the previous recipe, so I once again used Chocolate bitters. Chocolate and coconut go very well together, just think Mounds and Almond Joy, but you could also substitute almost any citrus extract or juice.
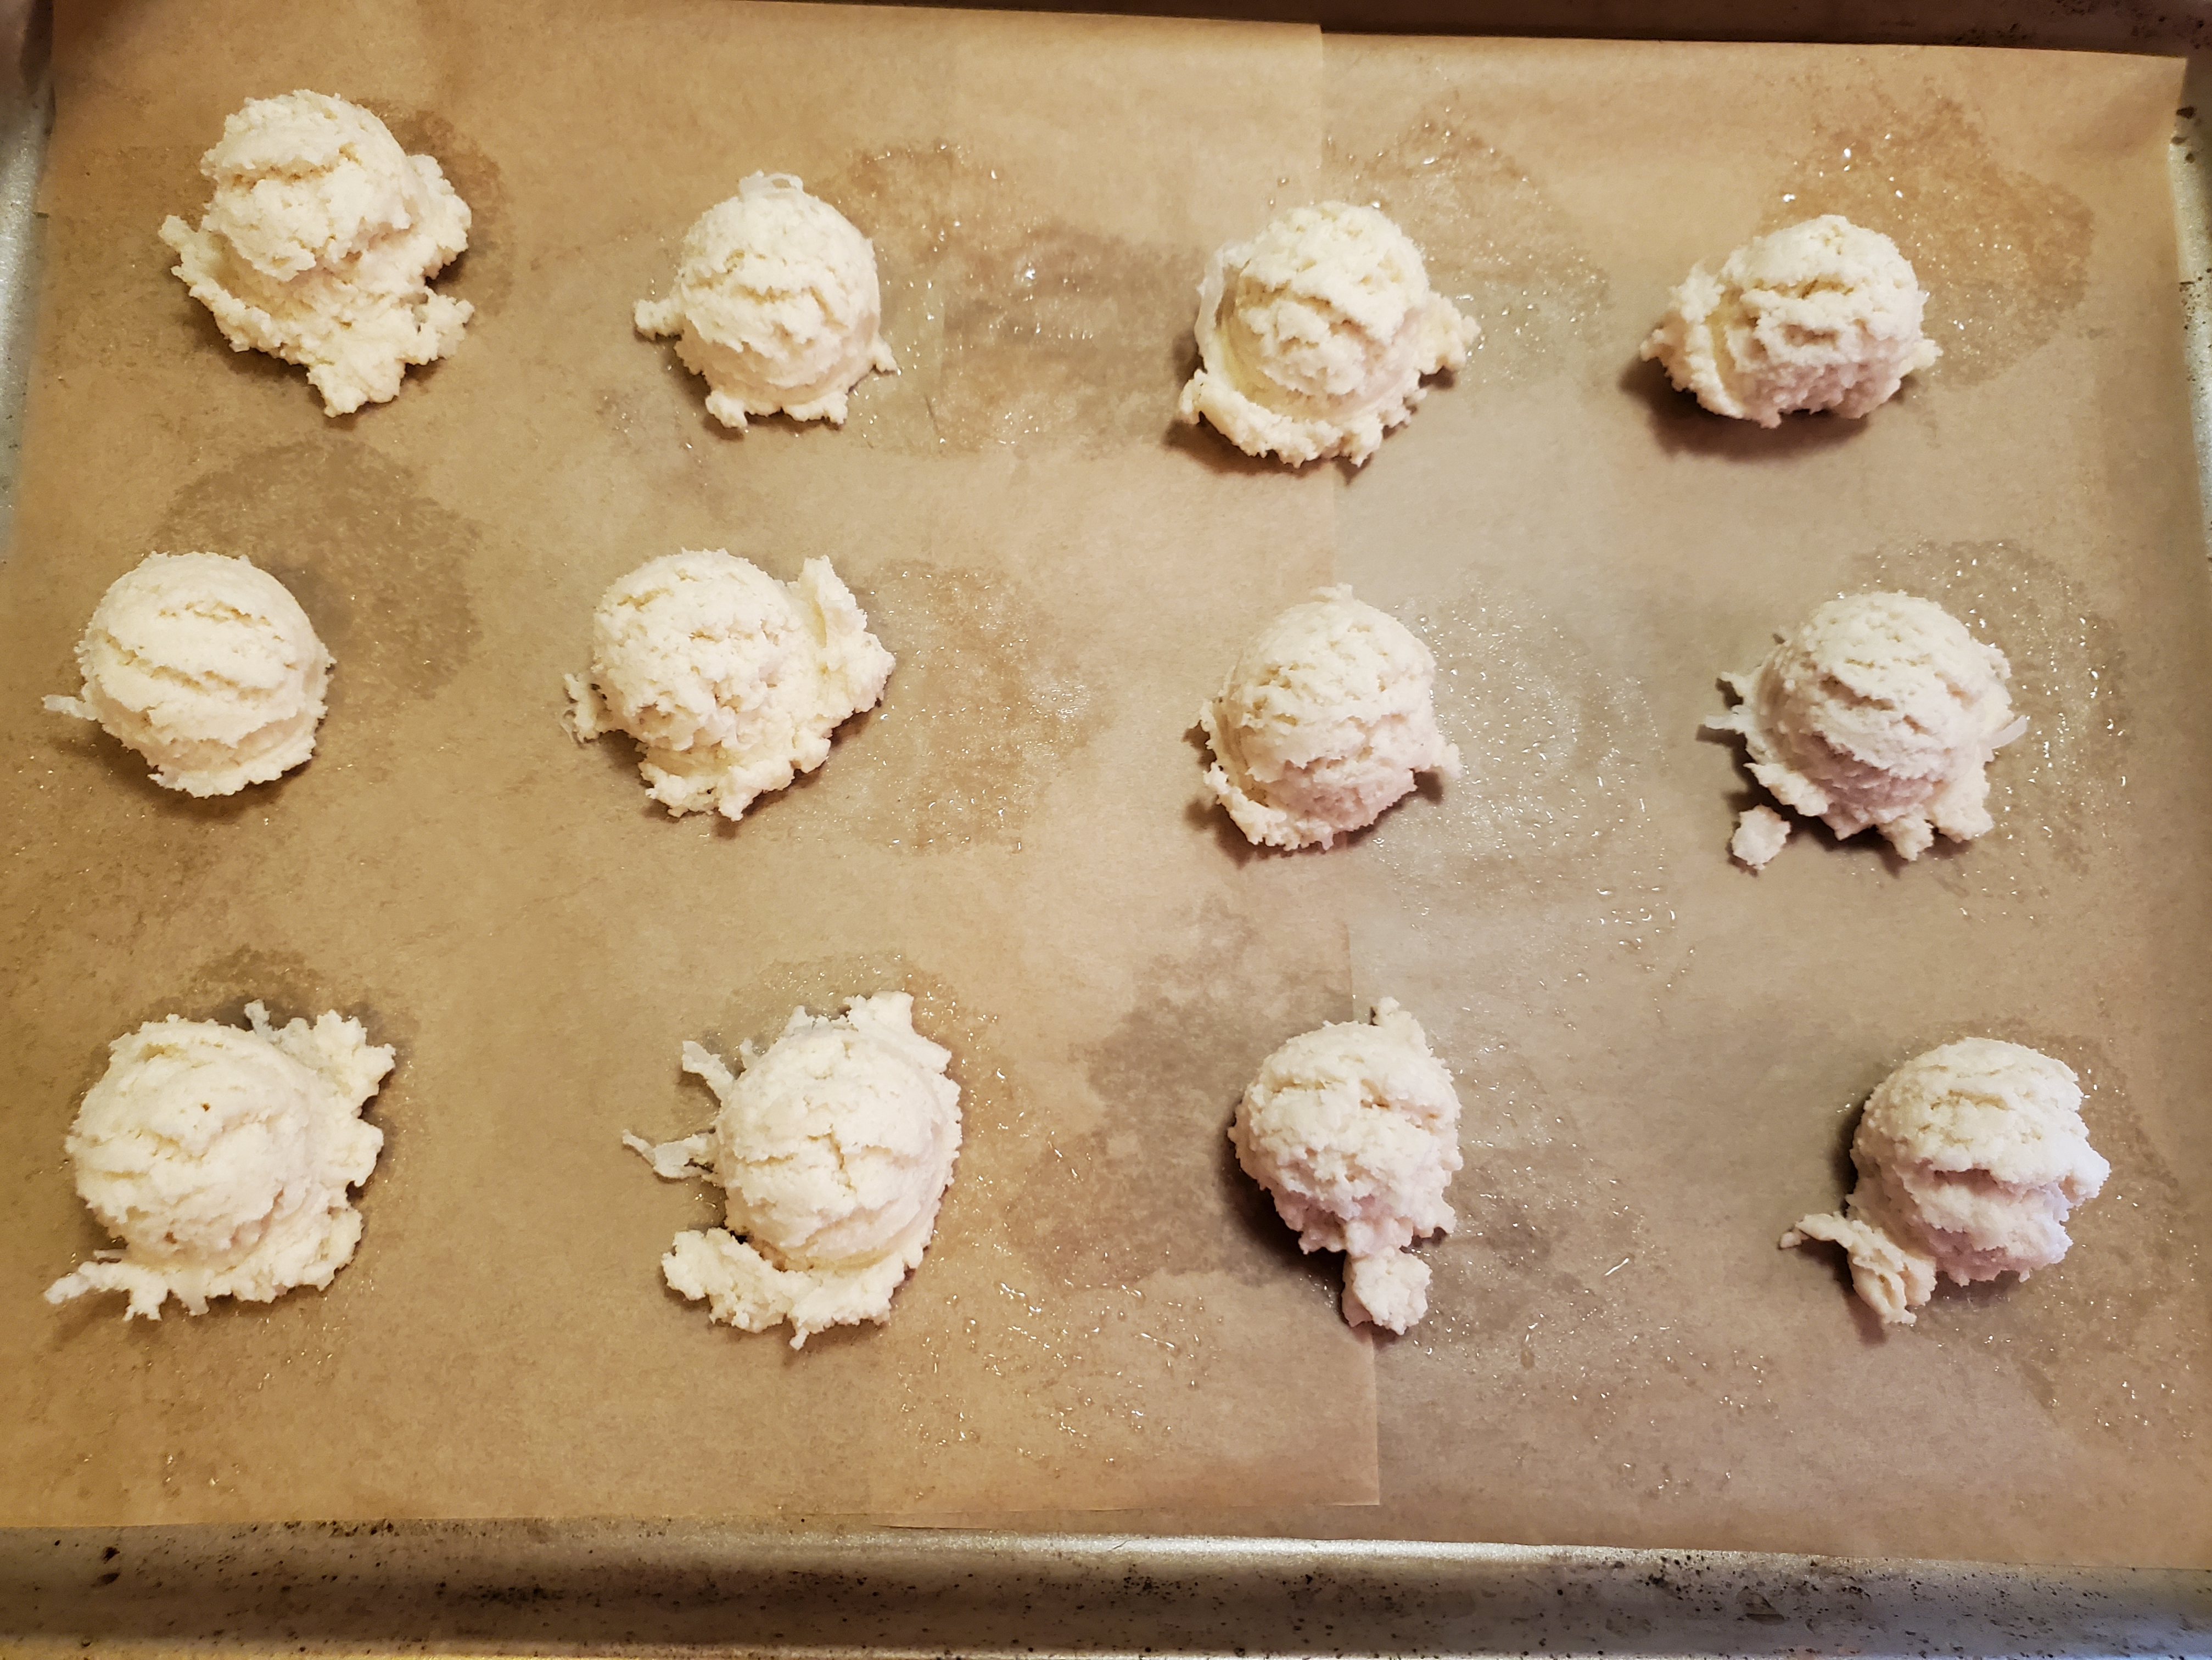
Line your cookie sheets with parchment paper or a silpat. You want to bake these light cookies until they are just beginning to brown. They puff up just like Snickerdoodles and as they cool, they will also sink in on themselves. Because they are so light and airy, you need to let them cool a few minutes before transferring them to a cooling rack so they firm up a bit; otherwise, they may actually fold down over the rungs.
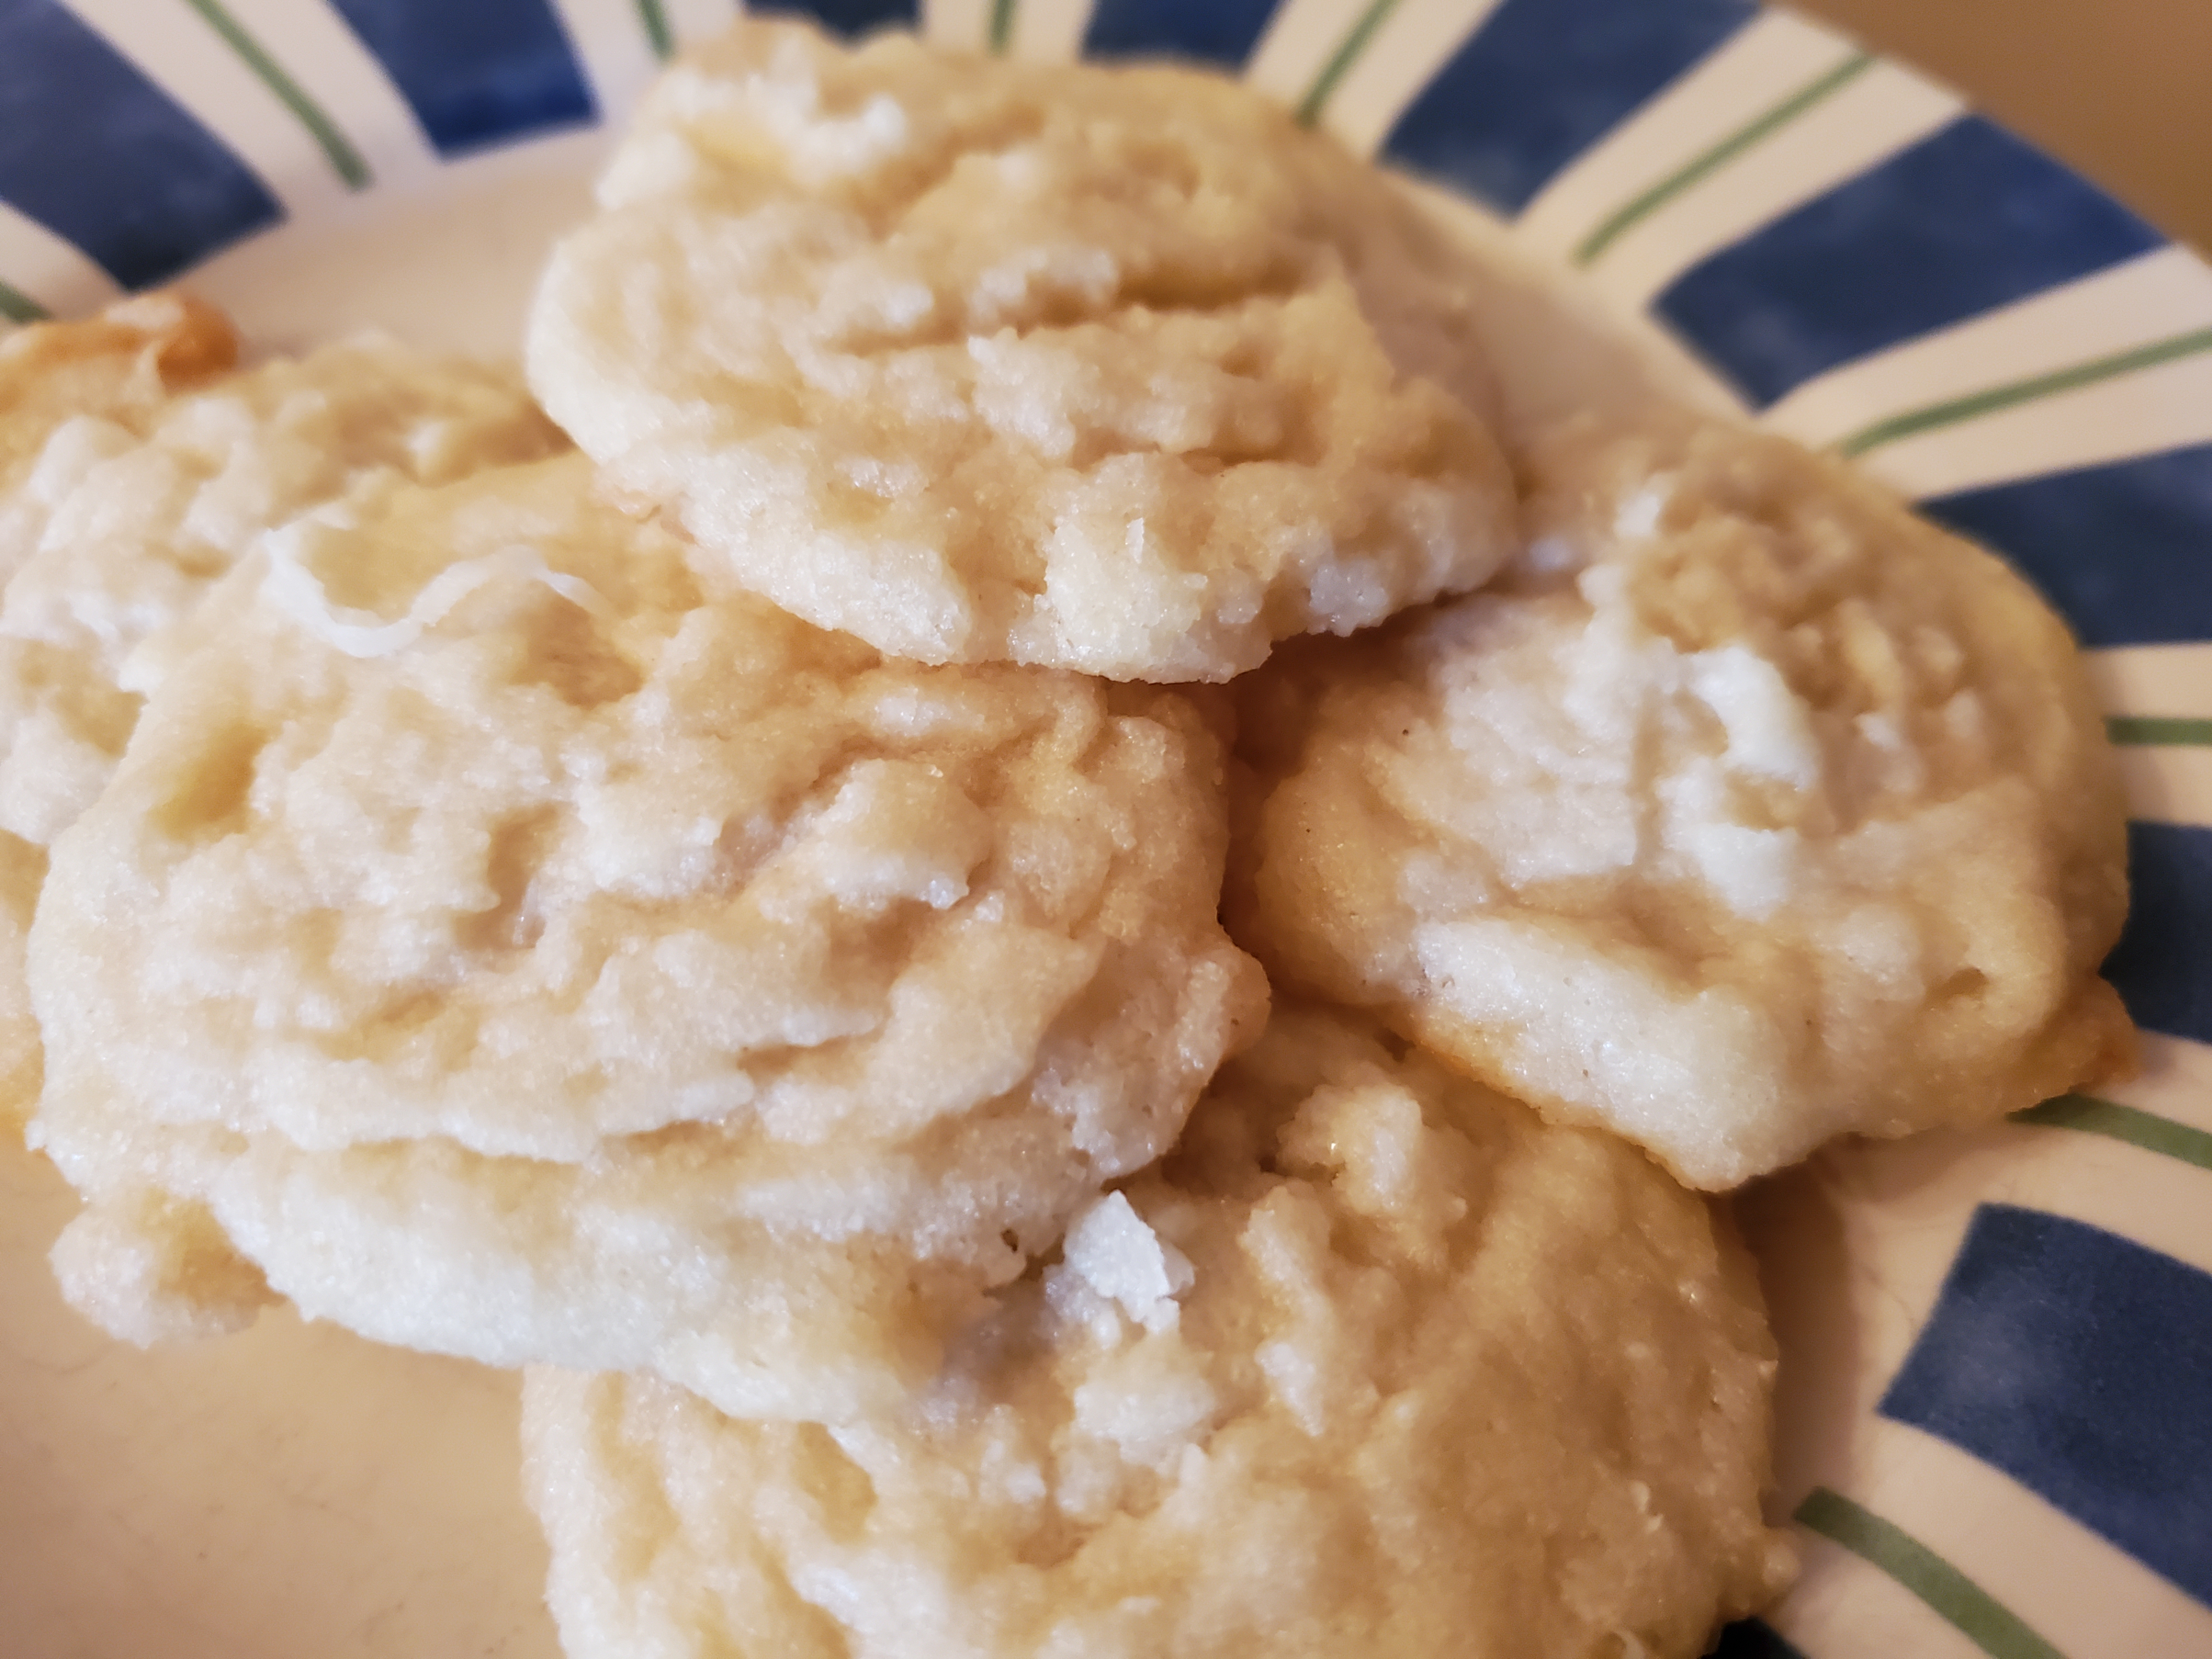
I was pleasantly surprised that the coconut flavor was very subtle, but it did add to the chewy texture of the cookie. Next time, I believe I will try a citrus version of this Swedish Dream.
Based on Best Blondie Recipe from SugarSpunRun.com
Hazelnut and Toffee Blondies
I was inspired to make Blondies this weekend after I watched the season finale of Ben and Jerry’s Clash of the Cones on the Food Network. The finalist, Rabia, made a Hazelnut and Toffee Chip Blondie chunk for her ice cream. I’ve made Blondie’s before usually used either walnuts or pecans, along with butterscotch chips, but the combination of hazelnuts and toffee sounded wonderful.
I decided to use the technique for a moister Blondie, as suggested by the “Best Blondie Recipe.” However, since I was baking for some vegetarians, I used plant butter in my recipe instead. I have used plant butter before, and I haven’t seen much of a difference in the consistency of the batter or cookie using this substitution.
Usually I cream together the butter and sugar, but this recipe suggested melting the butter. You do end up with a much looser batter as a result. I also toasted my hazelnuts for about 10 minutes at 350 degrees, until i could smell the scent of the nuts and the nuts darken slightly. This releases the oils and gives you a much richer flavor. Keep the toffee chips in the refrigerator until the last minute, to keep them from melting away as they are baked. This also works for chocolate chips. Be sure to roughly chop the nuts before adding them to the batter.
Blondie Batter
Unfortunately, as I was mixing all the ingredients together, I realized did not have enough vanilla extract. Vanilla extract is basically vanilla beans and vodka, so I substituted chocolate bitters for the remaining teaspoon. You will only get a slight hint of chocolate flavor in the Blondie.
If you are baking in a metal baking pan, you should definitely line your pan with parchment paper then spray it with a little cooking spray. If you use a Pyrex 13 x 9 inch dish, you can just spray the dish with cooking spray. I baked the batter for 25 minutes and it was still a bit loose, so I continued to bake for an additional 10 minutes until the toothpick came out clean.
Depending on how large you cut your Blondie, you will end up with anywhere from 15 – 30 bars. I hope you enjoy my adaptation.
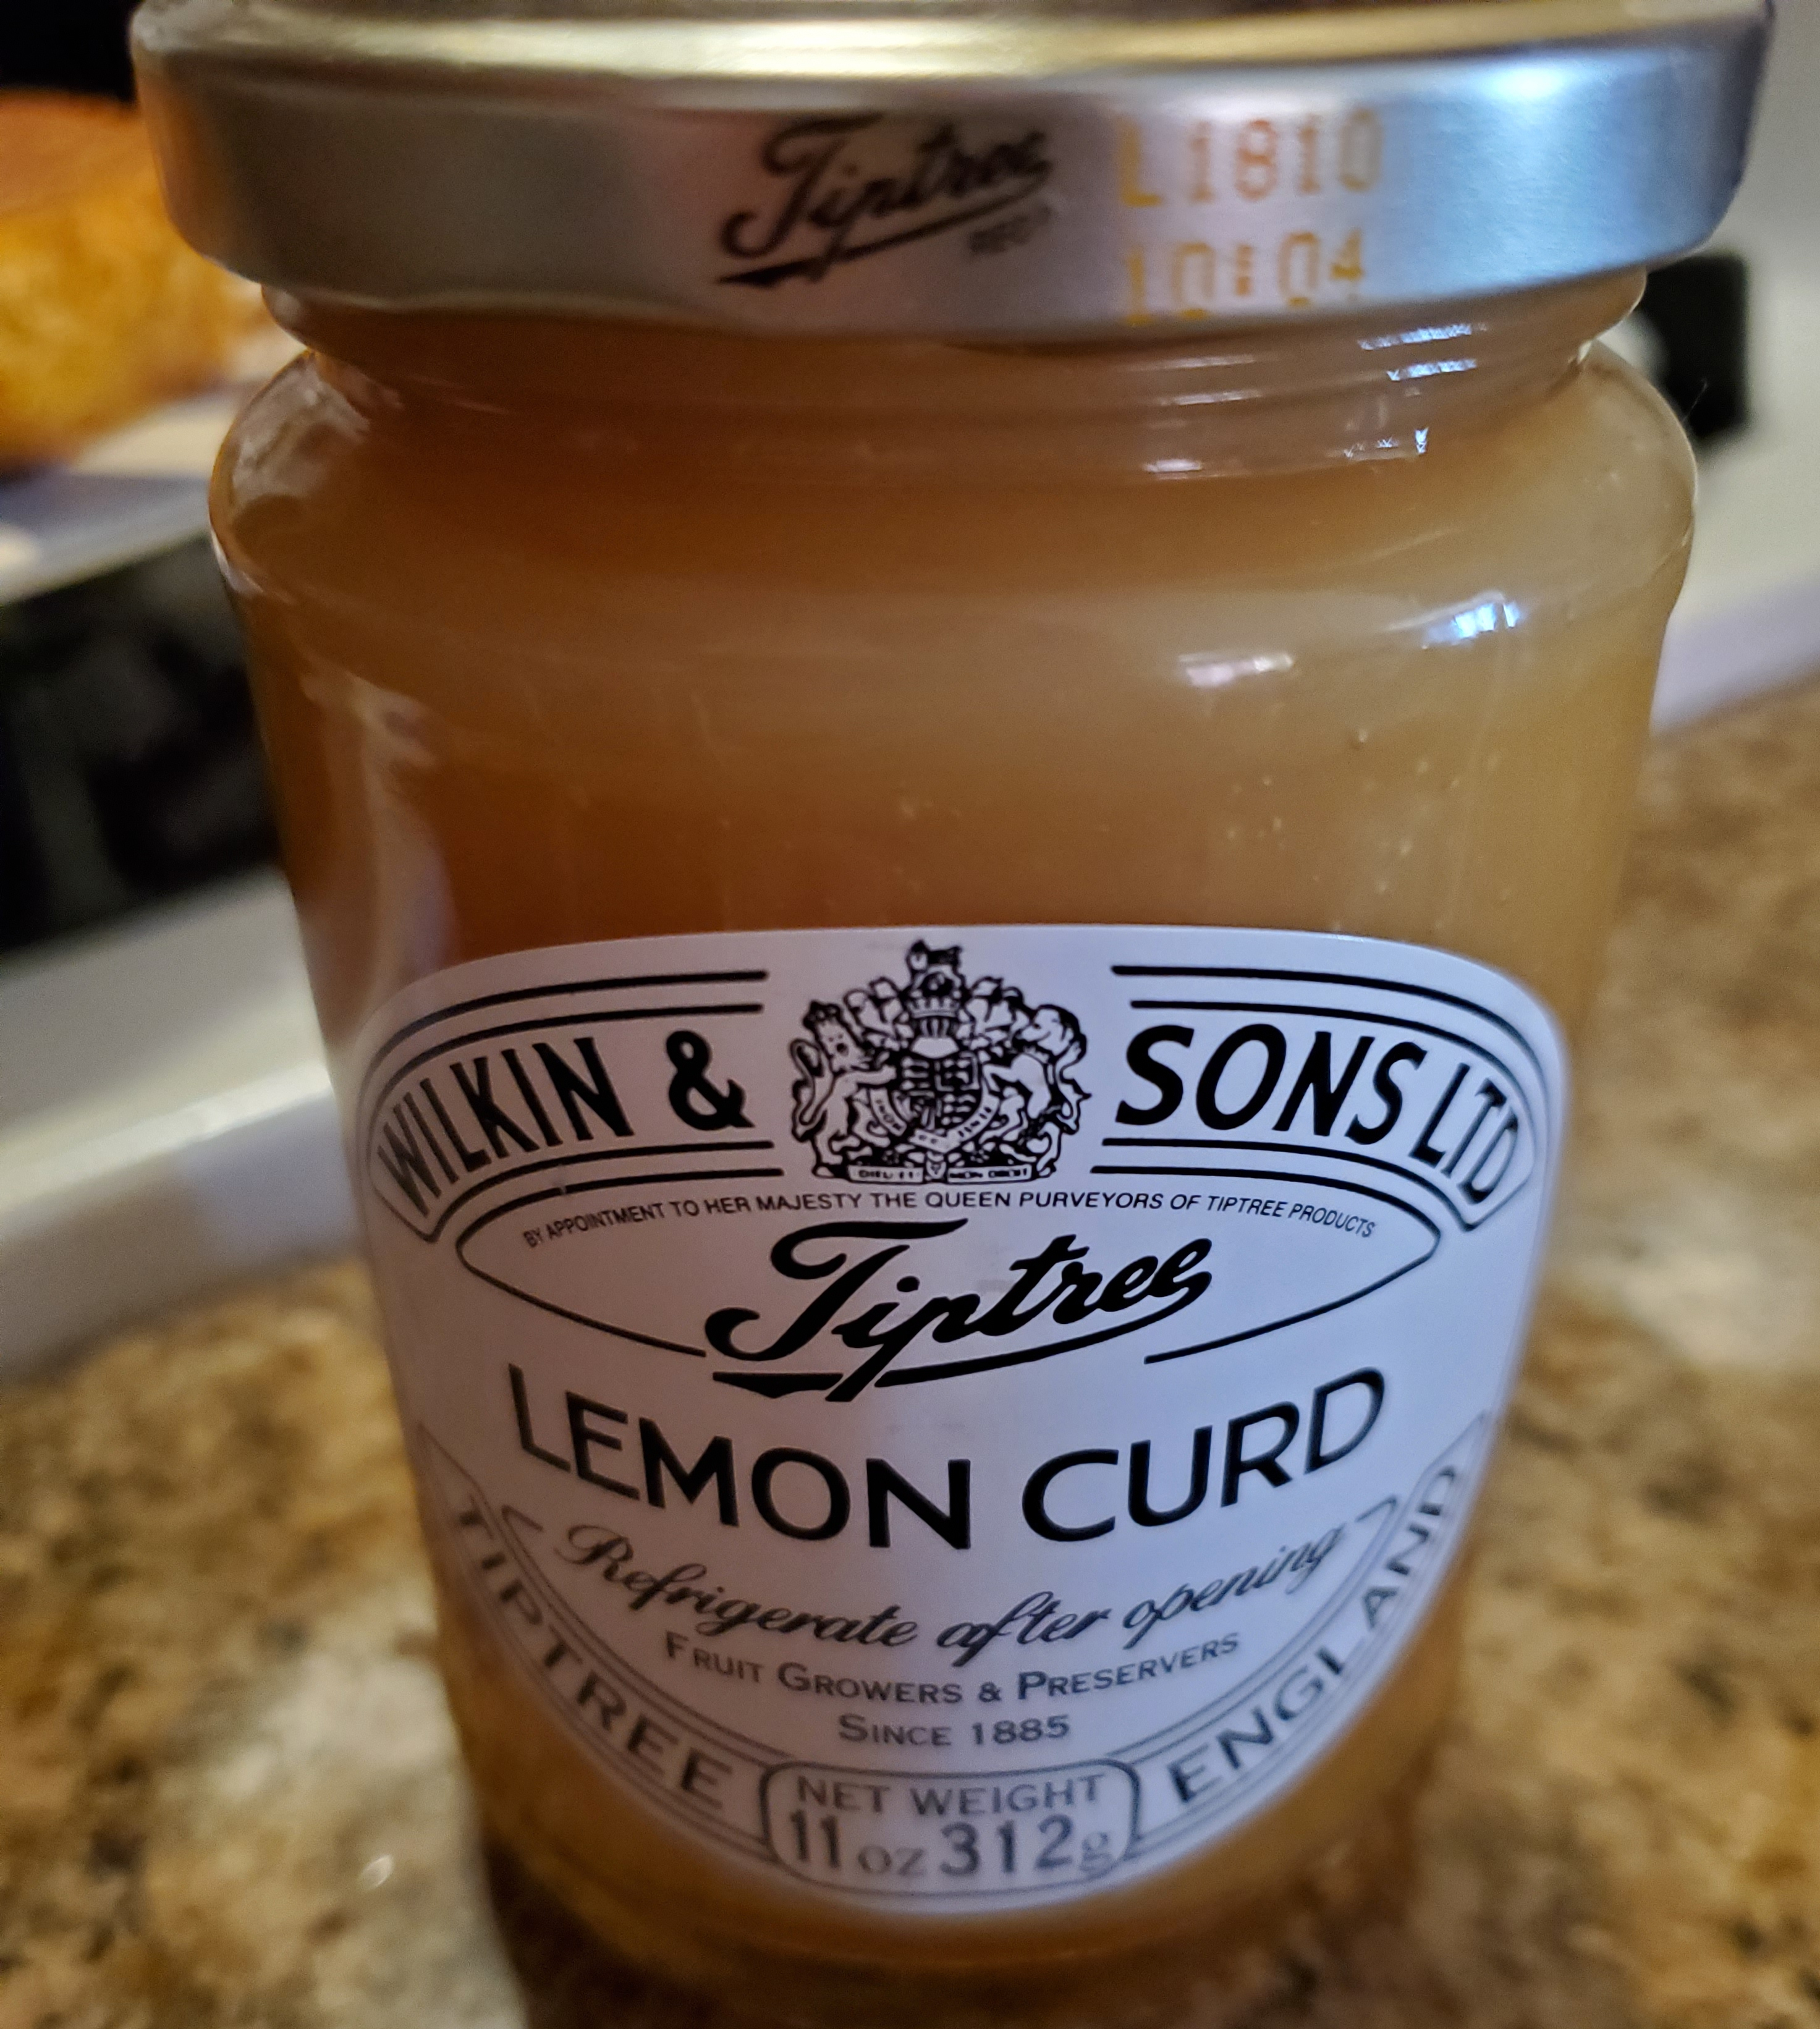
Last Christmas, I got a bottle of Lemon Curd along with an authentic British Scone mix, but although I made the scones I didn’t use the lemon curd. With the expiration date fast approaching, I paged throughMary Berry’s Baking Bible to find something utilizing lemon curd. Of course, I could have just made a lemon meringue pie or tart, but I wanted to try something completely different.
Raspberries were on sale at the grocery store, so I landed on the Lemon Griestorte, which also utilizes the semolina flour I used for the Orange Shortbread Cookies. Now this recipe only uses egg whites to make the cake light, fluffy and for rise, as opposed to baking soda or powder, so you need to make sure you don’t over blend your batter.
The original recipe calls for 1/2 ounce of ground almonds. You can buy ground almonds at the store, but if you do a lot of baking, it’s actually cheaper for you to buy almonds and then grind your own. This allows you to grind the almonds as fine or coarse as you want.
Once again, remember bring your eggs to room temperature before you start baking. This will actually allow allow the eggs to blend better and avoid lumpy batter. Whisk the egg yolks and sugar together until light in color and texture, then add the lemon juice. Add the semolina flour, lemon zest and ground almonds.
As opposed to many layer cakes, this cake is baked in one pan and then cut in half. The cake tin is lined on the bottom with parchment paper, and because this is such a fluffy and fragile cake, you should also line the sides of the tin with parchment paper. I suggest lining the bottom first, then you spray the sides and bottom with cooking spray. This will allow you to apply the parchment paper to the sides, then spray the sides again with cooking spray, especially if you have to piece together parchment paper for the sides.
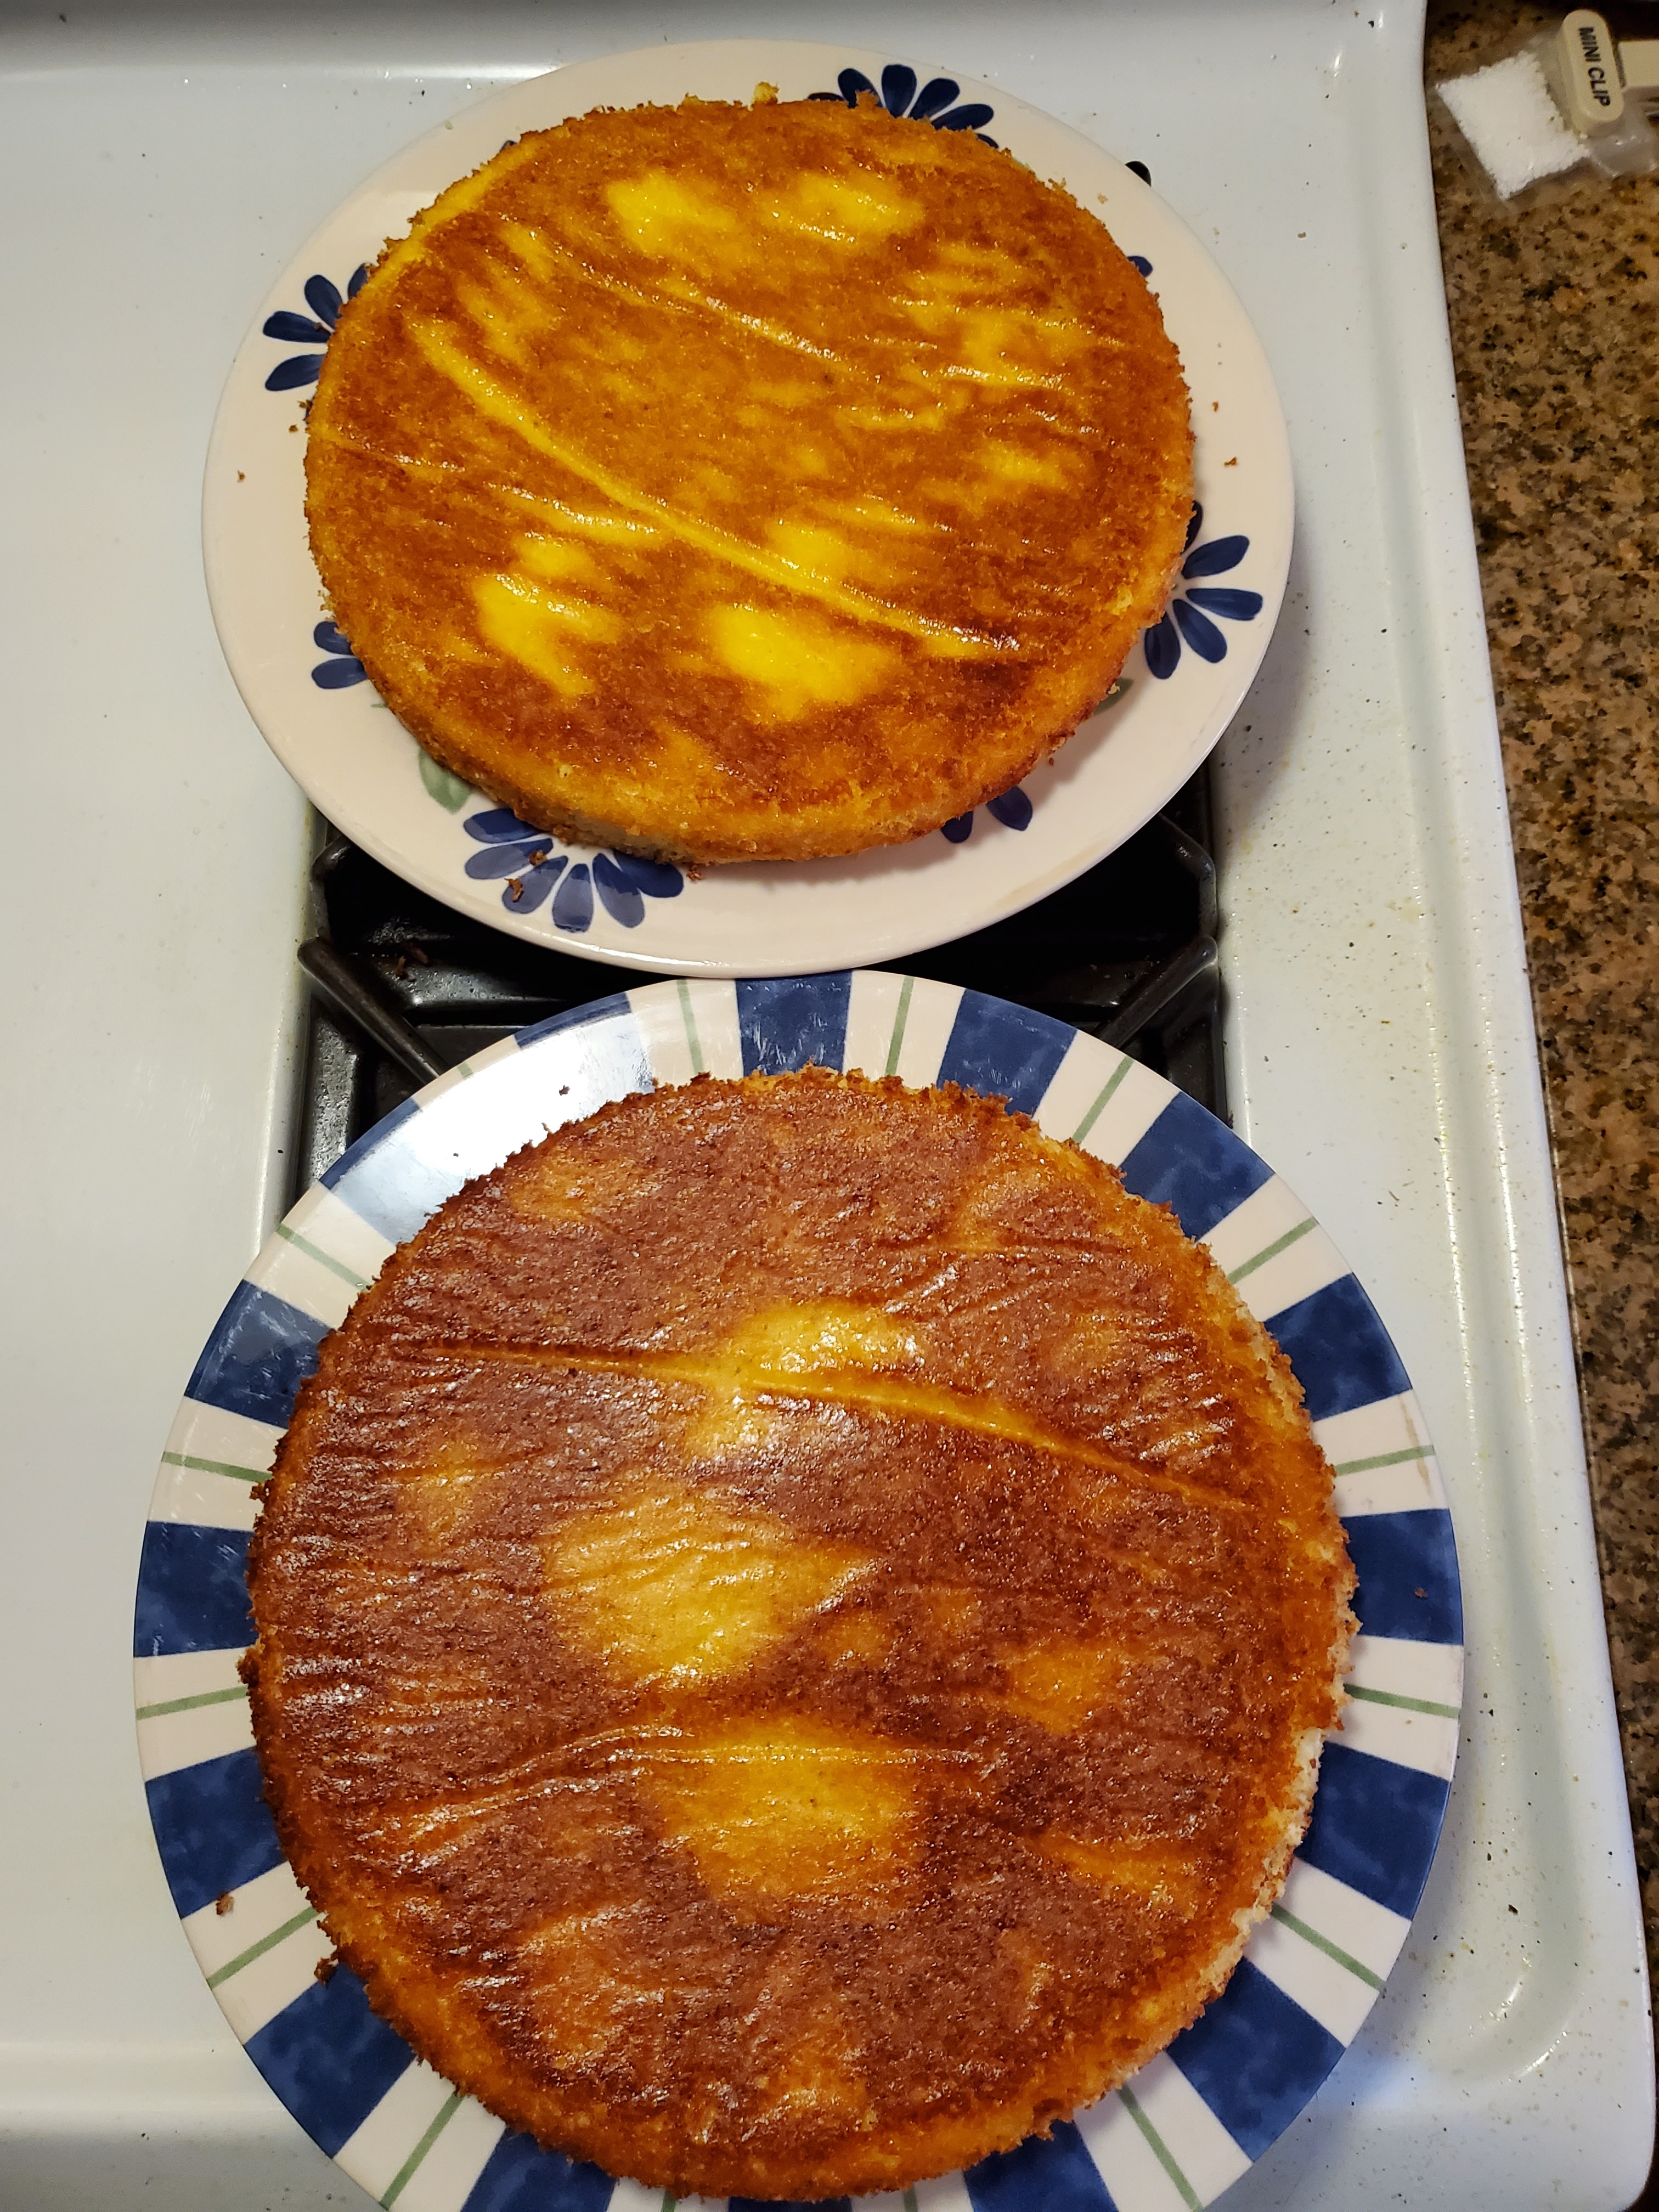
I baked my batter for 30 minutes as directed. I did everything I was supposed to; bringing my eggs to room temperature, whipped the egg whites to soft peaks, gently folded in the egg whites and lined the sides of the baking tin to allow for the rise of the batter, but when my cake came out of the oven, there was very little rise to the cake. I let it cool 10 minutes and turned it out onto a plate to see how thick the layer was. The instructions indicated that this layer was to be cut in half to form the two layers of the cake, but the layer was only 3/4 inch thick. There was no way I could cut this layer in half!
So I wondered, had I over folded or over whipped the egg whites? Or since the eggs were close to their expiration date did this cause them not to rise? I had just bought a new dozen eggs, so I decided to bake the cake all over again to see if I got a different result. Thirty minutes later, I found that I didn’t get a different result! I turned out both layers onto plates, and the little bits that stuck to the tin tasted light and fluffy, so I decided to go ahead and finish the cake with the two different layers I had baked.
Now I have looked at other’s results using Mary Berry’s recipe and found that many people got the same results as I did. However, I did find another Griestorte recipe, with the exact same ingredients, that indicated that the egg yolks and sugar should be heated over a hot water bath until thick and mousse-like and that the egg whites should be beaten into stiff peaks instead. If I decide to make this recipe again, I will definitely try this slight variation to see if it makes a difference in the rise I get from the batter.
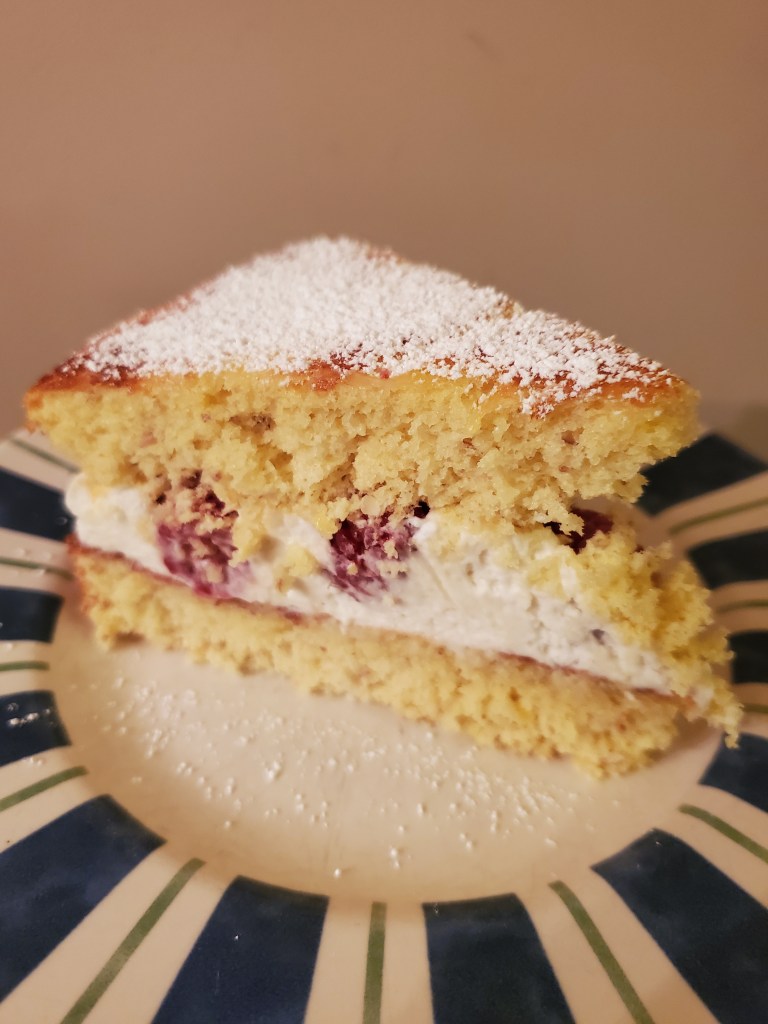
While the recipe only calls for 1/4 pint of whipped cream, I actually whipped up the entire half pint to make sure that I had enough filling for the cake. If you double the whipped cream as I did, make sure you also double the amount of lemon curd in the filling. Feel free to make your own lemon curd, but a quality bottled lemon curd can also be used. If you don’t use all of it for the filling, you can always serve the extra on top or on the side.
Now I know some people have an issue with raspberries. They don’t like the seeds. If you are one of those people, a good option for you would be to replace the raspberries with blueberries. Both pair well with lemon, so feel free to use your preferred berry. Top the bottom layer with half the lemon curd / whipped cream mixture. Add the berries of your choice, then the remaining whipped cream mixture. Carefully add the second layer.
Before serving, dust with Confectioner’s sugar or top with additional whipped cream and lemon curd and berries.
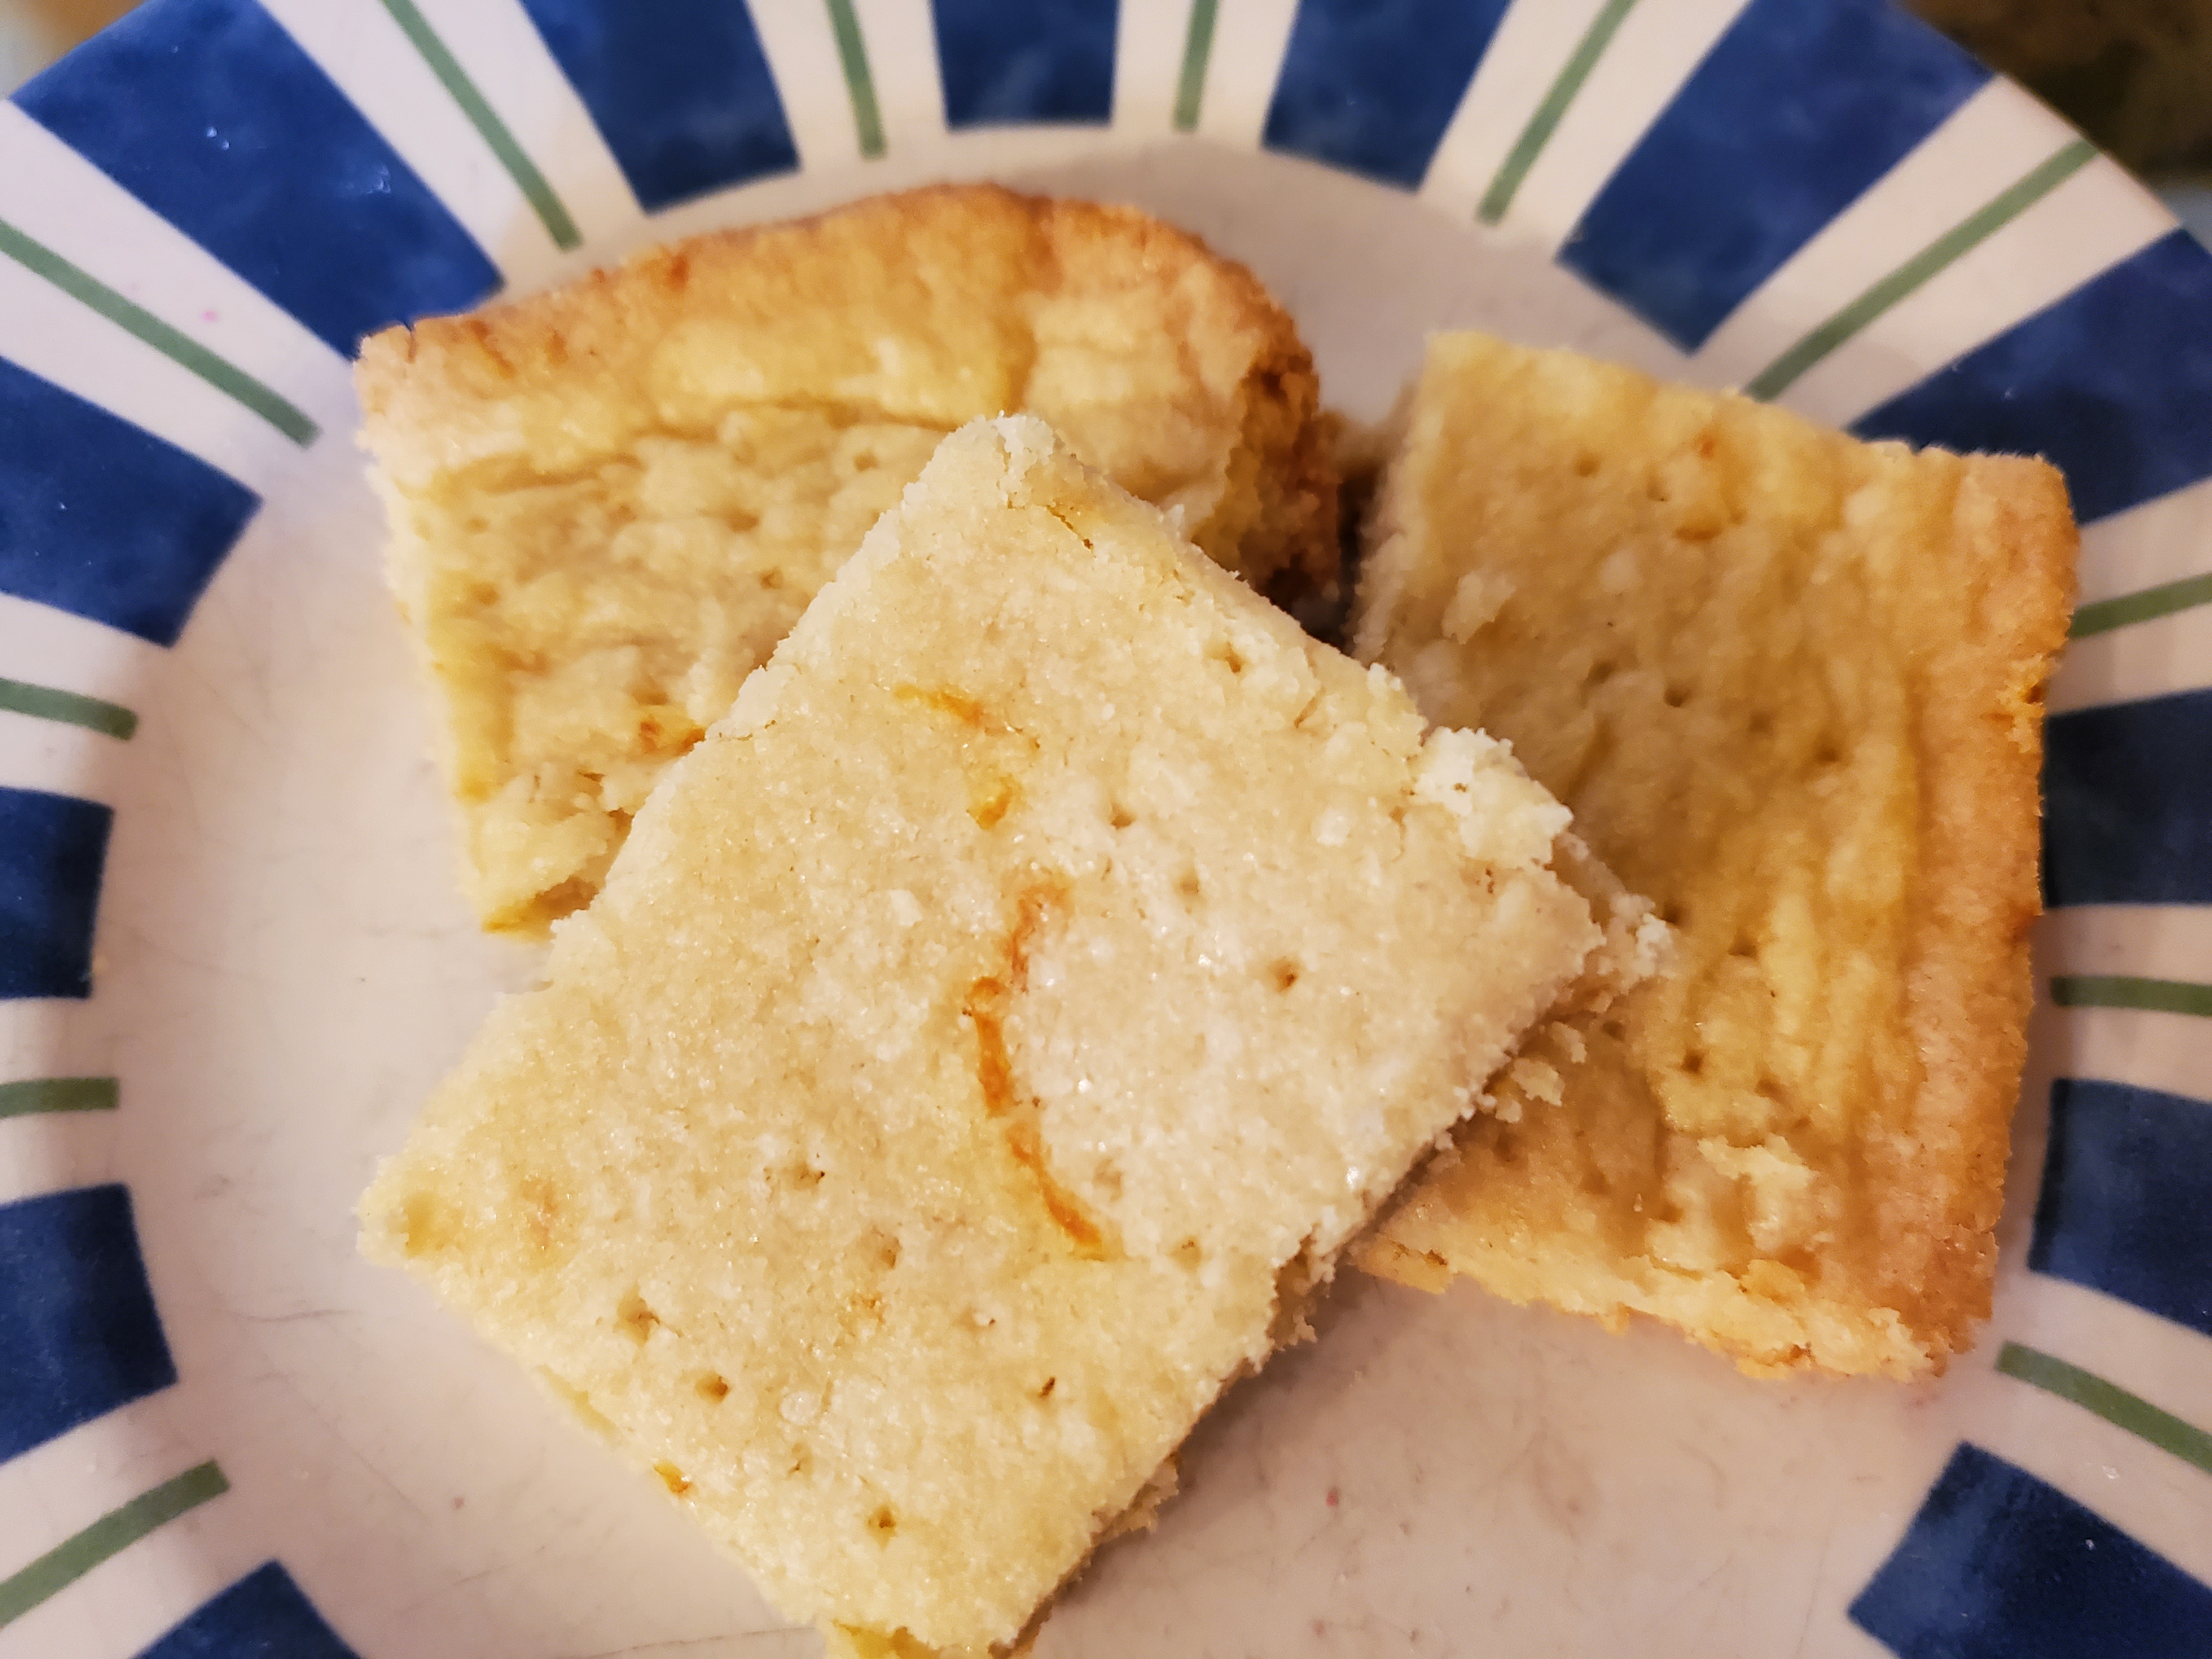
Based on The Very Best Shortbread from Mary Berry’s Baking Bible
Orange Shortbread Cookies
One of my favorite baking shows of all time is the Great British Baking Show or as it’s known in Great Britain The Great British Bake-Off. When I first saw the show on PBS, all I could think was would I ever be a good enough baker to get on this show!
I loved the comedic banter of the original hosts, Mel Giedroyc and Sue Perkins, as well as the expert bakers Paul Hollywood and Mary Berry. When the show was added to Netflix, I immediately watched the episodes I missed, as well as watching the season I had just seen again! I was sad when Mel, Sue and Mary Berry left the show in 2016, and I immediately added Mary’s Baking Bible to my Christmas wish list. It took a while, but I finally got my Christmas wish.
When I was looking for something to bake this weekend, I decided to pull Mary Berry’s book off the shelf and see what I could make. I have always been a sucker for Scottish Shortbread, and I have attempted it previously, but it just didn’t taste the same. When I previously made shortbread, I always just used all purpose flour. Per Mary Berry, using semolina flour in addition to all purpose flour gives the crunch you expect from shortbread; however, she also indicates you can use corn flour or rice flour instead.
The recipe itself is very easy to make. I decided to measure out my ingredients on a scale this time using the metric measurements in the original recipe. You can get a good multi-unit scale at Amazon for a reasonable price. It doesn’t take much more time and from what I have read on other websites, digging into a bag of flour to measure out flour can actually add too much flour to a recipe and create a drier dough. One suggestion I read was to scoop out the flour into a bowl and then remeasure, so the flour isn’t packed into the measuring cups.
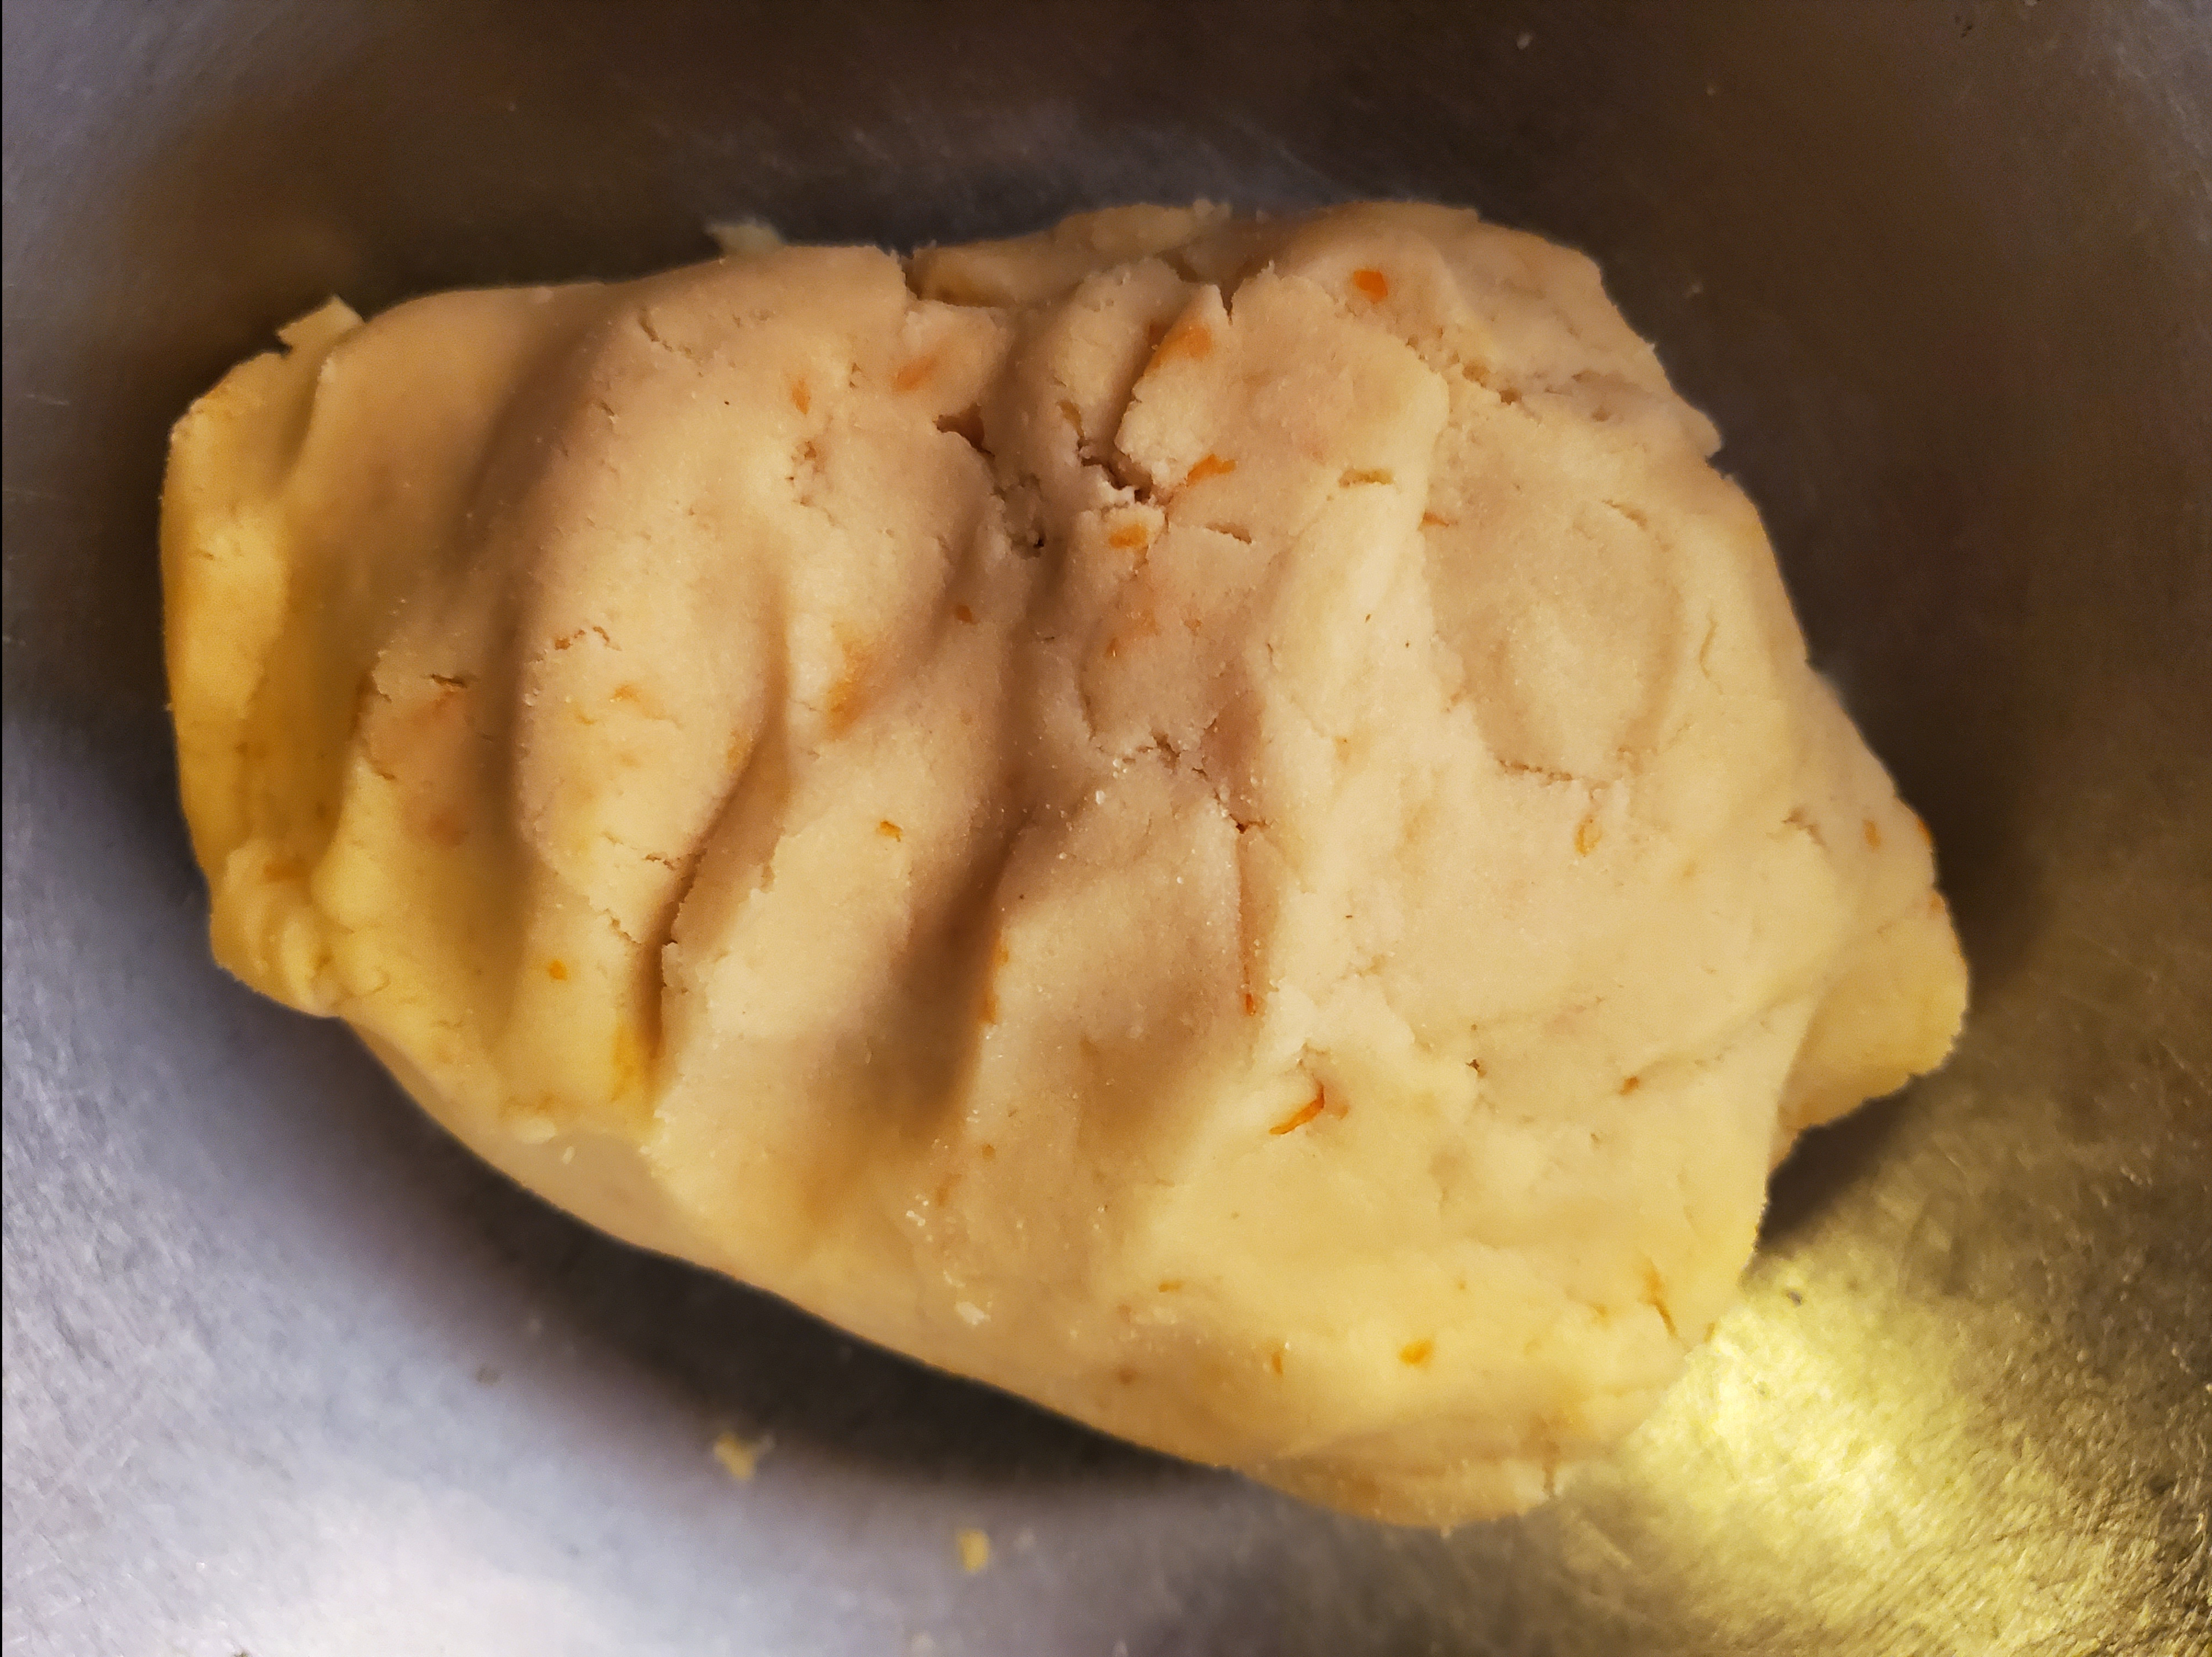
This recipe can actually be made in a food processor, simply add all the ingredients and mix until the dough comes together. I chose to use a pastry cutter instead and cut in the butter until the dough started to form. One step I had never seen for shortbread was to knead the dough. Mary Berry indicates that once the dough comes together, it should be kneaded until smooth. This step took me about 10 minutes, although if I had used the food processor, it would probably have taken a shorter amount of time.
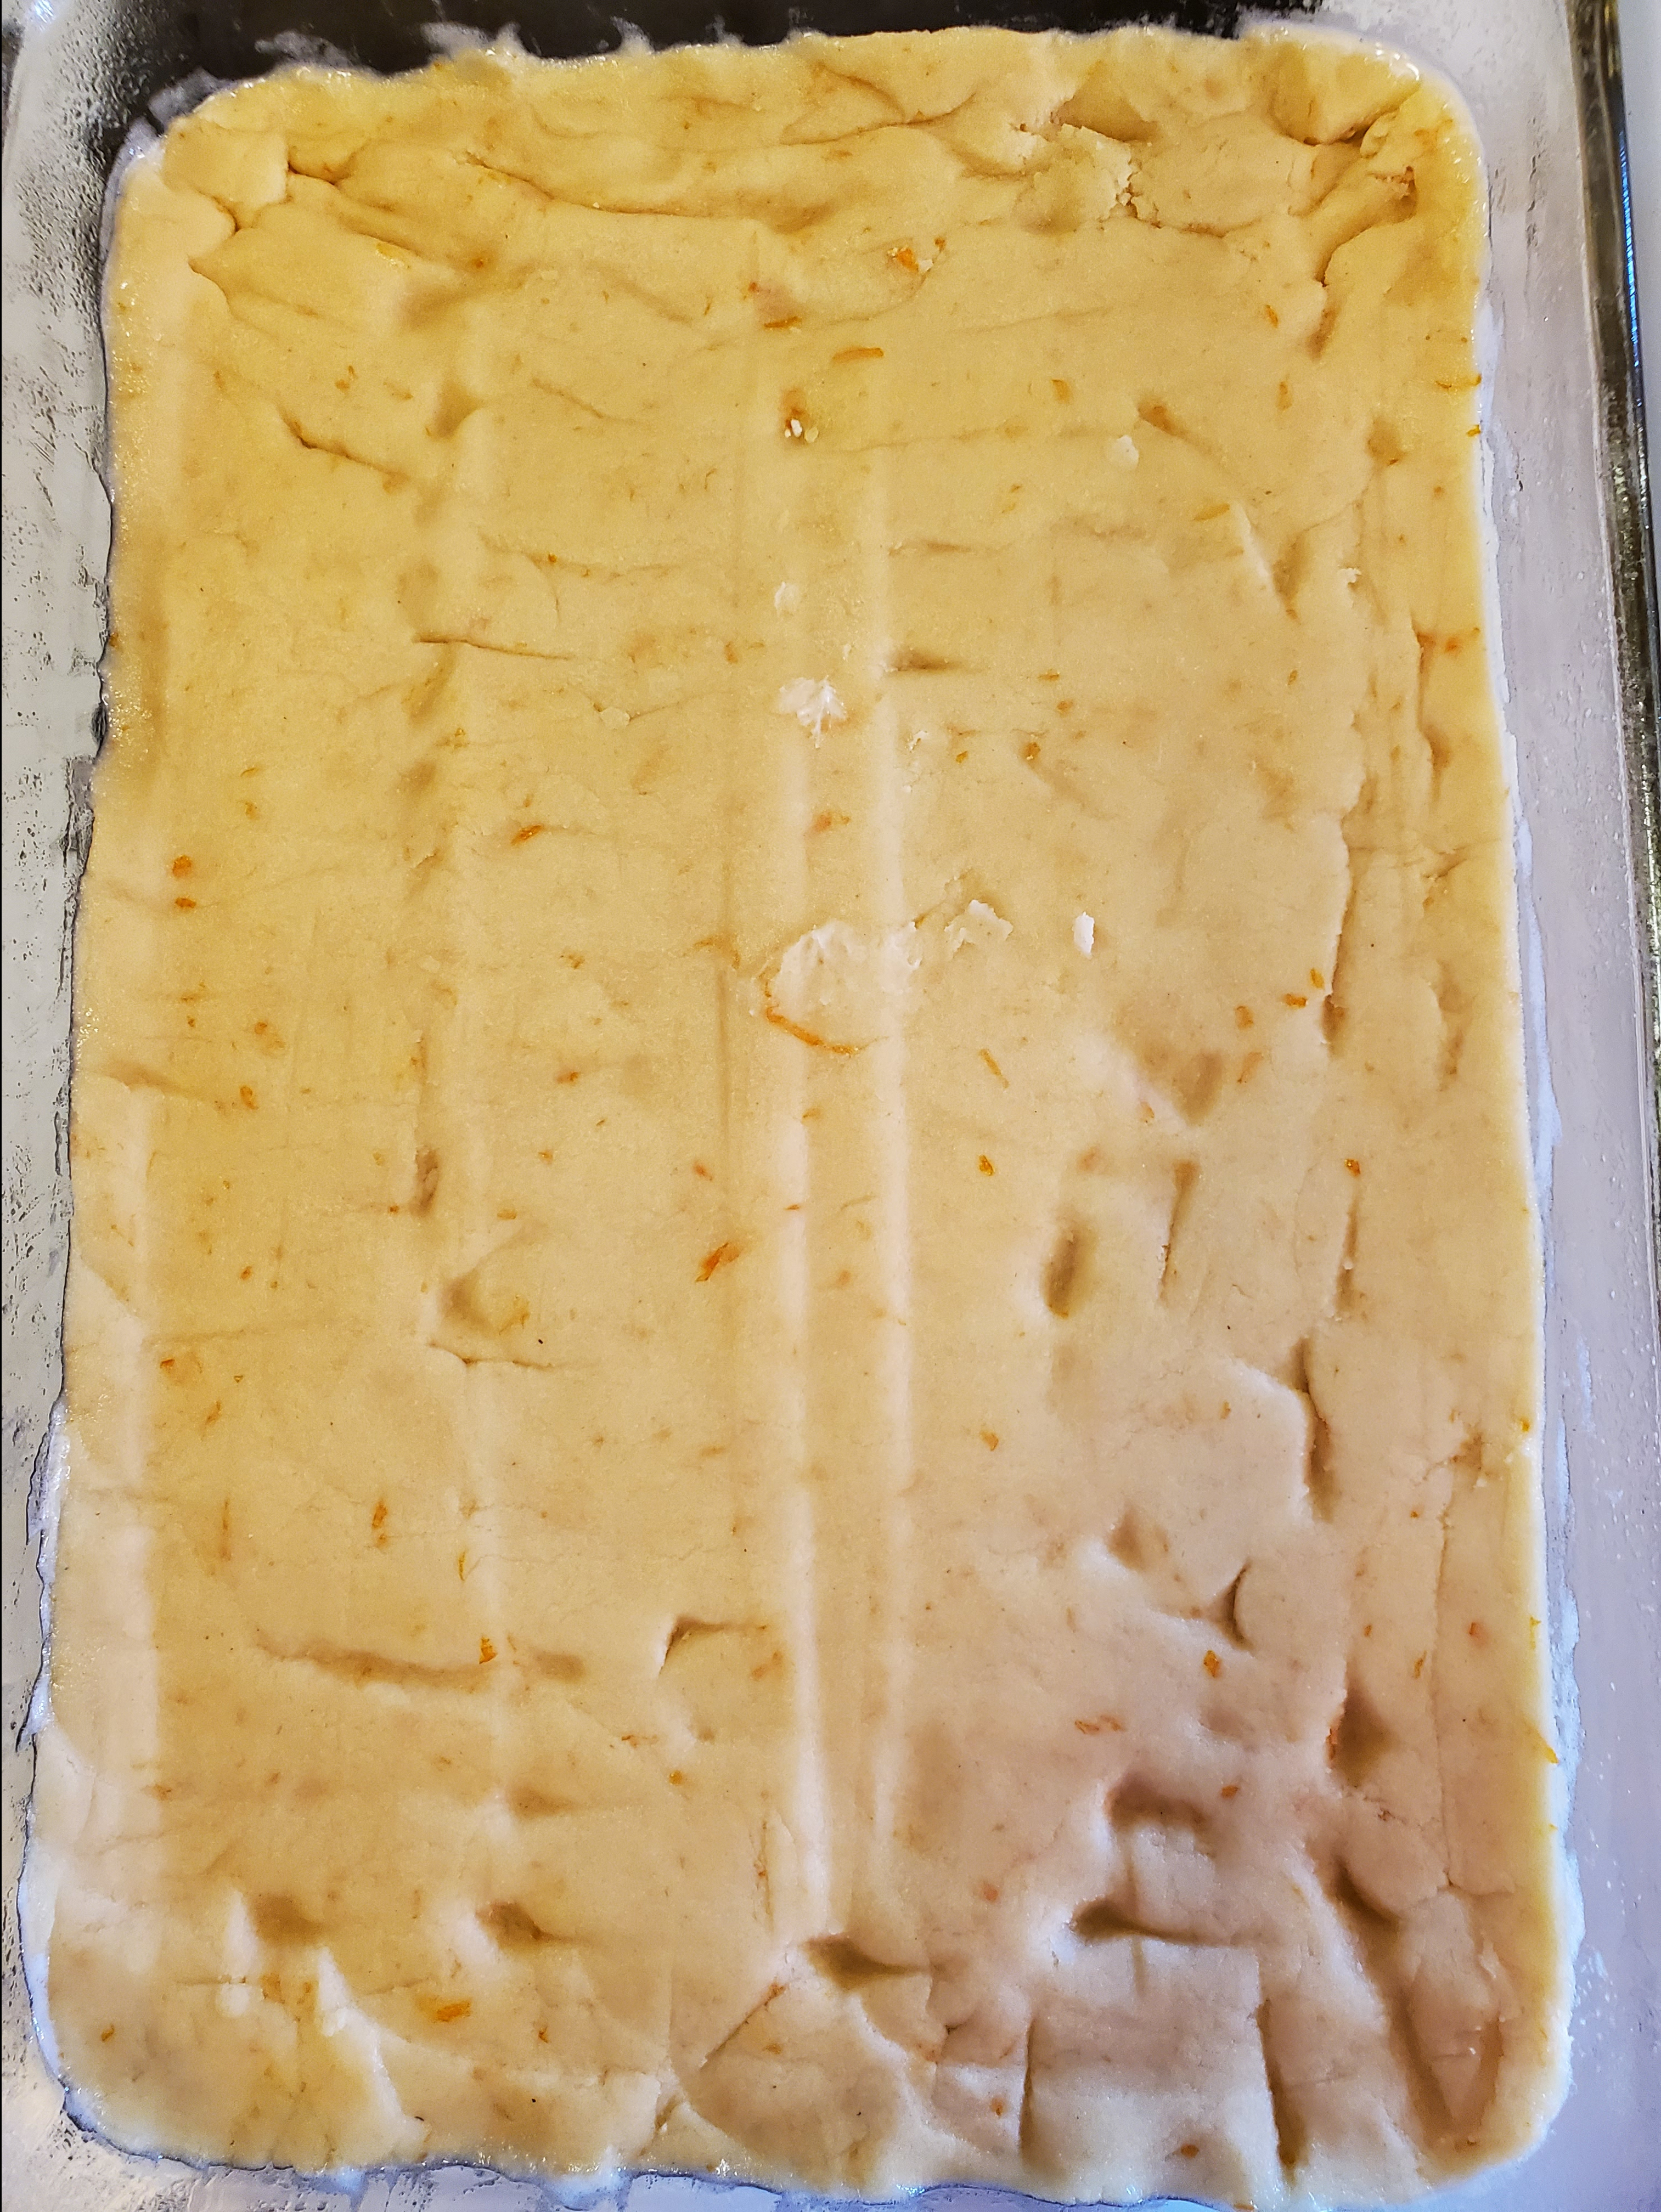
The recipe does call for a 30 x 23 cm (12 x 9 inch) baking dish; however, my baking dish is 33 x 23 cm (13 x 9 inches) and that one inch did make a slightly thinner cookie. But don’t feel like you have to use either size dish. If your baking dishes are too small, you can always divide the dough and bake separately, or use two or more dishes. Just remember, this may alter your baking time. I believe I saw one baker using a tart pan for their shortbread. The advantage to this is that you can easily get the cookies out of the dish without breaking them, as they are very fragile.
Since there is so much butter in a shortbread cookie, you want to refrigerate the dough until it firms. I refrigerated it overnight, but an hour will do. Remember to prick the dough with a fork before you refrigerate it, as this will allow steam to escape while baking, and once the dough is firm, it will be very difficult to do this. Mary’s original recipe indicated that the dough should be baked at 160 C/Fan 140 C/Gas. This converts to 320 F/Fan or 284 F/Gas. I do have a gas stove, but 284F seemed a bit low for baking a cookie, so I used 320 F and baked for 35 minutes.
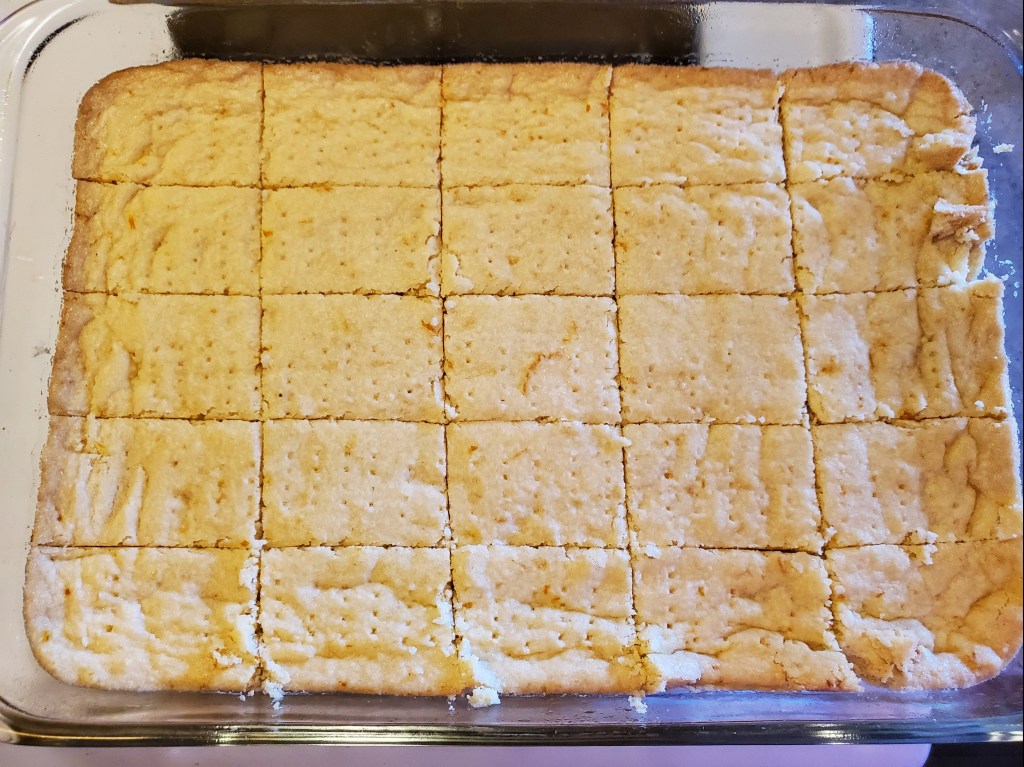
Once Baked Shortbread
After 35 minutes, I took out the shortbread and let them rest for 10 minutes and then cut 25 squares. If you want smaller cookies, this can yield anywhere from 30 to 50 cookies. I took out a corner cookie and it still seemed very soft. I remember seeing a few shows that indicated shortbread needed to be baked twice to achieve the crunch we all expect from this buttery treat. I checked out a few recipes online and they all indicated that after being cut, the cookies should be removed from the baking dish and placed apart on a baking sheet and baked for an additional 15 minutes. I just ran my knife down my cuts again, making sure that the cookies were cut through, placed the dish back into the oven and baked for an additional 15 minutes. I then cooled them and found that the cookies came out with ease from the baking dish. The longer you let them cool, the crunchier they become.
If you like, you can dust them with a little sugar while still warm, or with a little confectioner’s sugar once cooled.
Based on Shannon Auton’s Blueberry Brioche from Saveur Magazine
Chocolate Chip and Brown Sugar Brioche
The past few weeks, I have been watching Chopped Alton Brown’s Maniacal Baskets and Good Eats with Alton Brown and was inspired to try making some bread. On one episode of Good Eats – Fry Bread, Fry, Alton made two types of flat bread – Scallion Pancakes and Langos. I made the scallion pancakes, and they turned out pretty good, so I thought I would try the Hungarian Potato Langos. I was scared, because I haven’t had very good luck working with yeast. Half the time it never rises, but Alton made it look so easy. In the end I did get a great rise, but my dough was so sticky I had to add so much more flour, that the final product was very tough.
I had decided to give up my attempts at bread and find a cookie recipe that I hadn’t made before. As I was paging through my binder, I came across the recipe for Blueberry Brioche I had cut out of Saveur Magazine. I almost moved on, because I didn’t have any blueberries, but then I thought it would be good as a sweet bread with chocolate chips. I checked my cupboard and found I did have enough flour to make the recipe and decided to take the plunge.
Another ingredient I didn’t have was golden syrup. I have to admit, I didn’t know what golden syrup was, except for the fact that I always heard about it on The Great British Baking Show. Golden syrup is made from sugar beets or sugar cane. One of the many substitutions you can use if you don’t have golden syrup is honey. Unfortunately, my honey had crystalized, so my only option was maple syrup, which I thought would go well with the brown sugar and chocolate.
I started to bloom my yeast, but then realized I hadn’t softened my butter yet or brought my eggs to room temperature, so I had to start again an hour later. Working with yeast is tricky. If the water is too hot, you will kill off the yeast, but if the water isn’t hot enough it will just sit there. So if you are going to work with yeast, you need to have a good digital thermometer. The liquid needs to be between 105 and 110 degrees Fahrenheit to bloom the yeast properly. The original recipe indicated that the yeast should be bloomed in water, so I made sure the temperature was within range and when I added the milk that it wasn’t above 90 degrees, since the water would have cooled as the yeast was “activating.”
The original recipe called for the dough to be created by hand, but since I am a bread novice I decided to use my stand mixer so I could be sure that it was kneaded enough. I started on low speed until the flour was incorporated then moved up the speed to slow mixing (number 2 on my mixer), and kneaded the dough for 3 minutes, until the dough looked smooth. I checked the dough and it felt smooth, so I then turned it out onto a lightly floured surface and kneaded it by hand for another minute.
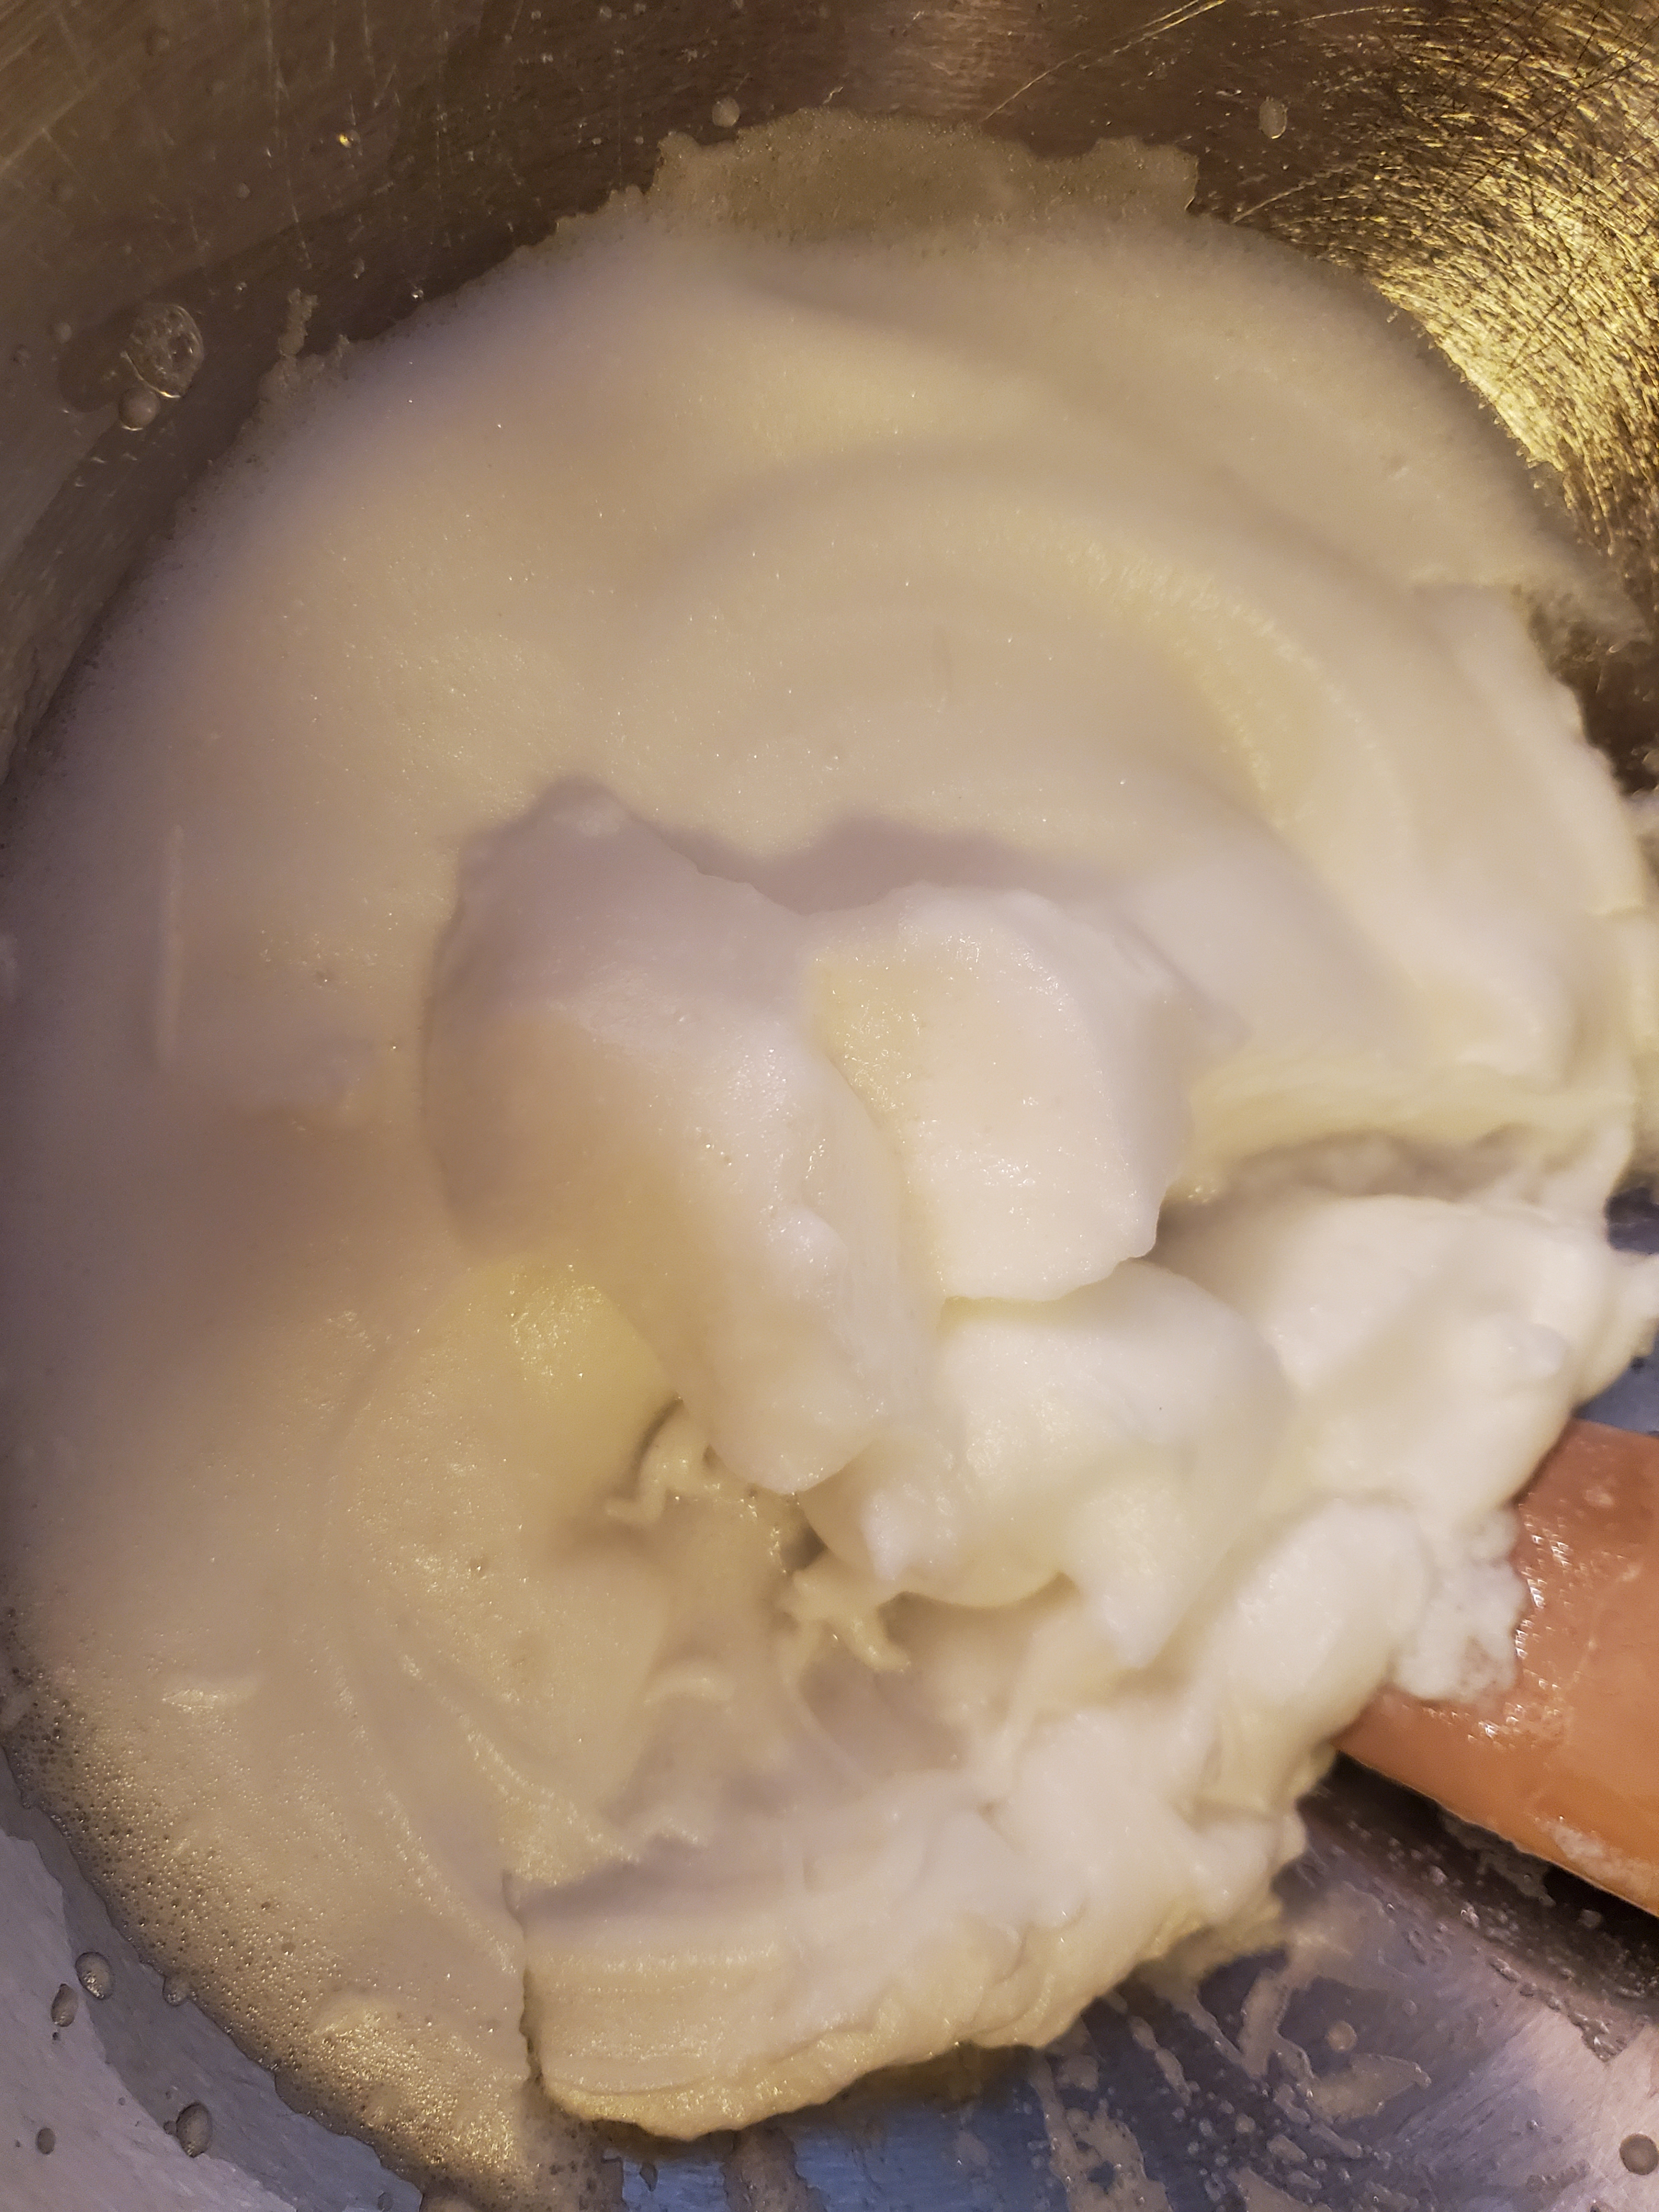
One problem I have always had is that most of my mixing bowls are metal, so plastic wrap doesn’t stick to it, so I never get a good seal to cover my dough. I do have a large measuring bowl with a plastic lid, but years ago my dog got a hold of the lid and chewed a few holes in it. My suggestion is to invest in a proofing tub from Amazon, because it also has a ruler on the side, so you can tell when the dough has doubled in size. Now according to the recipe, the dough should double in about an hour. I waited the hour, and nothing. I waited another hour and the dough still hadn’t risen. I did have my air conditioning on, so I thought maybe my apartment was too cold, so I took the quilted cover for my stand mixer and put it over the proofing container. Another hour passed and still no rise. By this time, it was 11 pm and I was about to give up again. I was so frustrated, because I had wasted 6 cups of flour! But then I thought, what do I have to loose, I will go to bed and see what has happened in the morning. To my utter surprise, the dough had doubled.
The dough has risen!
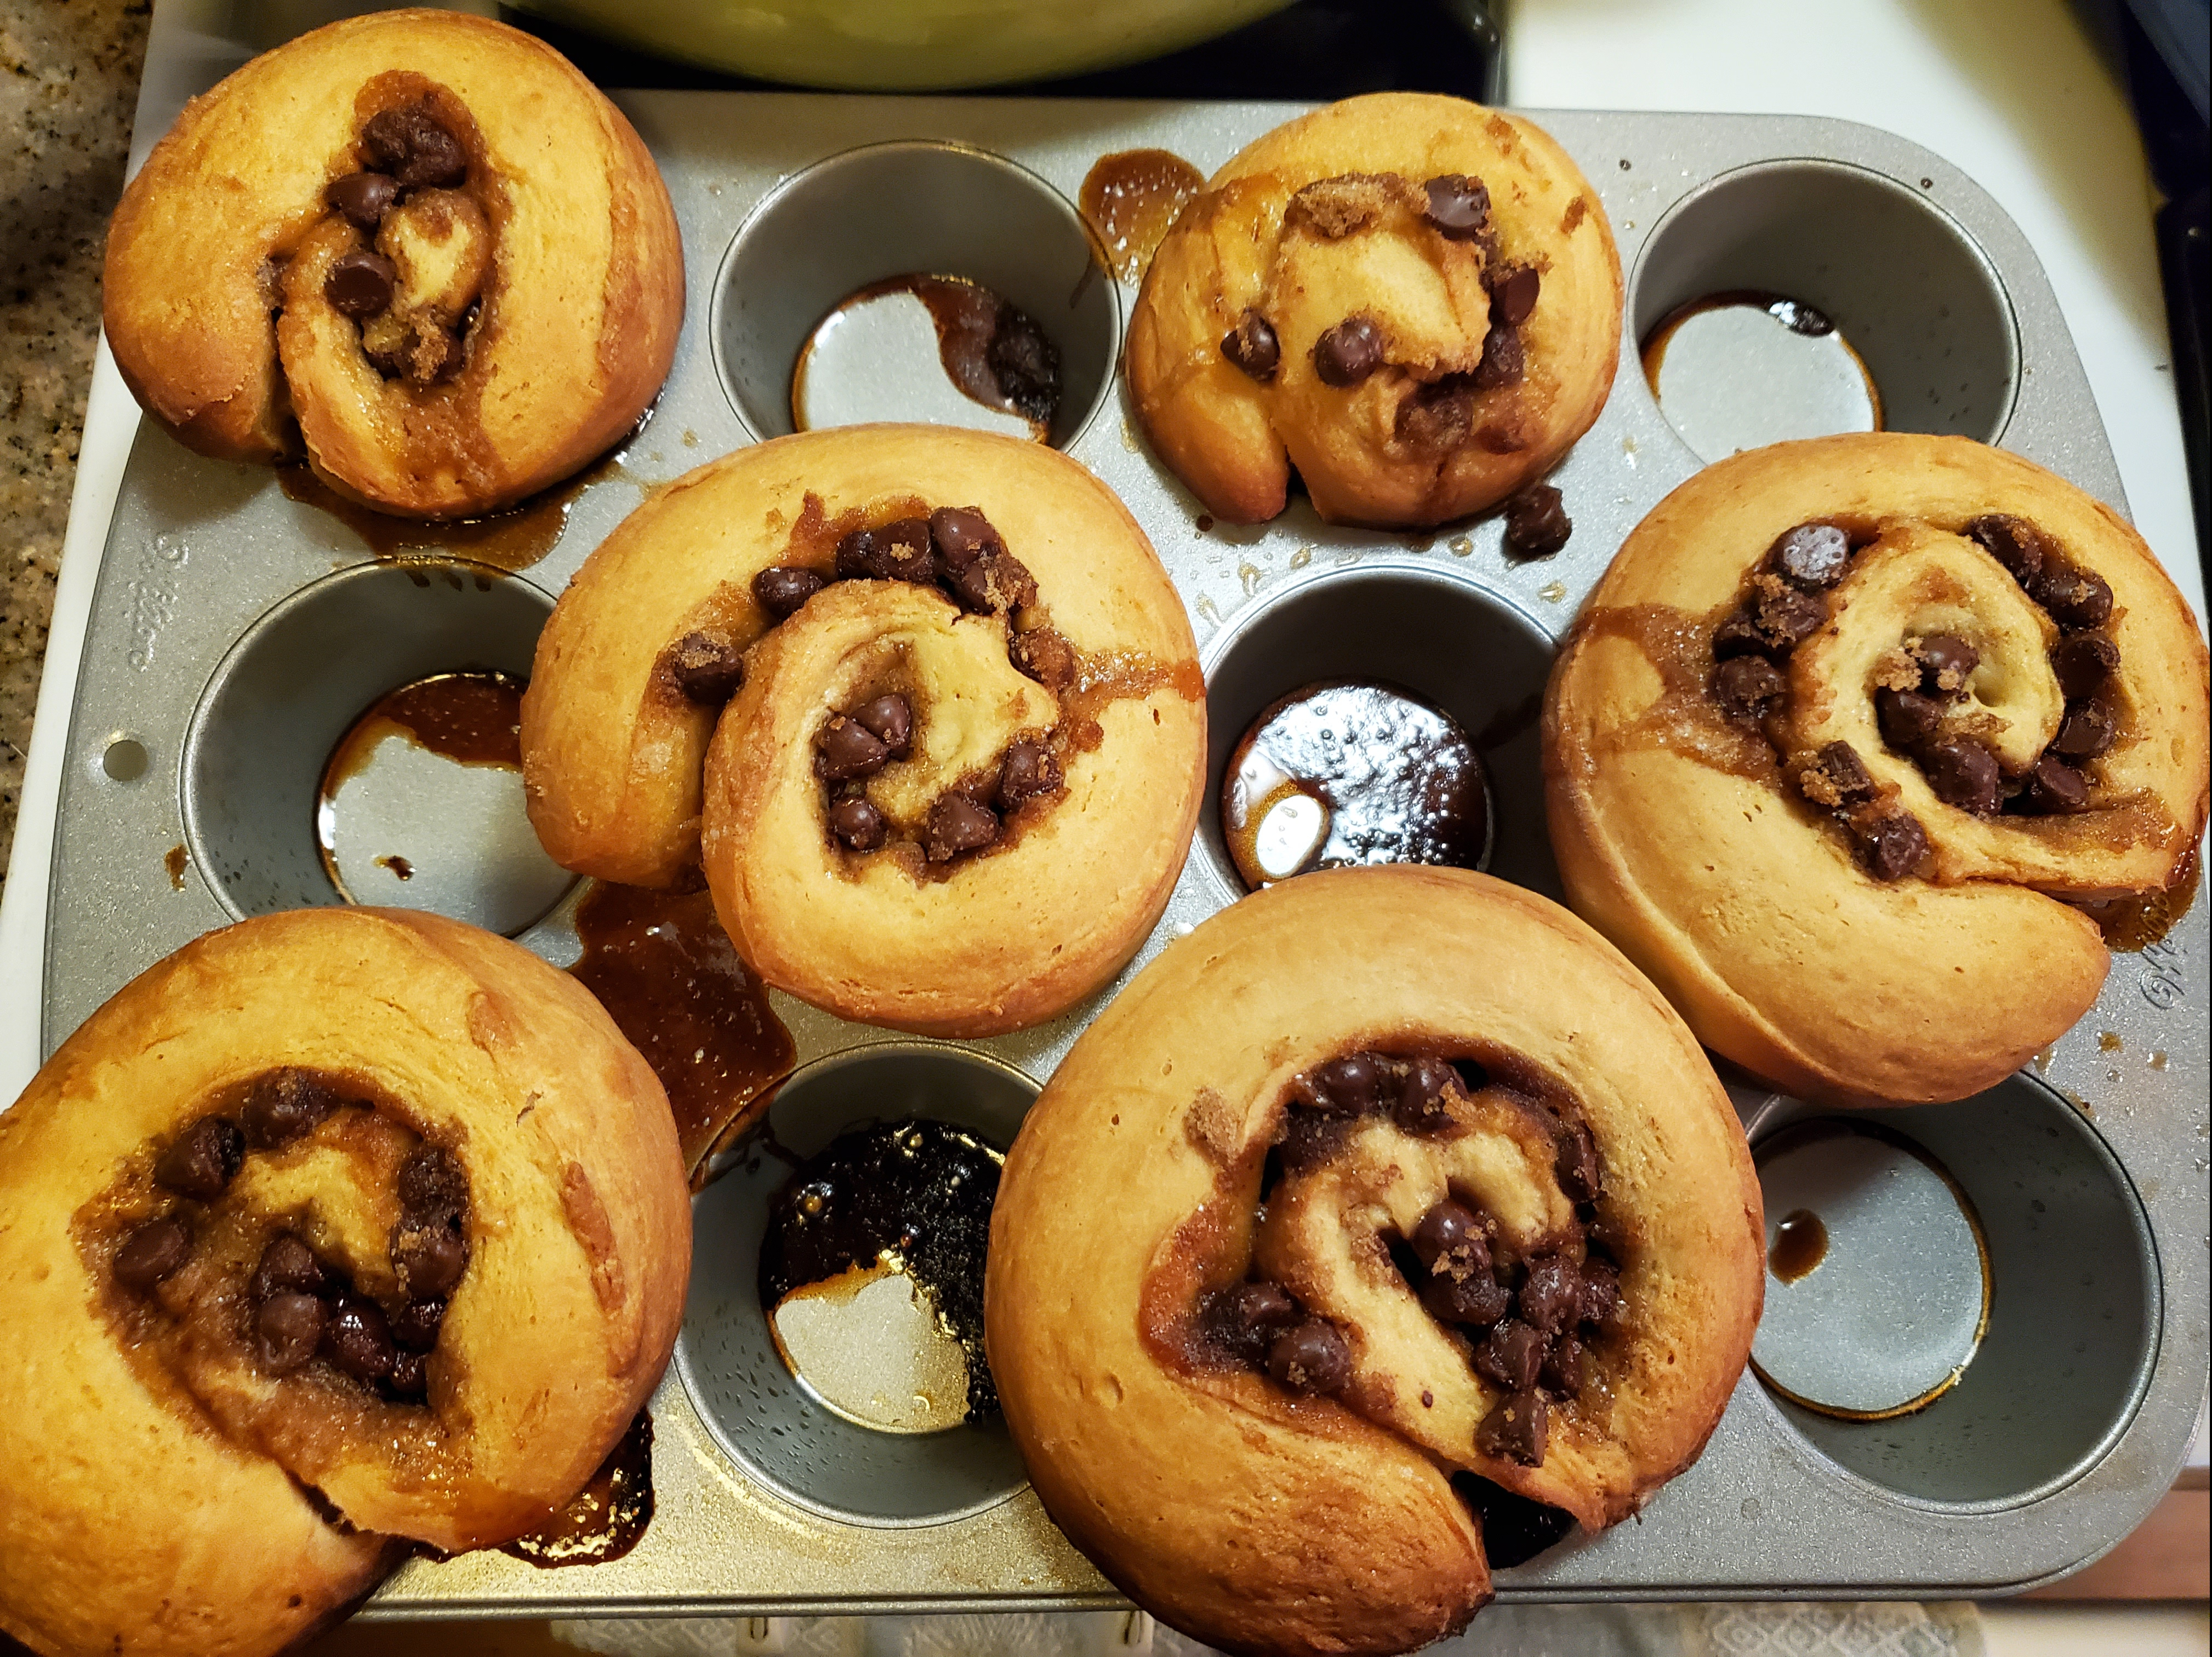
I rolled out the dough to approximately a 10 x 16 inch rectangle and spread the toppings. Now if any of you have ever seen Holiday Baking Championship, you will have seen them make a Yule Log, or you may have seen the competitors make a Jelly Roll or even Cinnamon Rolls. It’s the same concept for Brioche. You roll the long side of the dough tightly tucking in the contents as you do.
You will find that when you cut the dough, that the end pieces may be a bit smaller and the dough will stretch resulting in some of the individual pieces being a little wider than the others. When you grease the muffin tins, you want to spray the entire tin, including the spaces between the cups, since the dough will spread over the top as it rises and bakes. You also want to use every other cup, to allow the spreading of the dough. Gently push the dough down into each cup. If you want the brioche to have a glossy look after baking, you can brush with an egg wash made of the egg whites and water
Bake the dough at 350 degrees. Unlike cake, the toothpick test won’t work on bread. I know they say that the bread should sound hollow if tapped, but I’m not sure if what I think sounds hollow is what anyone else would think is hollow. I did find one website indicated that the internal temperature should be 190 degrees, so I started testing it around 30 minutes. The brioche should be golden brown when done. As you can see on the picture above, as the dough rises and bakes, the brown sugar will melt and caramelize. Because of this, you want to make sure that you take the brioche out of the pan while they are still warm; otherwise, as they cool, they will stick to the pan. I used my offset spatula to gently nudge each brioche our of the tin. They came out fairly easily and none of the dough stuck to the pan. I also used the spatula to scoop out all that luscious crunchy caramel to snack on as the brioche cooled.
This sweet bread can be eaten for breakfast or if you sprinkle a little Confectioner’s sugar on them, as a dessert. I hope you enjoy these as much as I have. It is definitely a recipe I will make again.
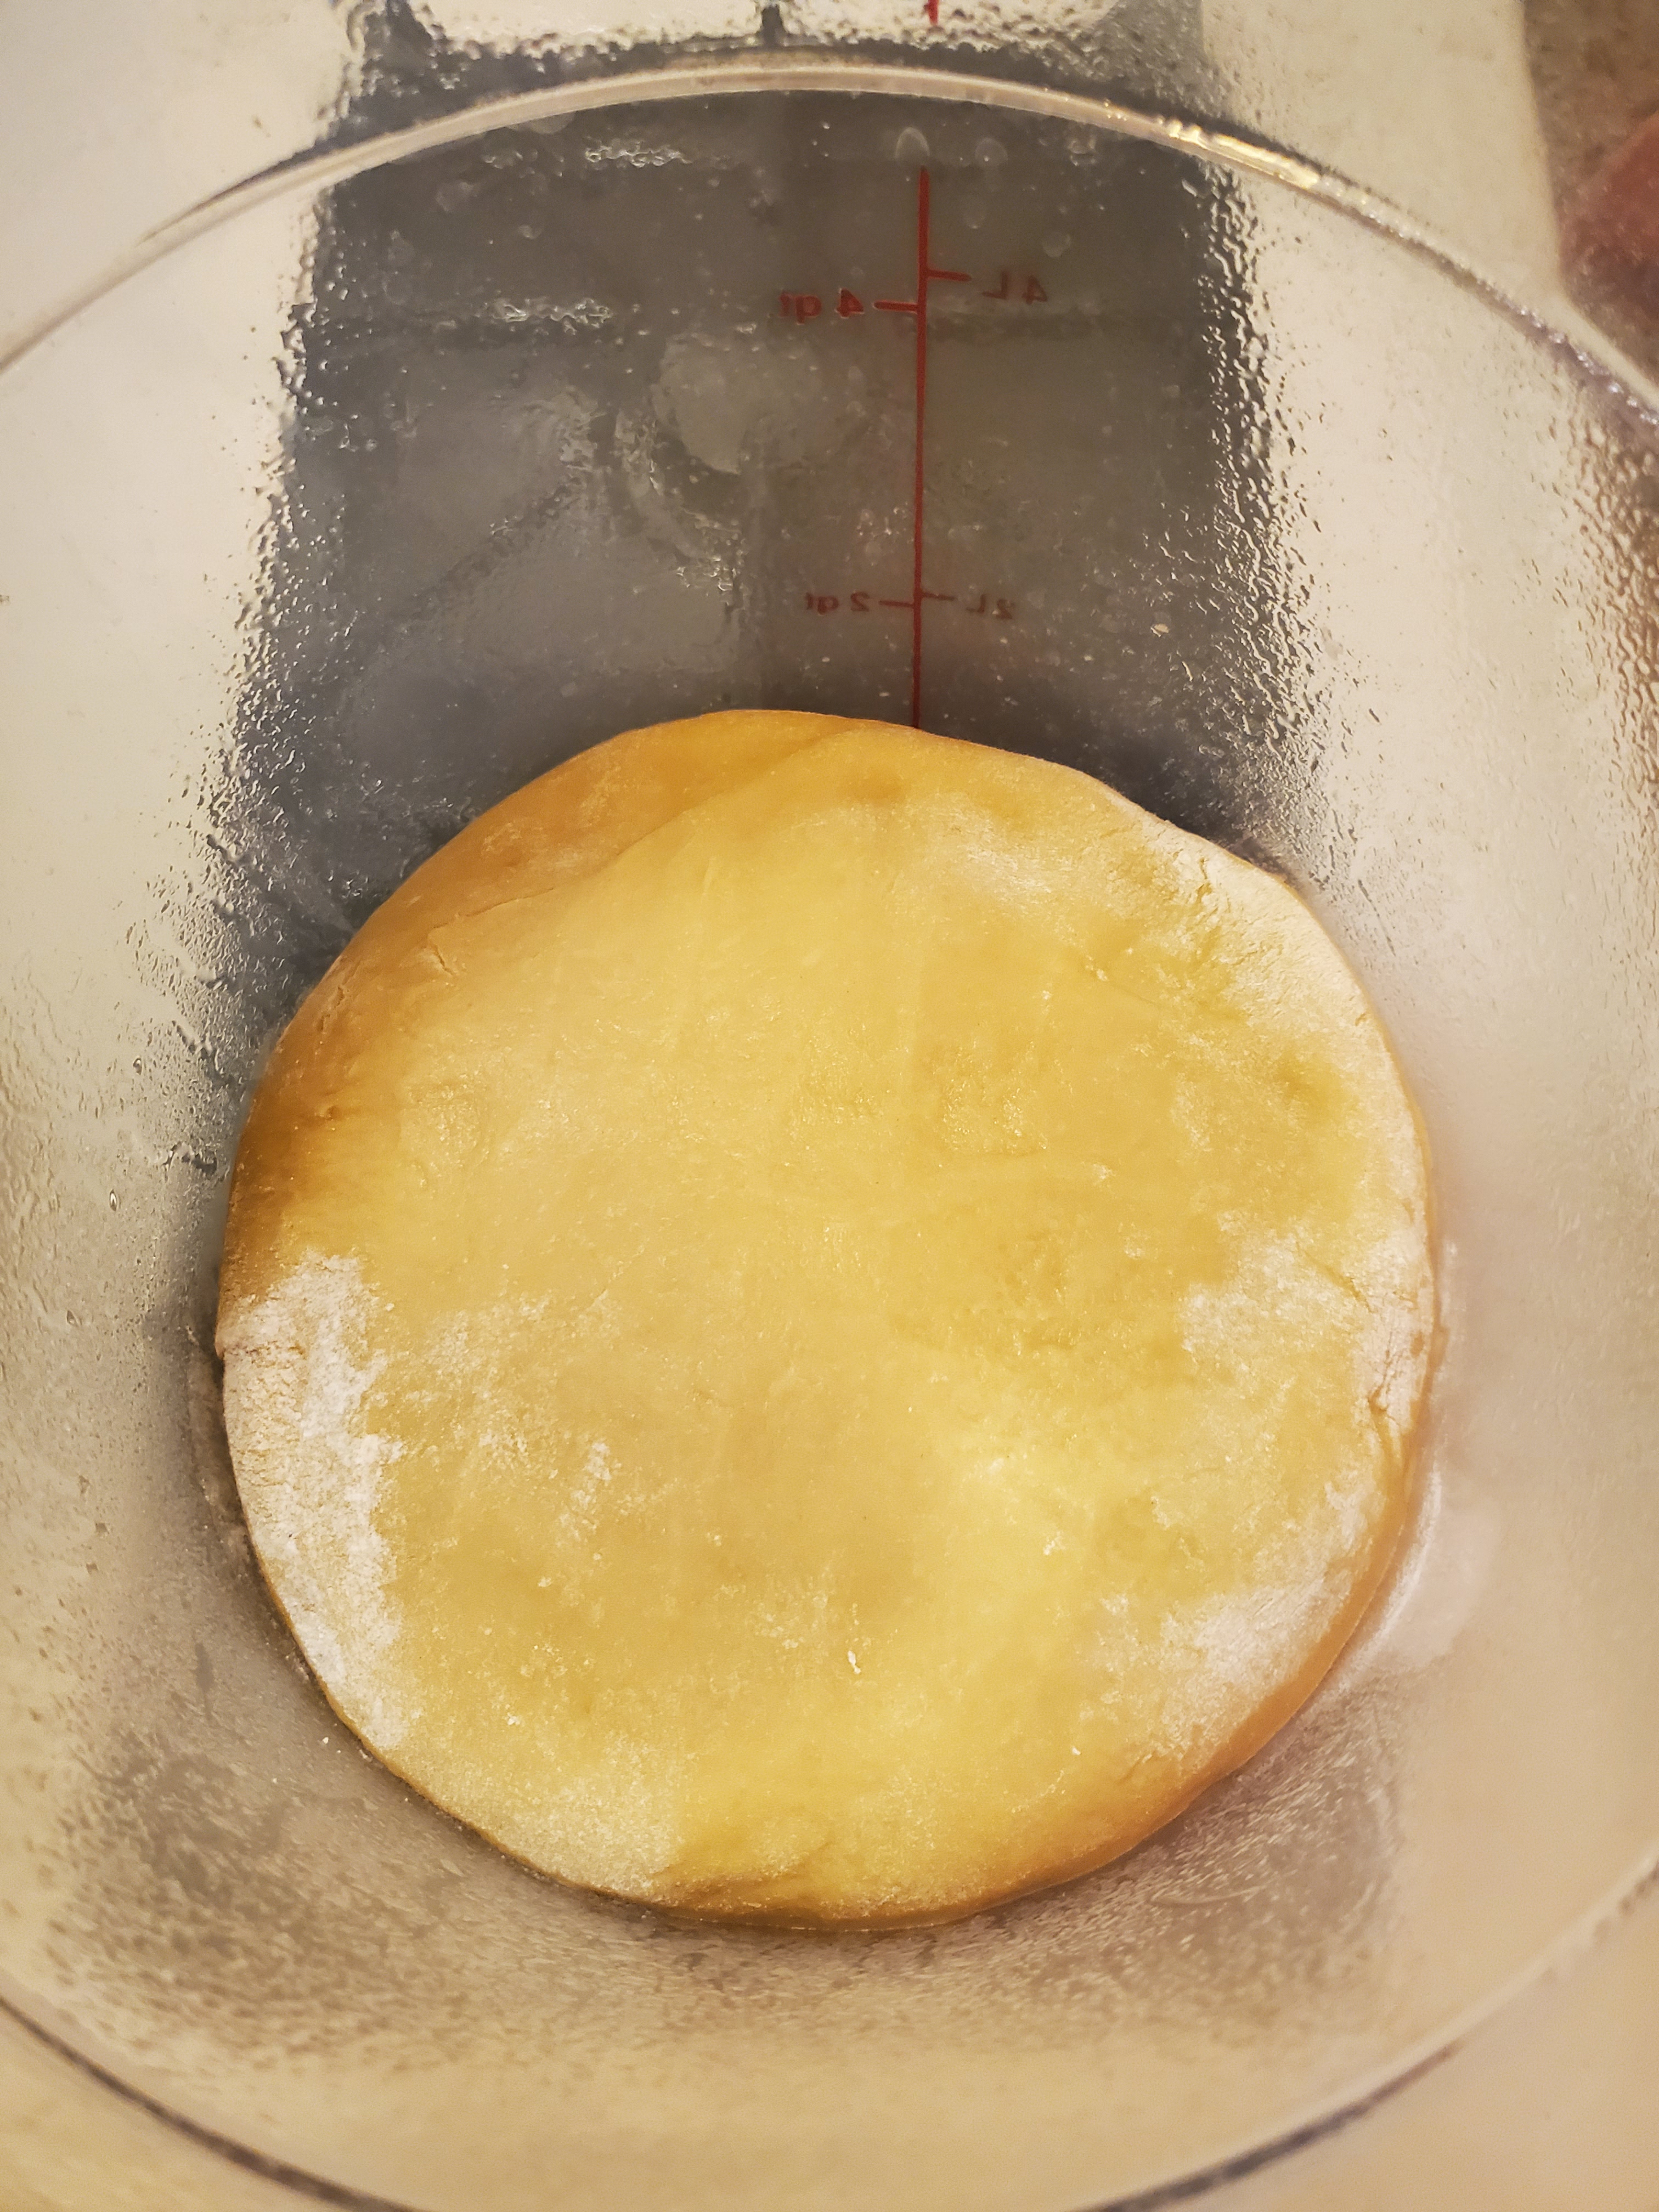
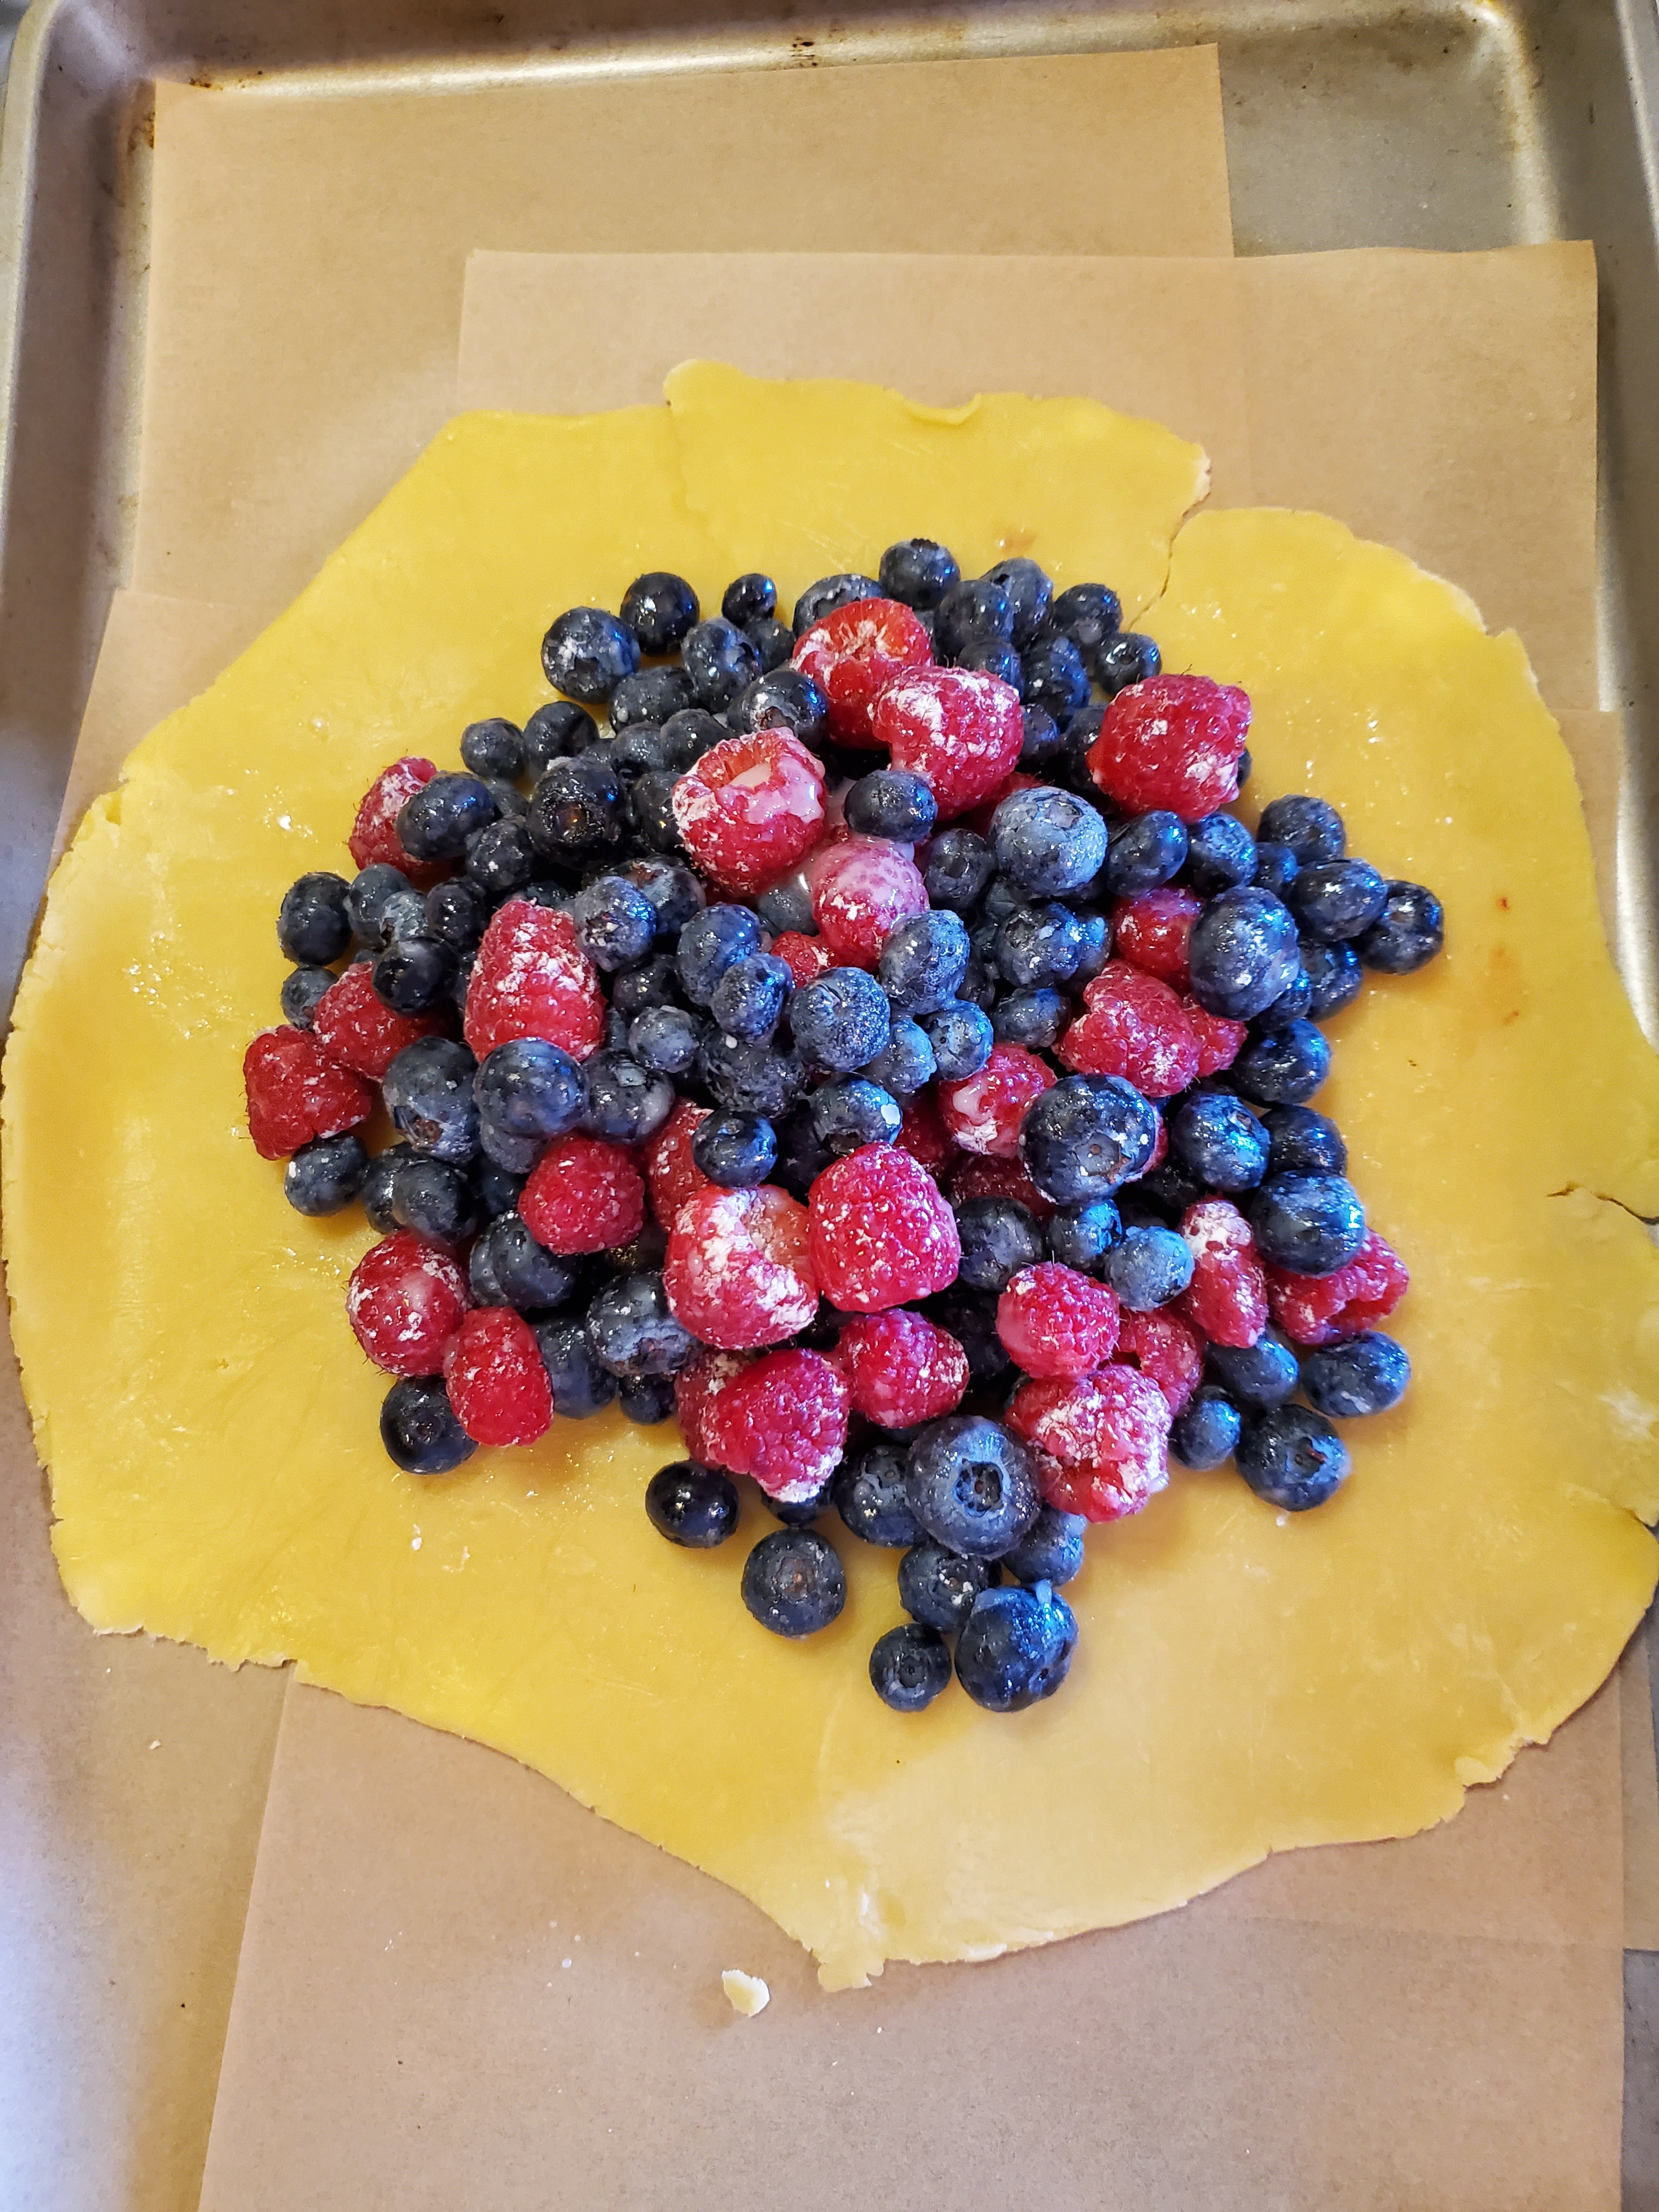
Summer is almost here, so last week I thought I would bake something seasonal and light. I cut out this recipe for a Rustic Raspberry Tart with Irish Butter Crust from either Saveur or Epicurious Magazine.
I admit, I sometimes struggle with pie crusts, but this one is very easy, with the exception of trying to roll out the dough in a circle! This crust is made with Kerrygold Irish Butter. Now I’m sure some of you are wondering if you have to use Irish Butter or if you can use regular butter. The simple answer is yes, you can, but the crust will have a slightly less buttery flavor. Irish Butter actually has 2% more butterfat than American Butter, so it has a smoother, creamier texture. Also, you will notice a that Irish Butter is bright yellow in comparison to American Butter, due to the higher level of beta-carotene the Irish cows absorb from the fertile soil and extra green grass.
American Butter (left) vs. Kerrygold Irish Butter (right)
The recipe calls for the dough to be made in a food processor. If you don’t have one, that’s okay, you can still make the crust. You can cut the butter into the flour with a dough blender and cutter or with a fork. You just want to make sure that once the it resembles a coarse meal or small peas. You can then switch to a hand mixer to add in the eggs and water. In a lot of baking shows, I have seen the professionals use vodka instead of water in a crust, and the result is a flakier crust. I used water, since this was the first time I was trying this recipe. While this is a very quick and easy crust to make, if you are in a rush you can use a pre-made crust from the refrigerated section of your local market.
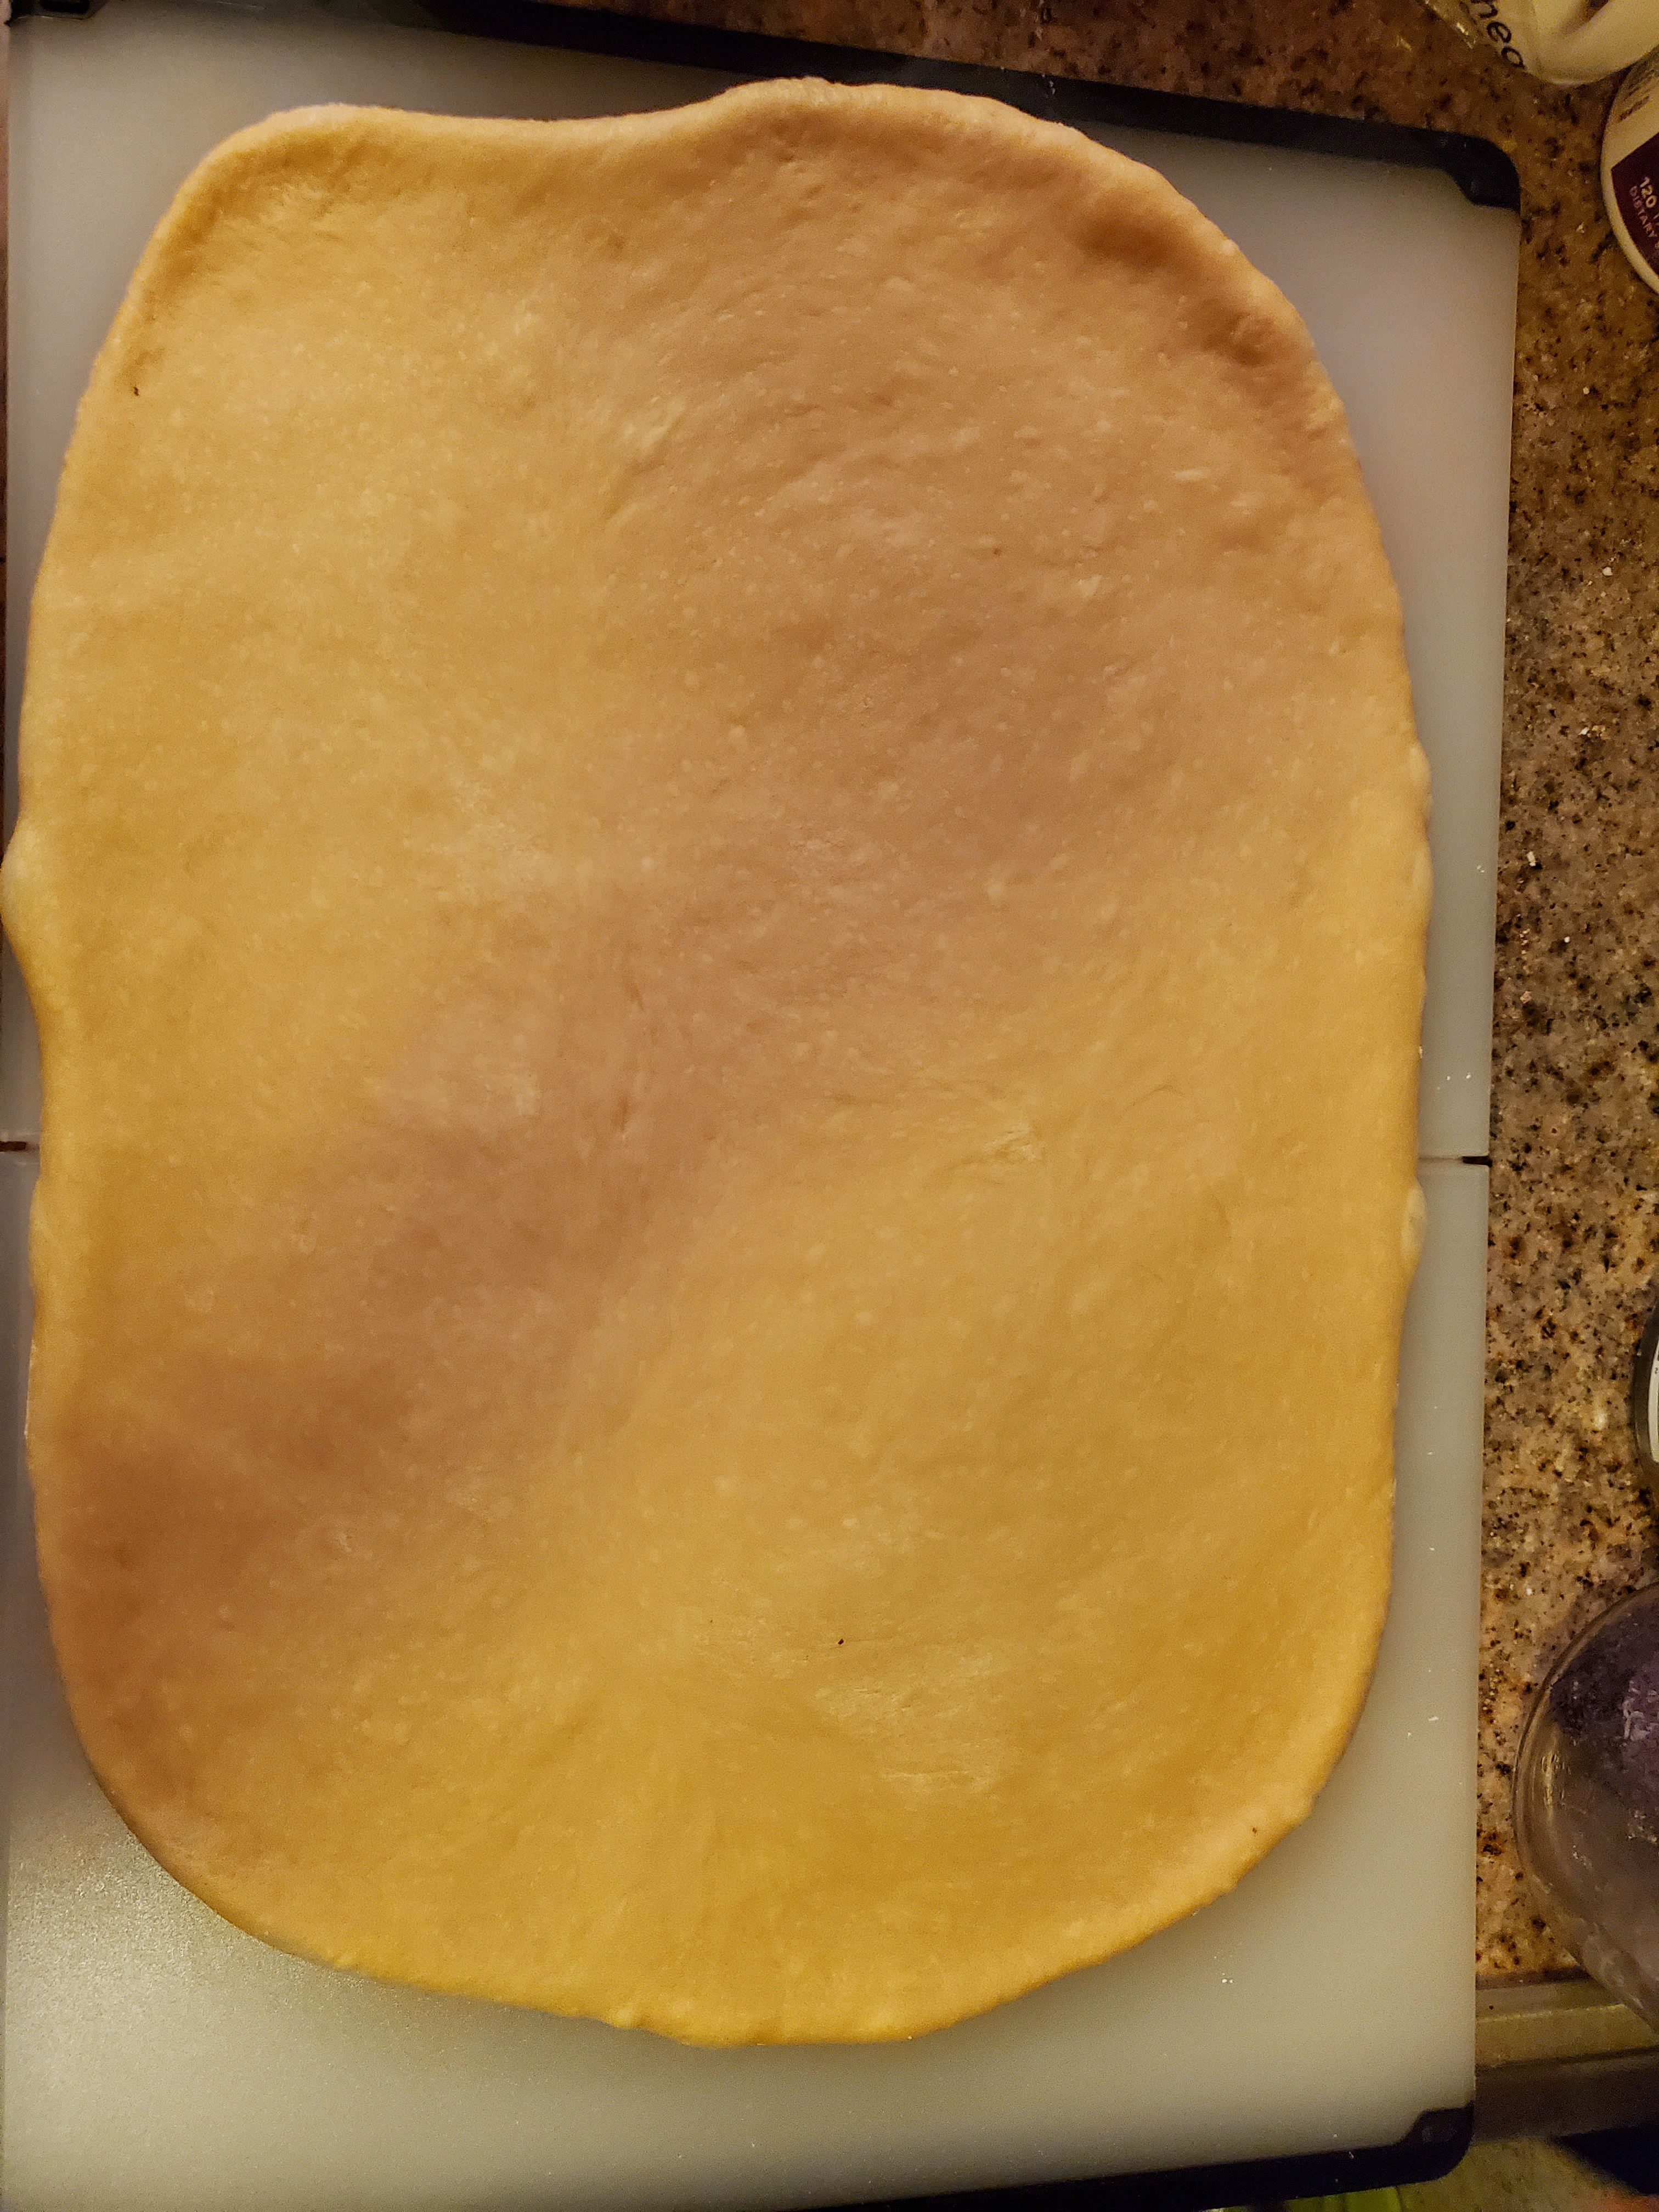
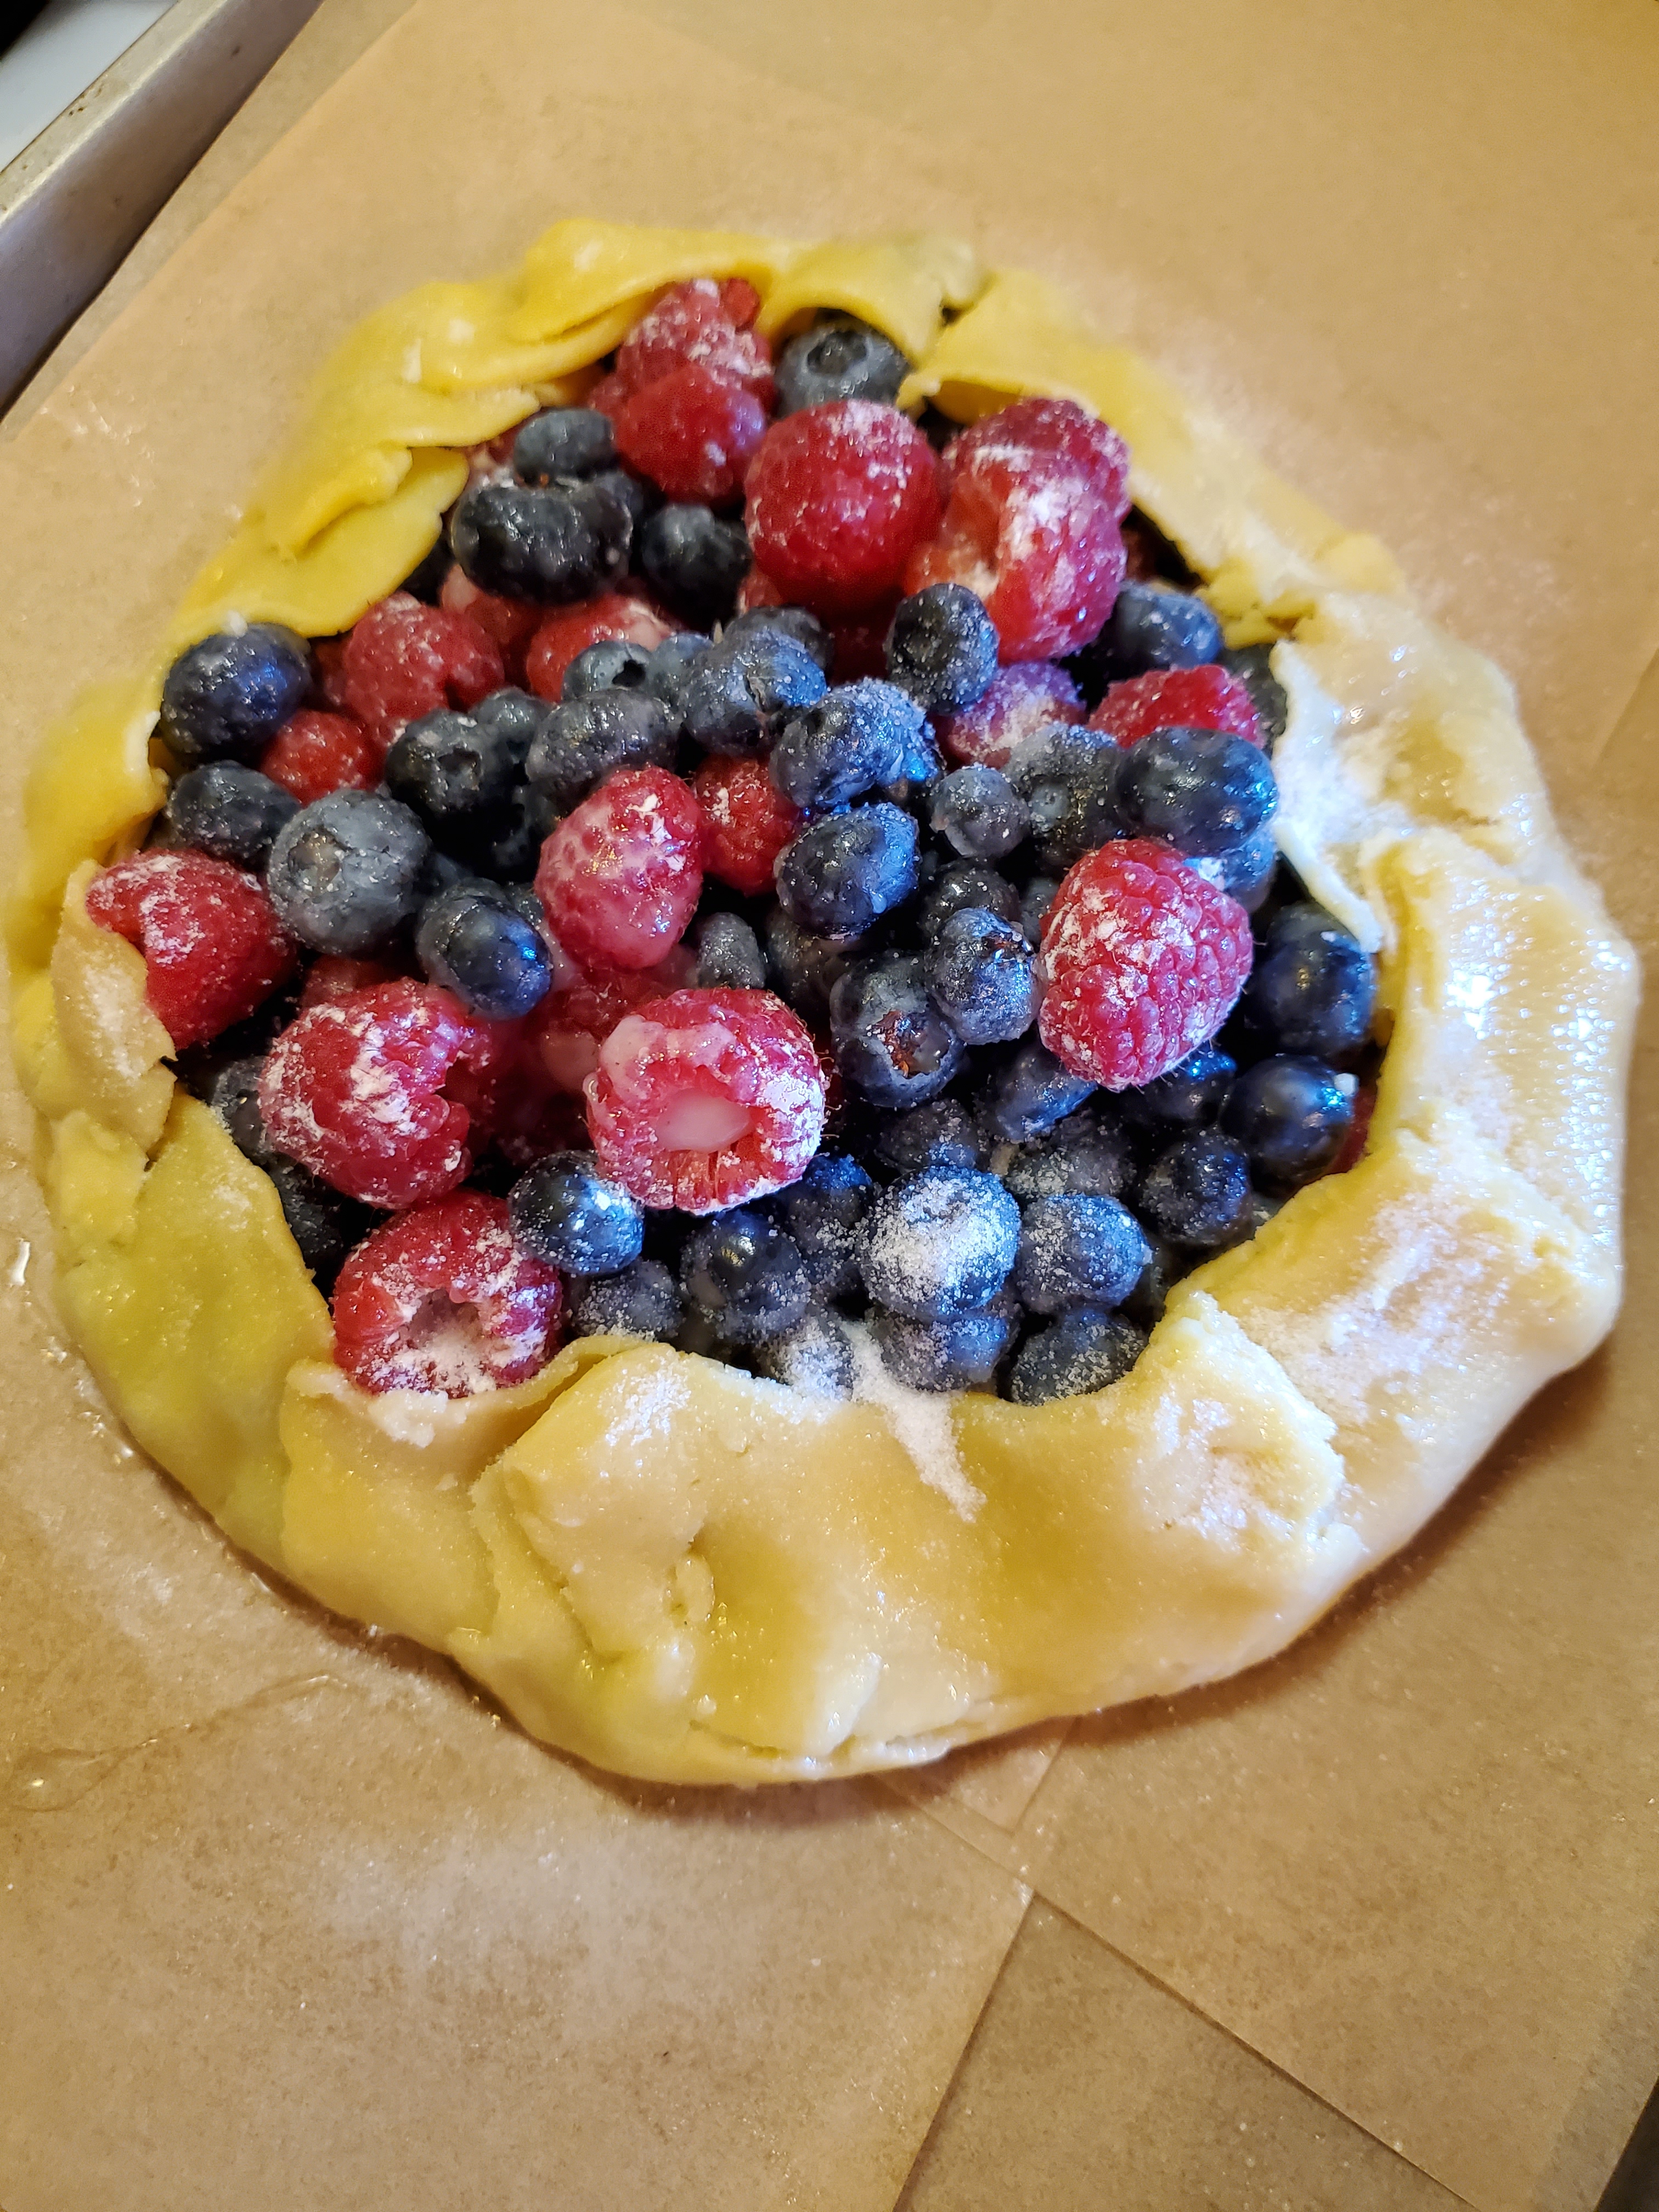
Since it doesn’t take that long to make the crust, I combined all the ingredients for the filling in a bowl and let the berries macerate for a short time. I added lemon juice and zest to add a little more brightness and tartness to the tart. It will appear that there are too many berries for the crust, but they will cook down. You need to be very careful when you are folding up the crust and try to avoid it tearing. I didn’t manage to roll out a perfect circle, so my folds were a bit uneven. If your crust should tear when you fold it, simply try to press it back together when you are making your pleats, and brush these areas with a little more egg whites to help seal the seams. The Pioneer Woman also suggests that you use an egg white wash inside your crust to help prevent your crust from leaking, a hint I will definitely be using on the next pie or tart I make.
Most likely, you will have some juices leak out onto the parchment paper. You want to make sure you loosen it while the juices are still warm, so the cooling juices don’t make the tart stick to the parchment paper. If you are baking this on a cookie sheet, you will easily be able to slide the tart onto your serving plate. If, like me, you used a baking sheet, you will need to carefully lift the tart from the sheet onto your serving plate trying to avoid breaking the fragile crust.
This recipe serves 4 to 6 people. I served it at room temperature with whipped cream. I hope you enjoy it as much as I did.
1 tbl granulated or turbinado sugar, for decoration
For the Filling:
1 cup fresh blueberries
1 cup fresh raspberries
3 tbl granulated sugar
zest of 1 lemon
1 tbl lemon juice
2 tsp cornstarch
Directions
For filling, rinse berries and drain.
Combine berries, sugar, lemon zest, lemon juice and cornstarch in a bowl. Toss together and let sit until crust is ready.
For the crust, add the flour and salt to a food processor and pulse to mix together.
Cut butter into 1/2 inch chunks and add to the food processor. Pulse until mixture resembles coarse meal.
Add egg yolk and pulse, adding cold water 1 teaspoon at a time until dough begins to form a ball.
Cut two pieces of plastic wrap, about 12 x 15 inches. Lay side by side on counter and lightly dust with flour.
Remove dough from food processor and form a disk about 6 inches wide.
Place in center of plastic wrap and cover with the floured side of the other piece of wrap.
Roll out dough to approximately a 12 inch circle. If the plastic wrinkles, you can peal it off the dough carefully to smooth out.
Line a baking sheet with parchment paper.
Peal off the top layer of plastic wrap and gently flip onto the center of the parchment paper, then carefully peal off the remaining plastic wrap.
Preheat oven to 425 o F.
Place berries mixture in center of crust, leaving approximately a 2 inch border.
Gently fold up crust over the berries, pleating as you go, leaving a 4 to 6 inch opening in the middle.
Brush crust with reserved egg white, then sprinkle with granulated or turbinado sugar.
Bake for 25 to 30 minutes until crust is golden brown and berries are bubbling.
Cool 15 minutes before serving. While still warm, loosen from parchment paper, especially where juices may have leaked out of the crust. Transfer to serving plate with wide spatula.
Serve warm or at room temperature. Dust with powdered sugar or serve with whipped cream or marscarpone cheese, or ice cream.
Variations
Use any fresh seasonal berries or stoned fruit.
Replace lemon juice and zest with orange zest and juice or Cointreau.
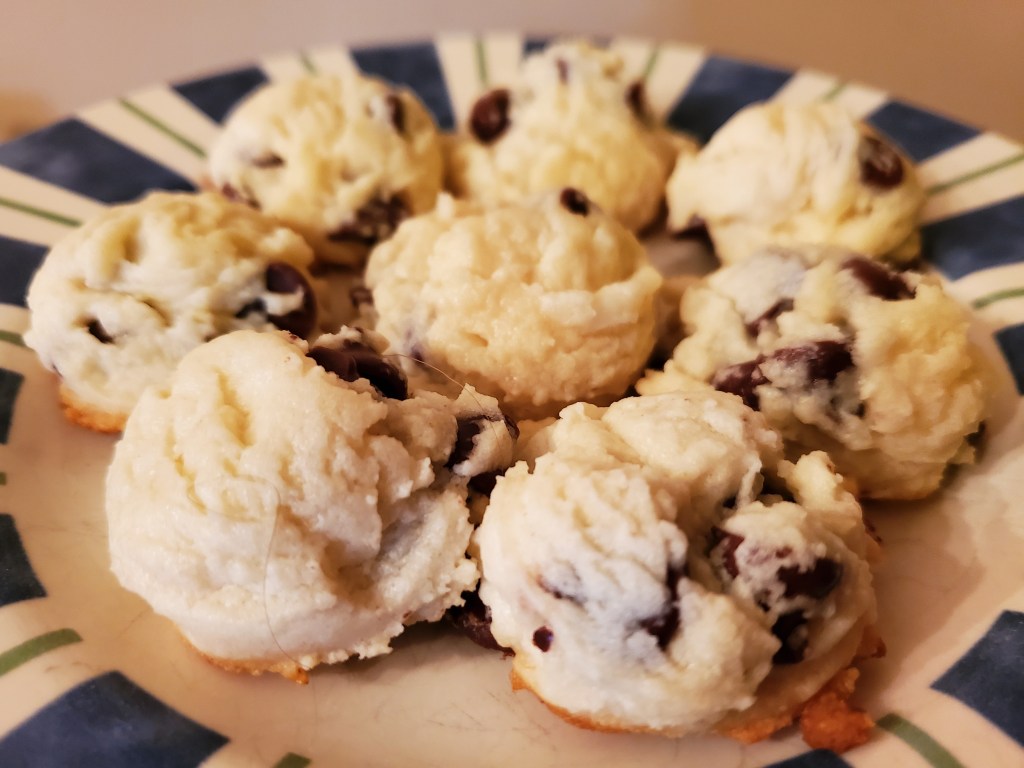
Based on Chocolate Cheesecake Cookies from Carla Hall on “The Chew”
Chocolate Chip Cheesecake Cookies
Happy Mother’s Day! I’m sure some of you are surfing the web for a recipe to make for your mothers or grandmothers.
I was an avid viewer of The Chew on ABC and enjoyed all their banter and helpful hints for both the home and kitchen. I especially enjoyed all the dessert recipes from Carla Hall. While I enjoy watching all the other baking shows and challenging myself with more difficult recipes, this recipe from Carla that is perfect for the baker who is looking for something quick and easy to make at the last minute or while they are preparing a holiday dinner.
Cheesecakes almost always call for a graham cracker crust and the original recipe called for crushed graham crackers to be folded into this recipe. I didn’t have any on hand, so I decided to use one of the substitutions that was suggested, which was chocolate chips.
Chilled Dough
The actual preparation and baking time for this recipe only takes about an hour. What takes the longest time is warming the butter and cream cheese to room temperature and chilling the dough, about an hour each. The longer you chill the dough, the less spread you will get when baking your cookie. I chose to chill the dough overnight, so the final cookie retained it’s ball-like shape.
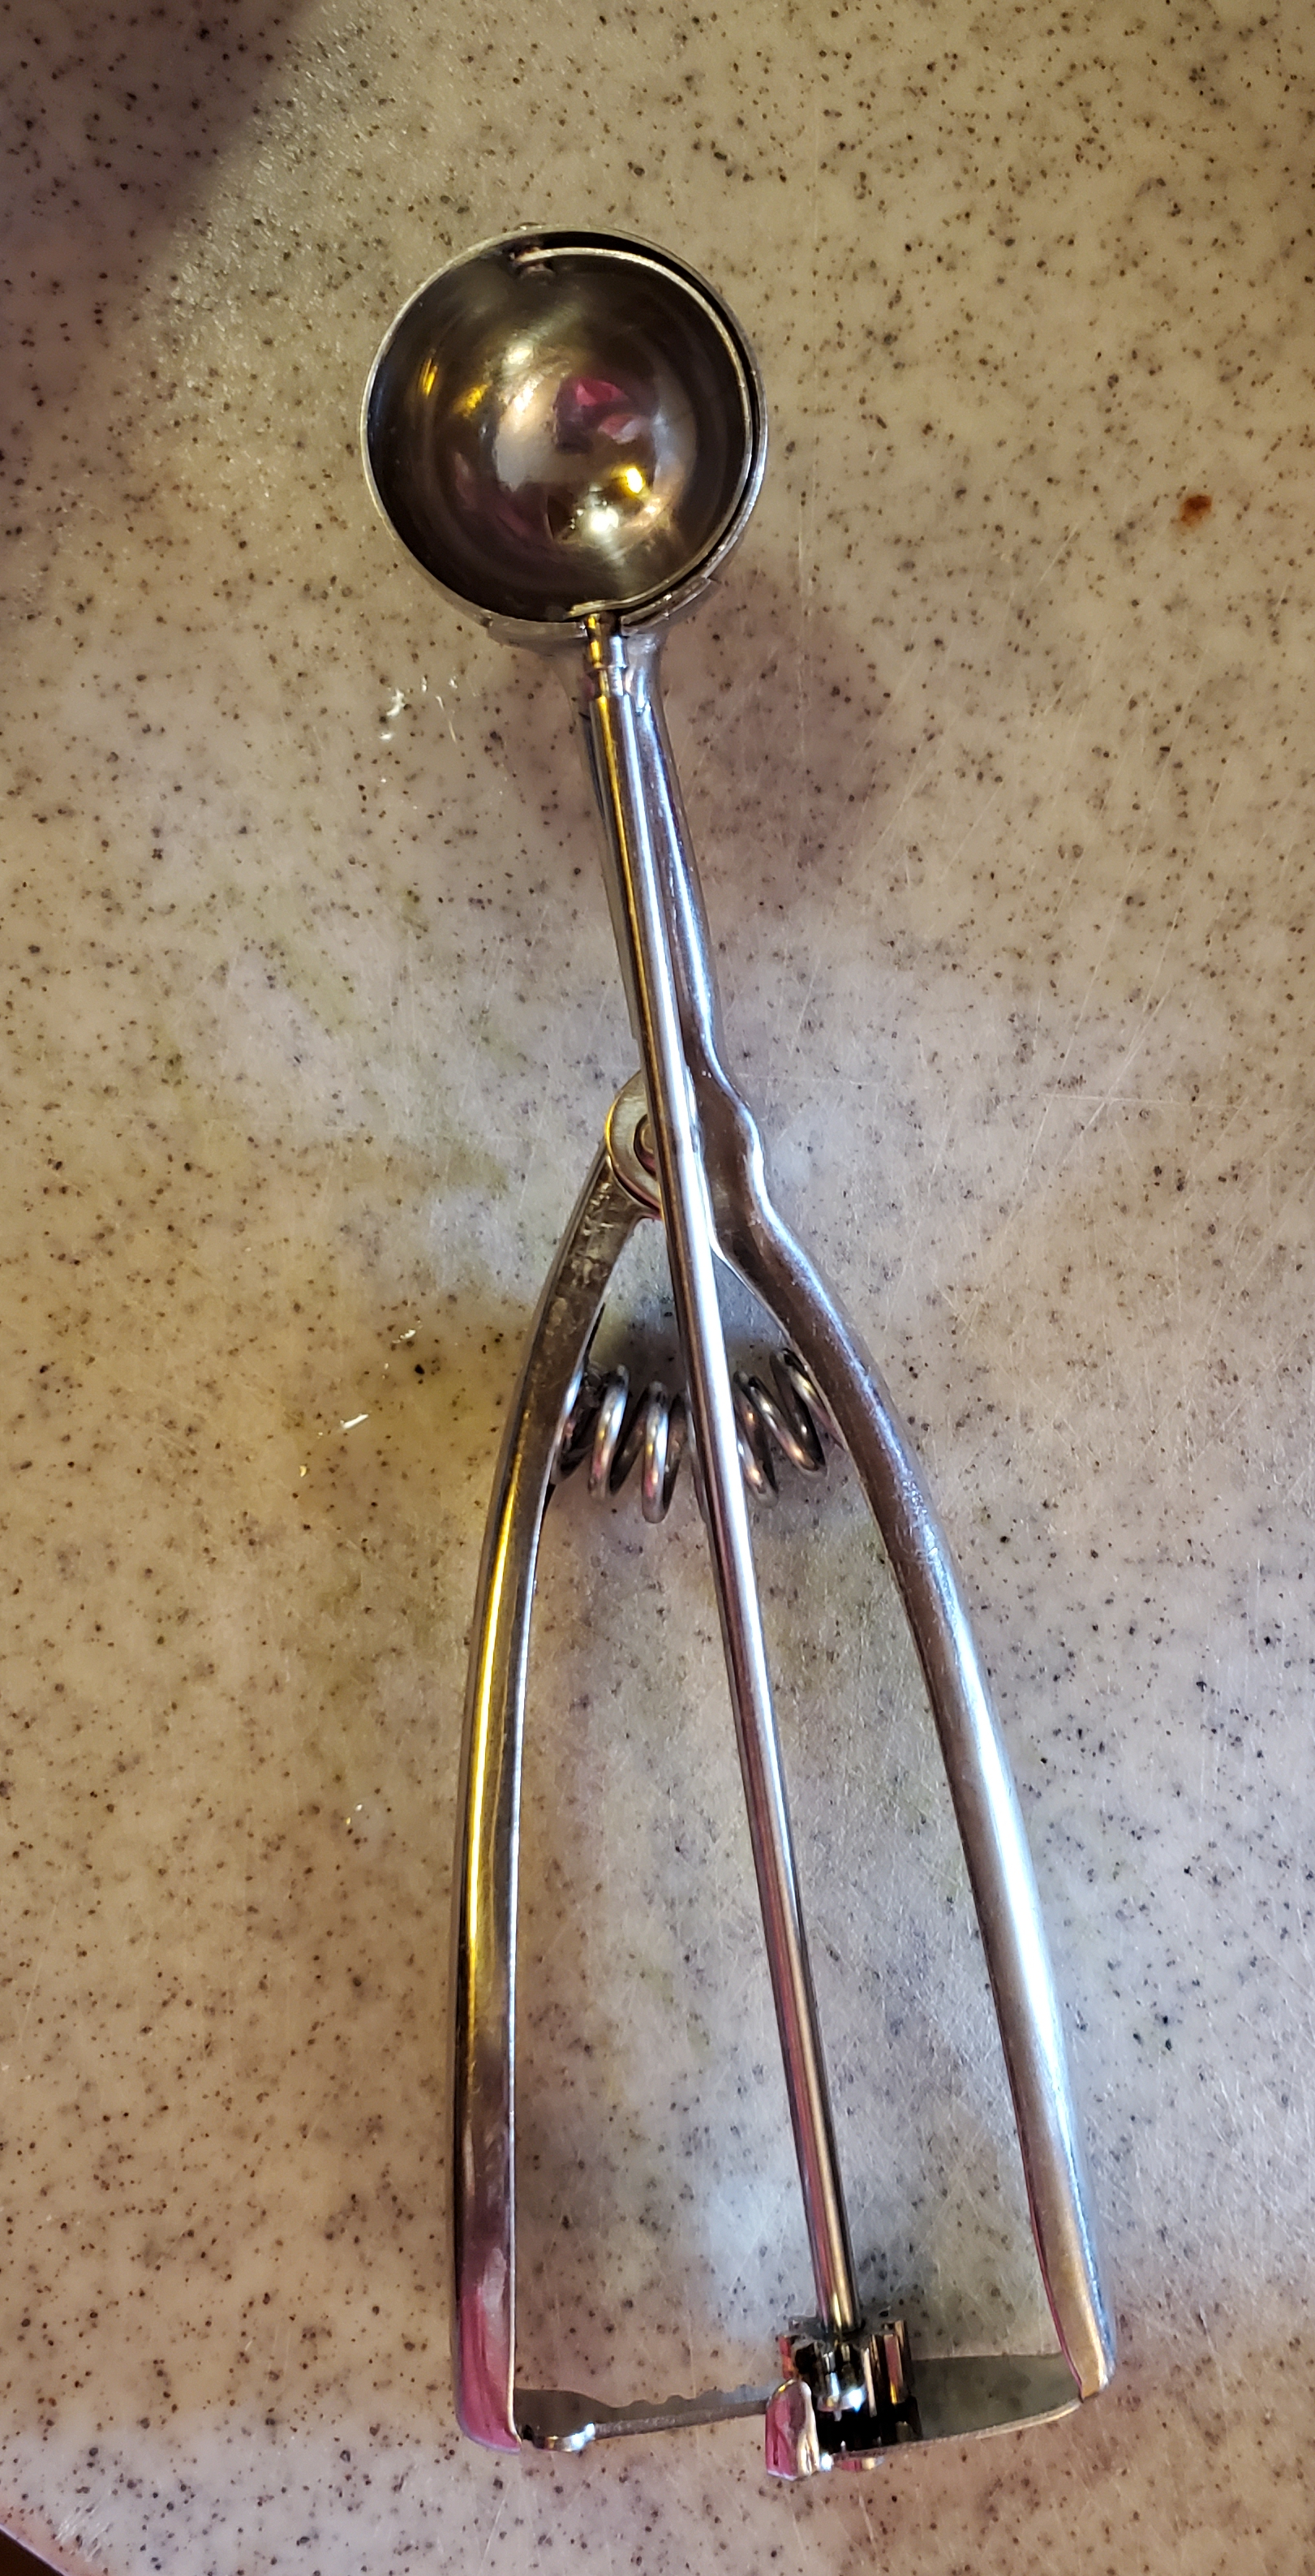
Carla Hall’s recipe calls for you to use approximately 2 tablespoons of dough, but as usual I like to use a small cookie scoop. Now, my definition of small and yours might vary. I found this website of Cookie Scoop Size Chart that will give you an indication of what size scoop you want to use. Unfortunately, my scoop doesn’t have a number stamped on it, but the one I use measures about 1-1/2 inches in diameter. This size scoop yields a nice one or two bite cookie.
Based on Jean Anderson’s Almond-Orange Icebox Cookies
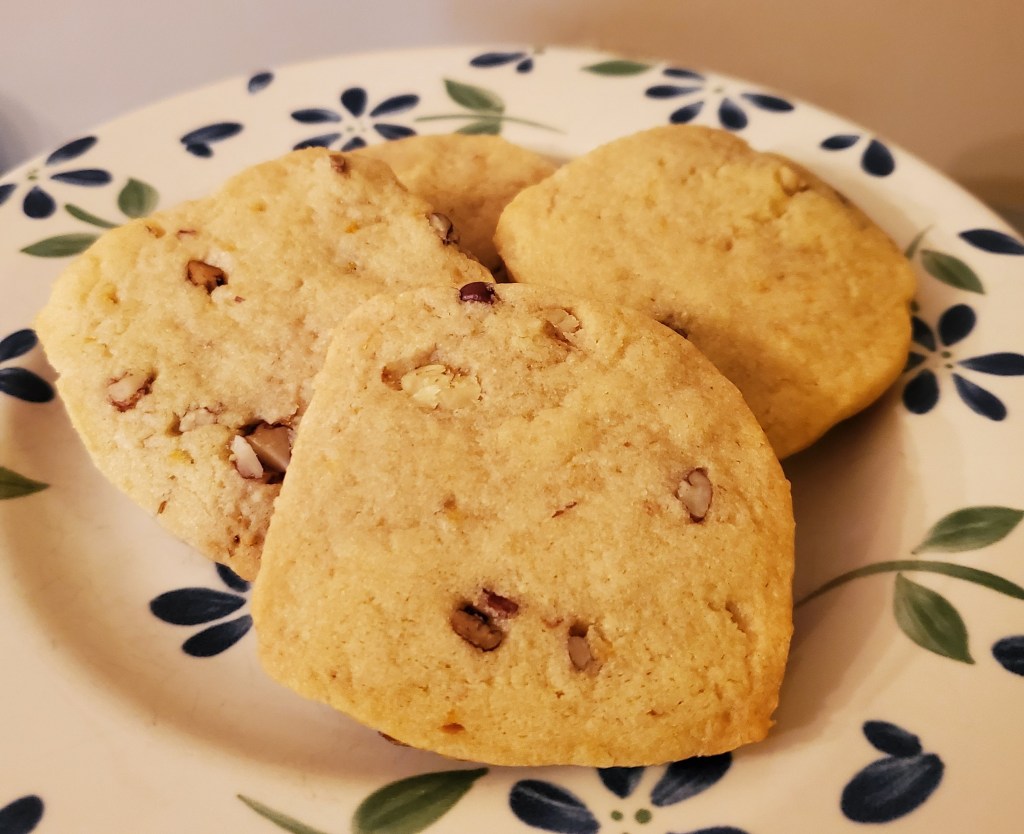
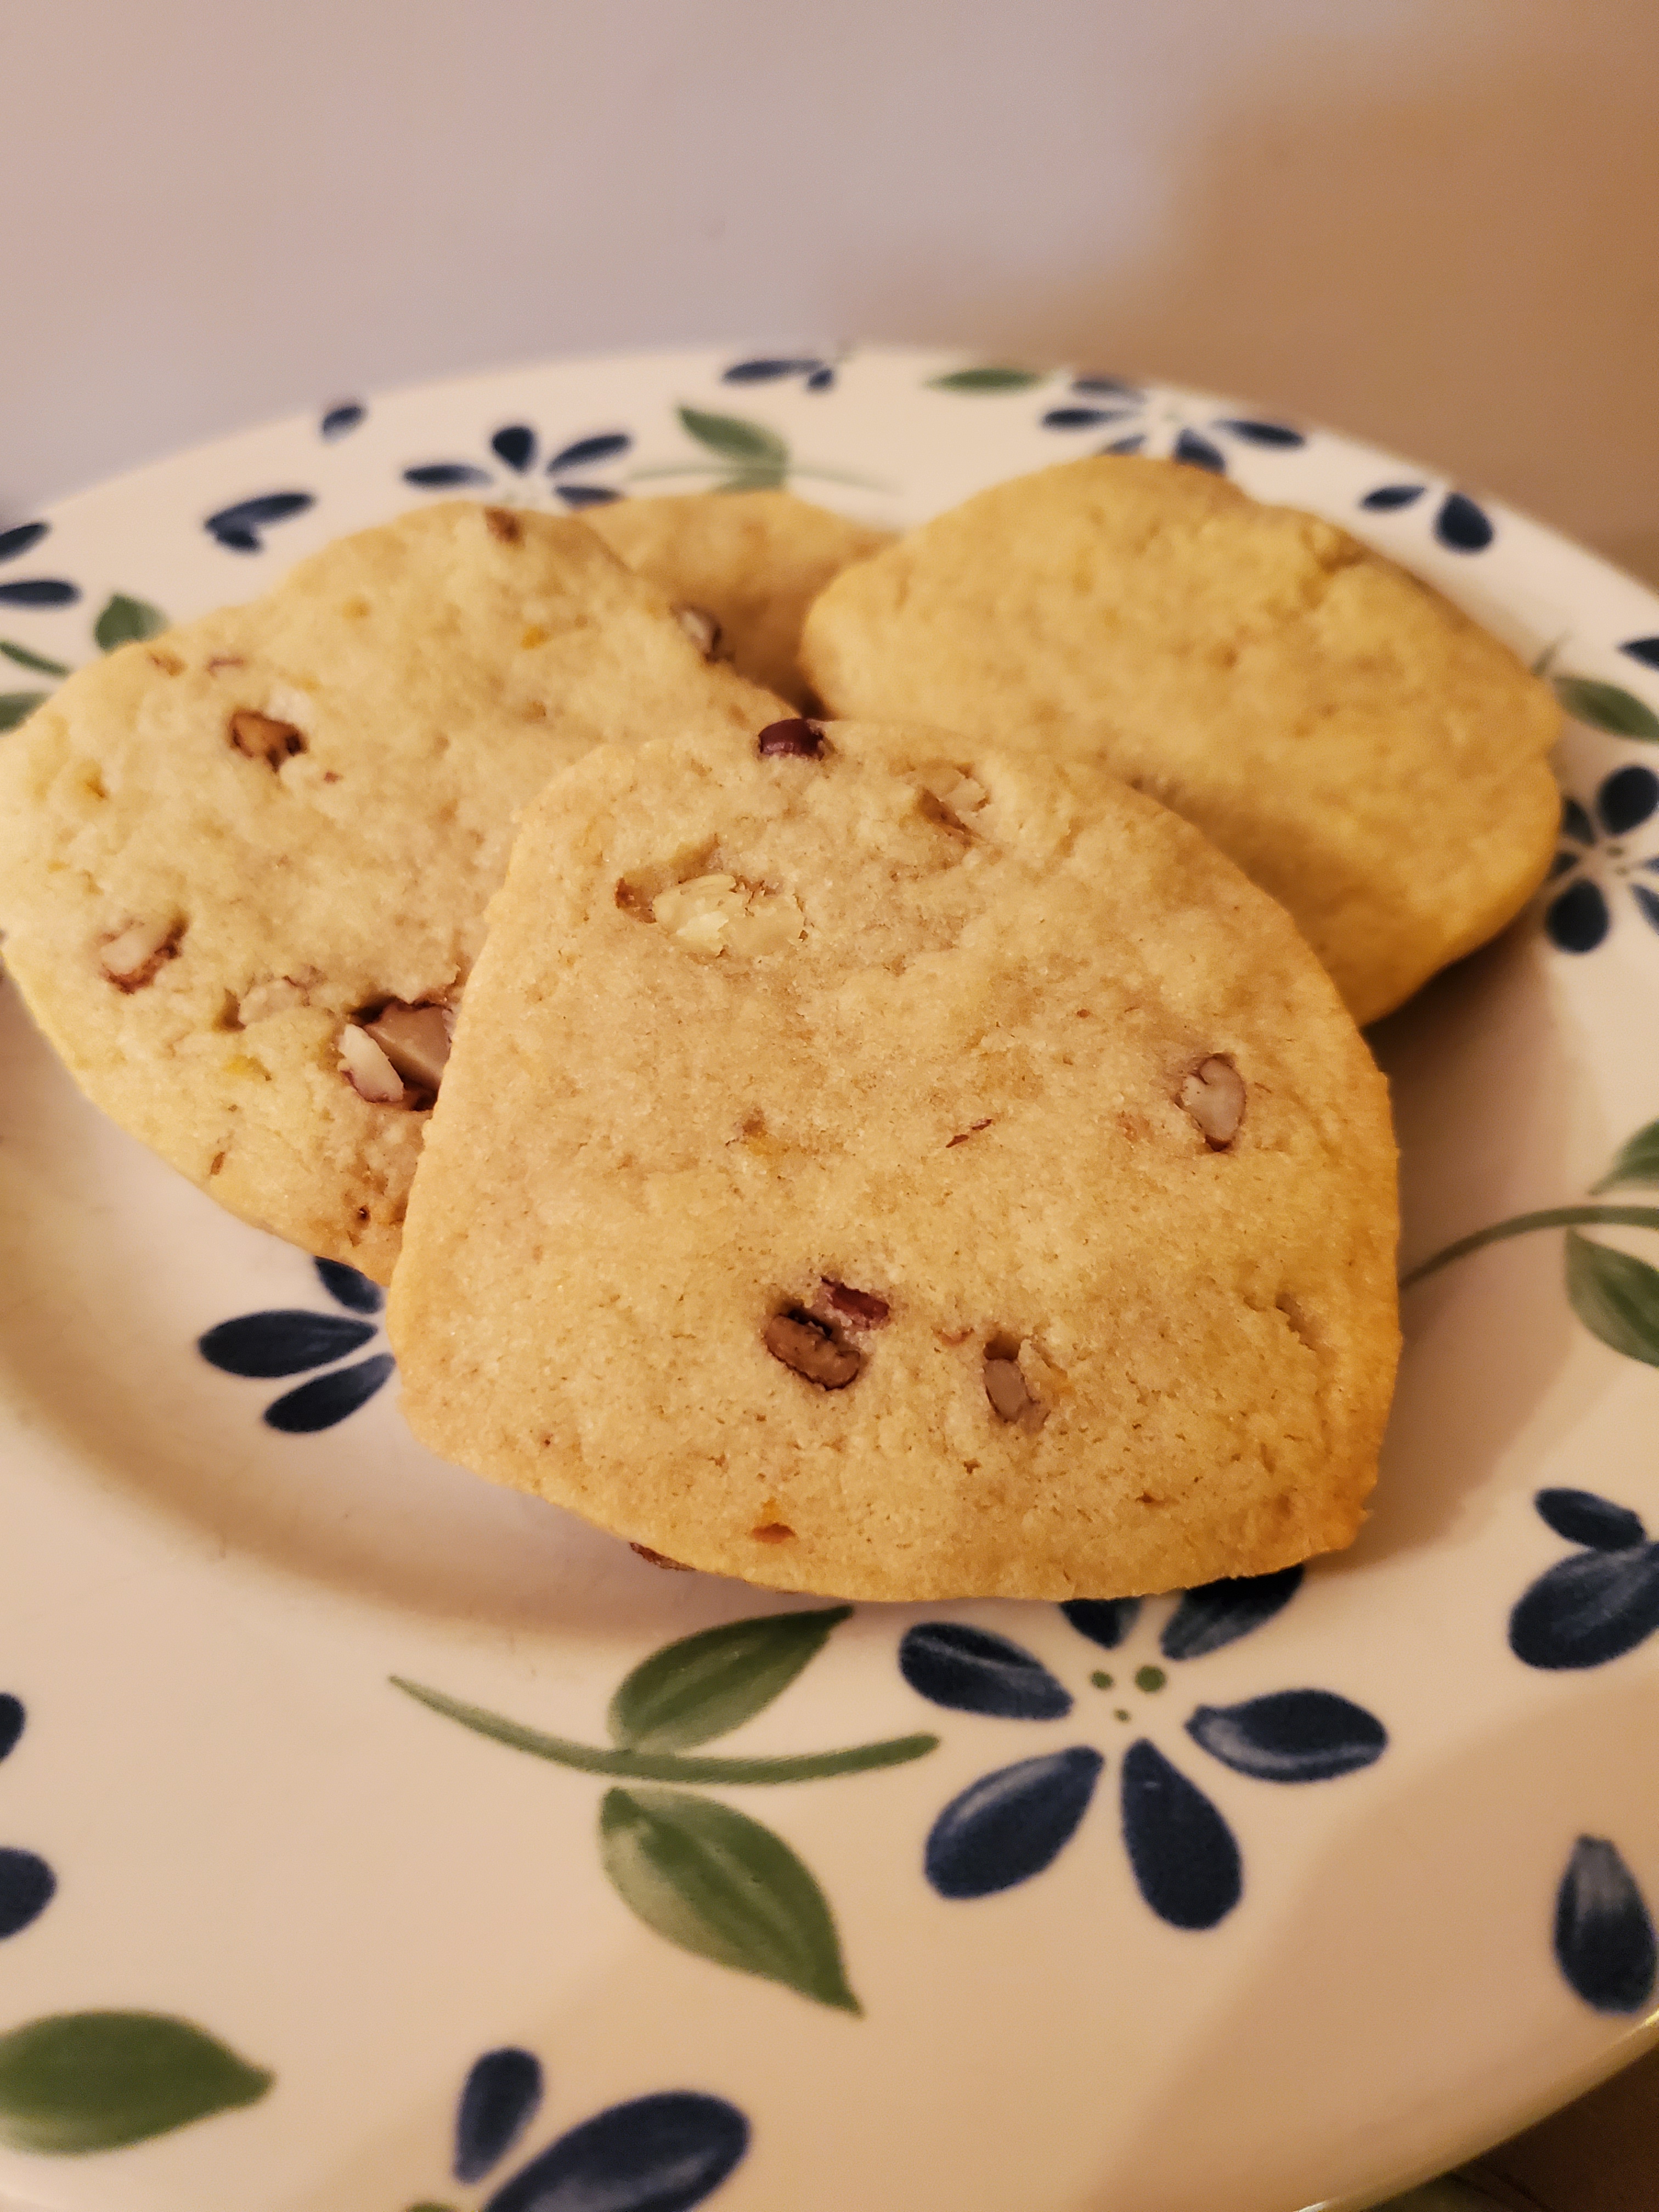
Pecan-Orange Icebox Cookies
Happy New Year everyone! After baking six different types of cookies along with a couple of cakes for Christmas, I decided to take a little break from baking, to work off those added holiday pounds. Although now another holiday is upon us…St. Patrick’s Day. Growing up, we never really celebrated St. Patrick’s Day as a holiday, but as my grandmother’s birthday. What are the odds that both my maternal grandparents would be born on holidays? (Grandpa was born on Christmas Day.) While this isn’t specifically a St. Patrick’s Day Cookie, it is part of the Ladies Home Journal – The Cookie Book ’81, which was part of my mother’s Christmas Cookie repertoire.
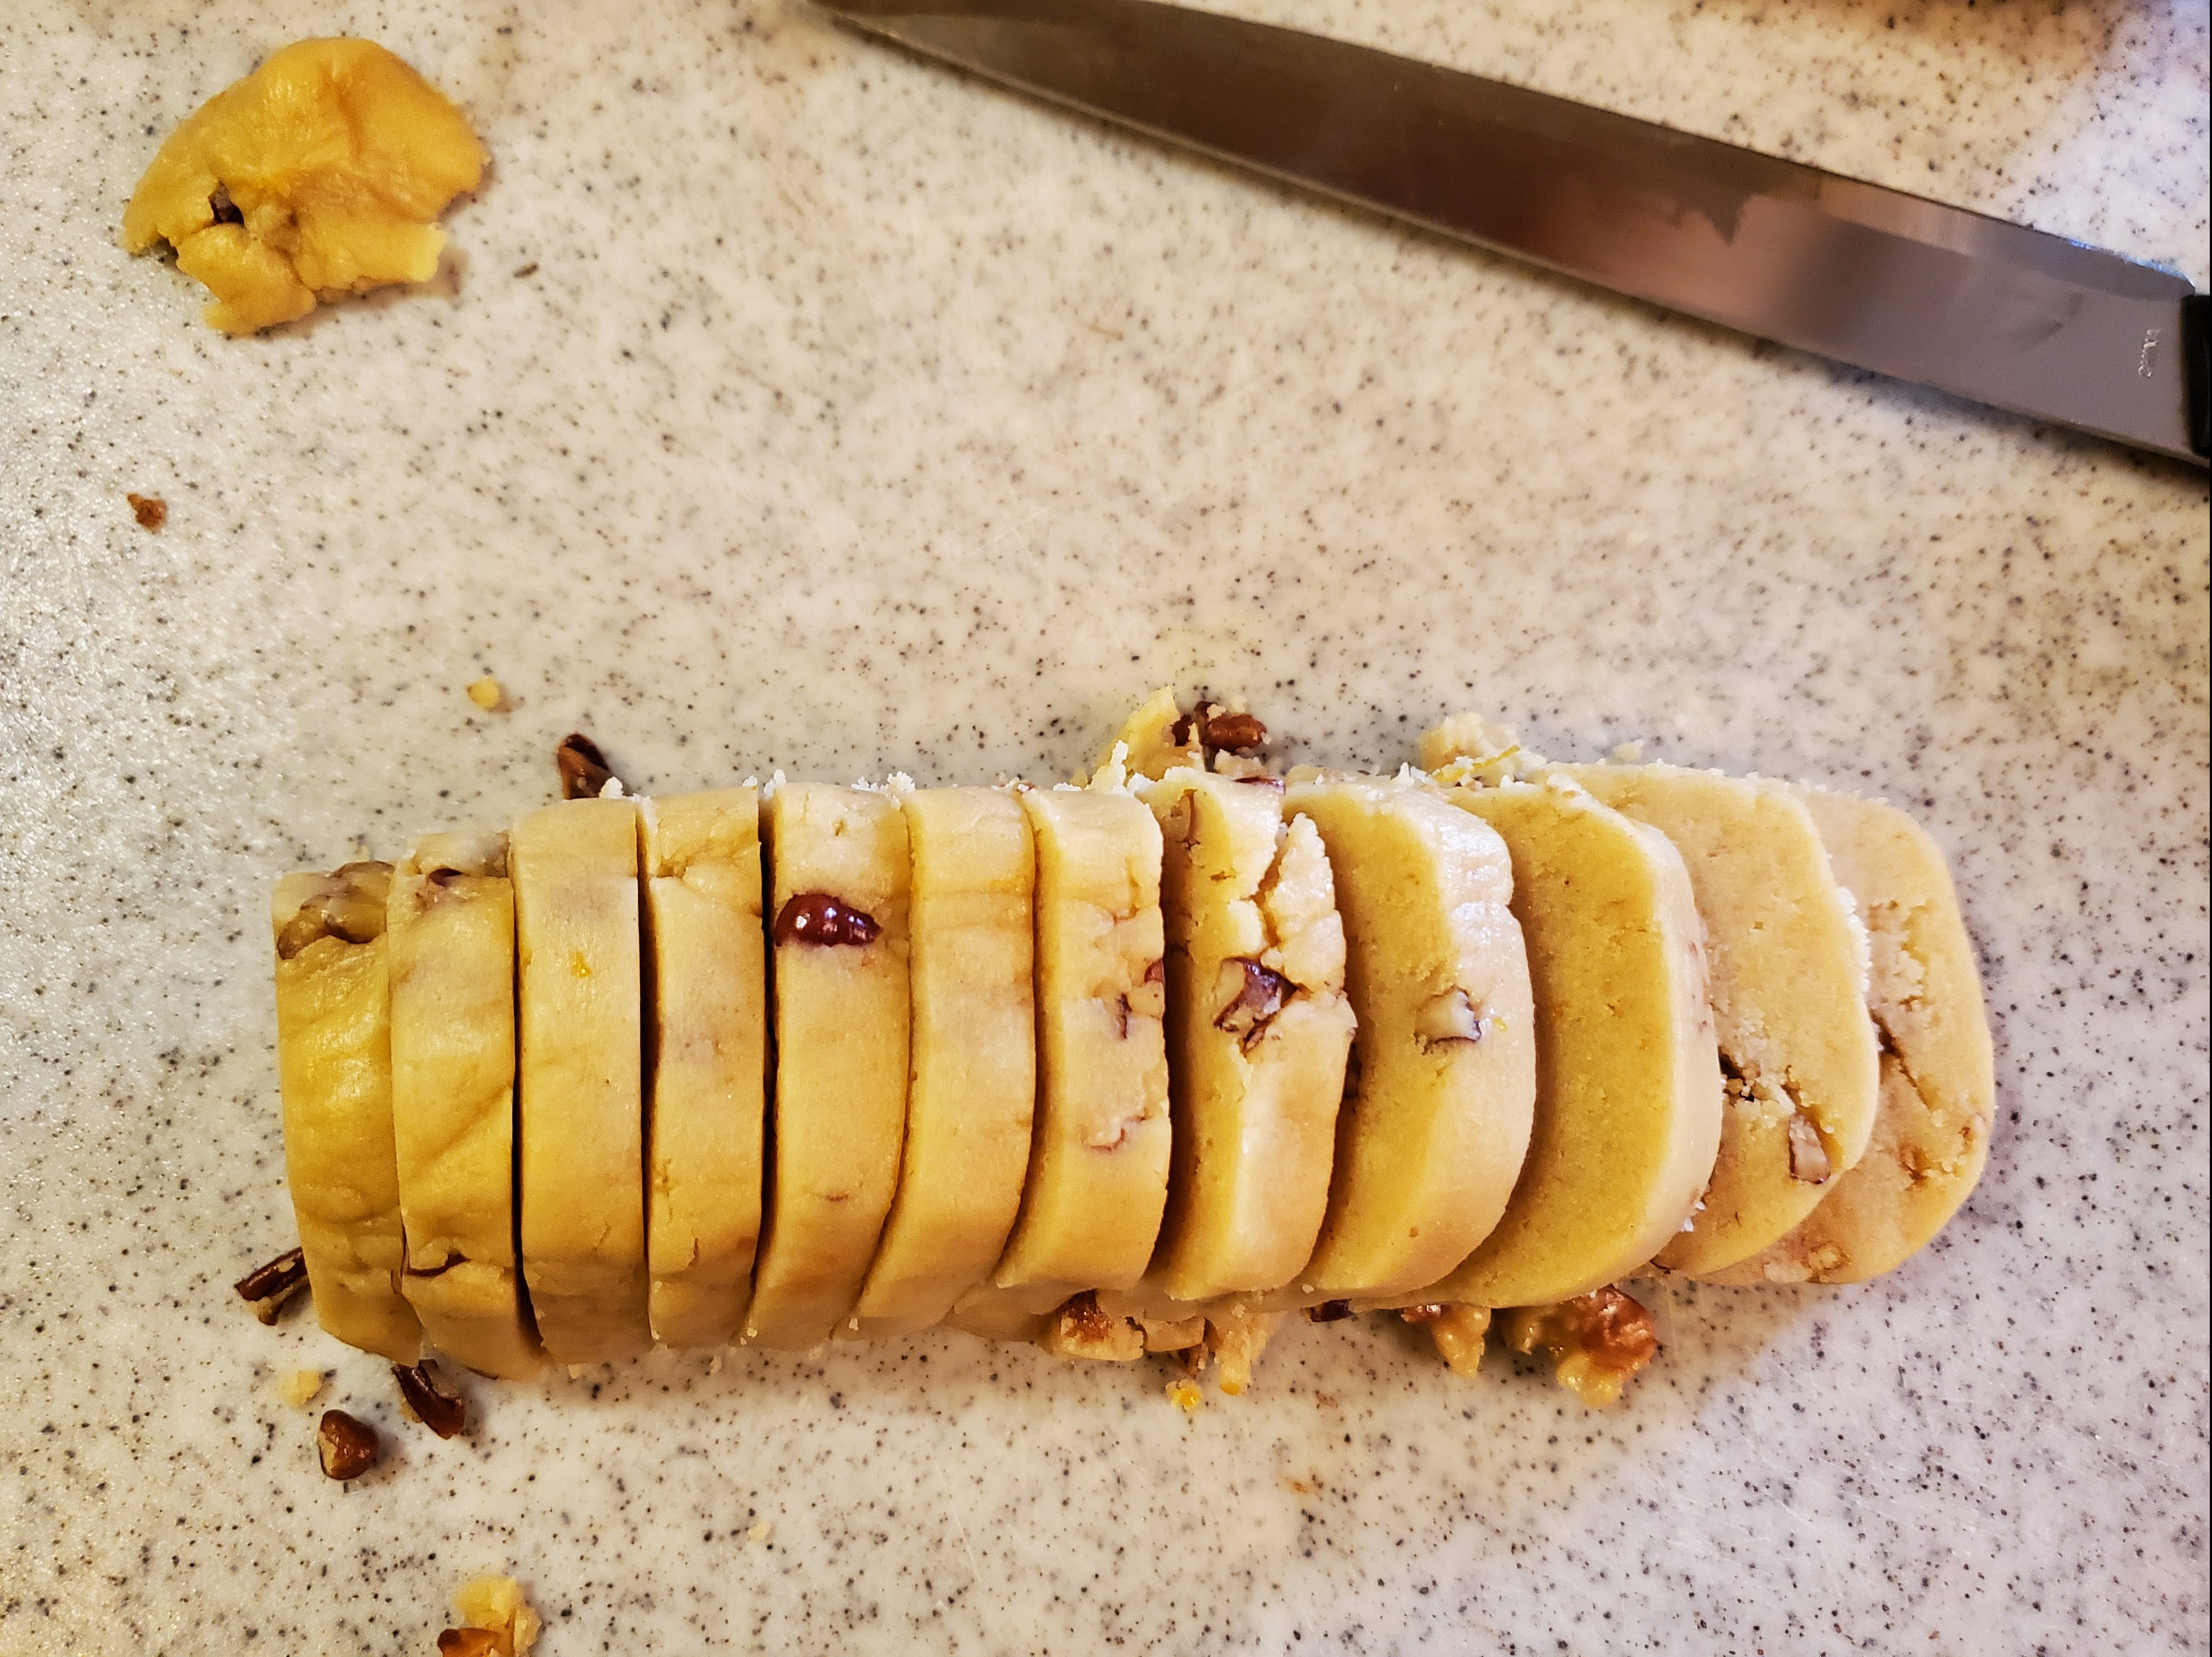
What is an icebox cookie? It is basically any cookie dough that is formed into a log and frozen or chilled for several hours, then sliced before baking. Think Nestle’s or Pillsbury pre-made cookie dough. So actually, you can make almost any cookie into an icebox cookie. Also, any cookie dough you want to hold it’s form and not spread as much, should actually be chilled before baking.
Fully incorporated dough
The basic icebox cookie is flour, salt, baking soda, shortening or butter, granulated and brown sugar, and egg. Most tend to then add some sort of fruit and nut to it. One of the most popular combinations with my family was candied cherry and pecan. Unfortunately, this not being the holiday season, it’s very difficult to find candied cherries in Los Angeles, so I chose to make this citrus version.
One of the first things you want to do when prepping your ingredients is to toast your nuts. You can do this either on the stove top or in the oven, and it only takes about 5 to 10 minutes, until you smell the nuts making sure they are lightly toasted. You can use either butter or shortening for this recipe or a combination of the two. I used shortening, simply because I had more of that on hand. Once you cream together the sugars and shortening, add the juice, zest and egg, along with a tablespoon of Cointreau.
Once you add your dry ingredients, you may find that the dough may be a little dry and won’t come completely together. If this is the case, you will want to add either additional Cointreau, juice or water a tablespoon at a time until you no longer have dry bits hugging the bottom of the bowl. Lay out a sheet of plastic wrap or parchment paper and scoop the dough onto it. You may want to split the dough into two separate pieces to make it easier to chill the dough in your refrigerator or freezer. The dough should be chilled for a minimum of three hours. If you are able to work with the dough in that short time, place the dough in the freezer. If like me, you made your dough late at night and wouldn’t be baking it until the next morning, you can chill the dough in the refrigerator.
Once the dough is chilled, you can slice the dough. You will want to use a very sharp knife or a serrated knife, because you will need to cut through the nuts. When you cut the dough, the end slices will be slightly smaller than the rest. I usually take the end slices and the bits that fall off as I slice the remainder of the log, and at the end form it into another cookie, so none of it goes to waste.